Column Groups View
Add groups view definition by using the Property Builder
Since R3 2015 you can add and configure the groups view definition in the property builder. This section will show you how you can use the property builder to setup the groups view definition.
-
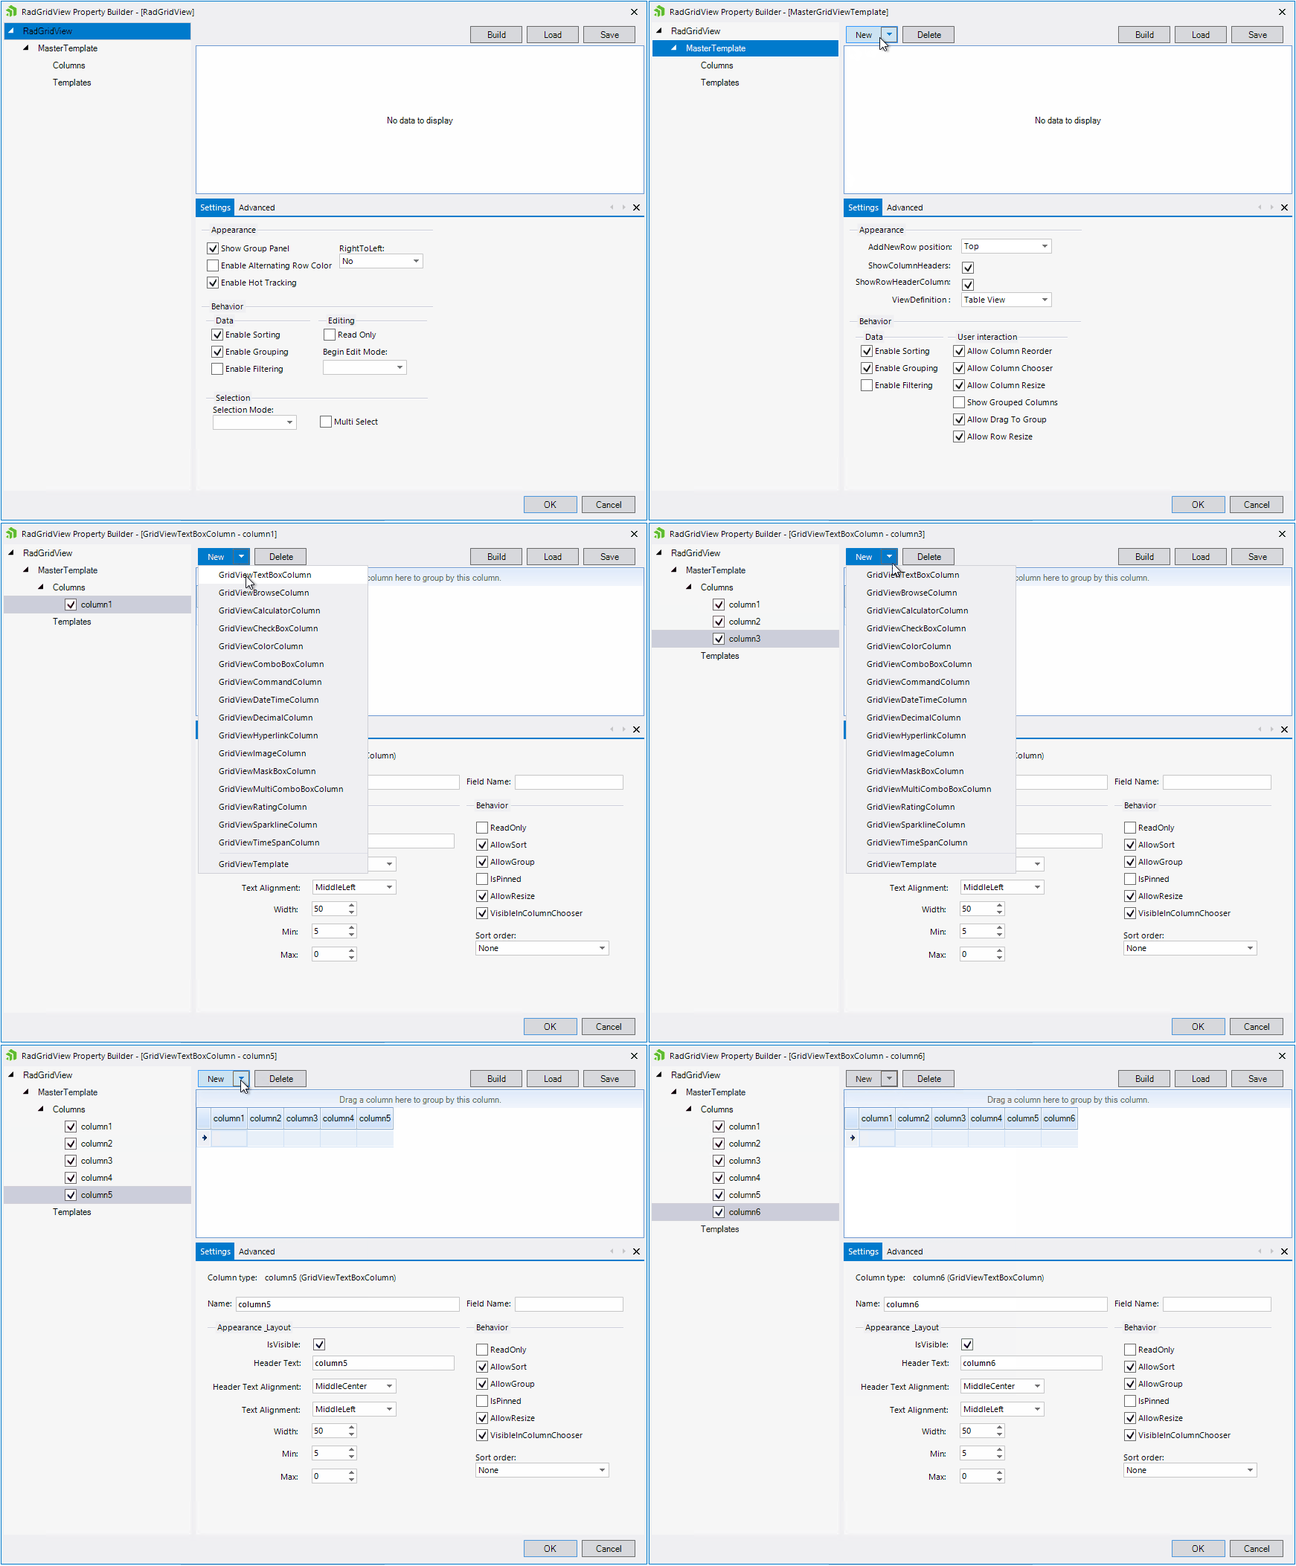
Before configuring the view definition you should add all regular columns to the grid. For example you can add some columns directly in the property builder window. Figure 2 shows how you can do that.
Figure 2: Add the default columns.
-
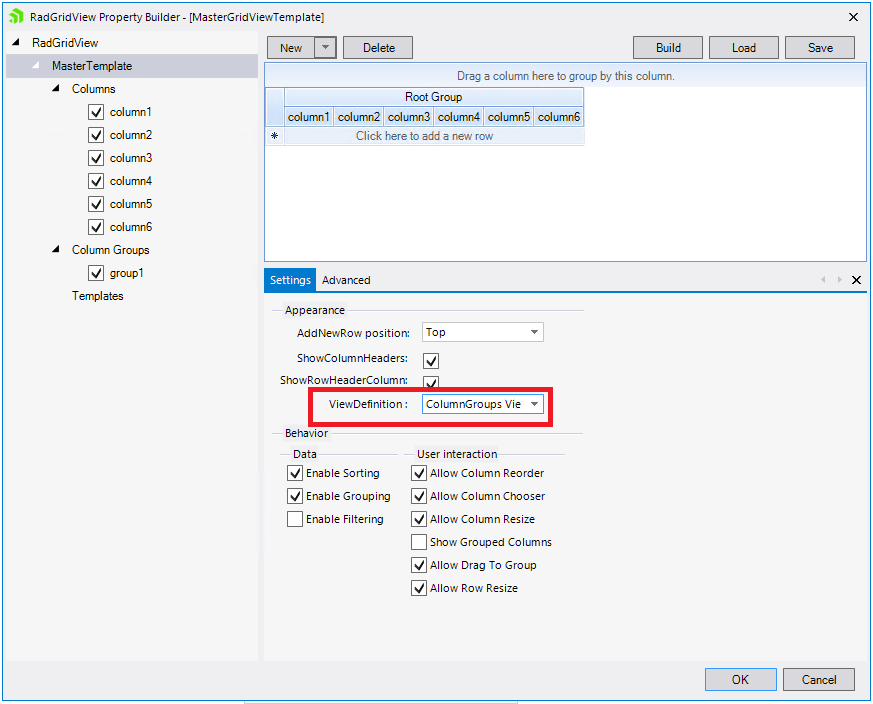
The next step is to change the ViewDefinition to ColumnGroups View.
Figure 3shows where you can find this property. Changing the view will add the default root group.Figure 3: Change the ViewDefinition
-
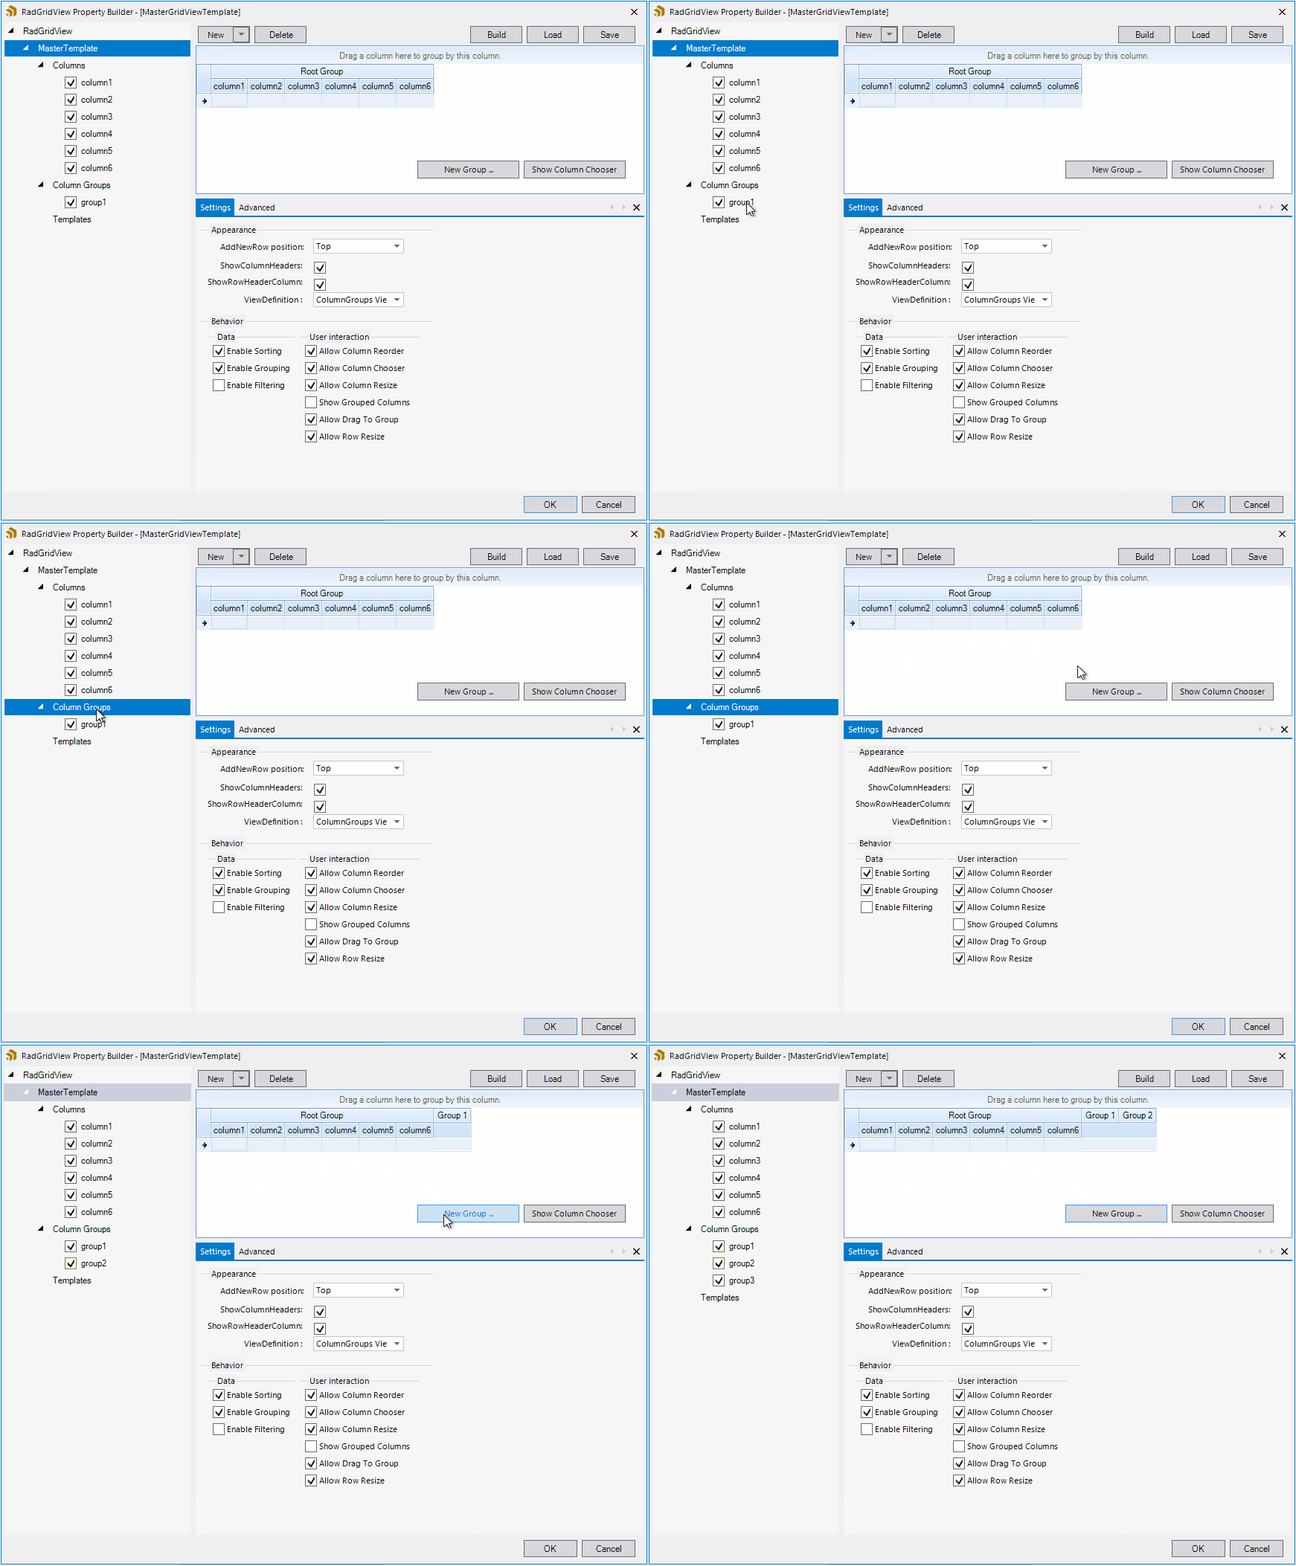
Now you are ready to add the groups. This can be achieved by selecting the Columns groups node which will show the button for adding groups.
Figure 4: Add Groups
-
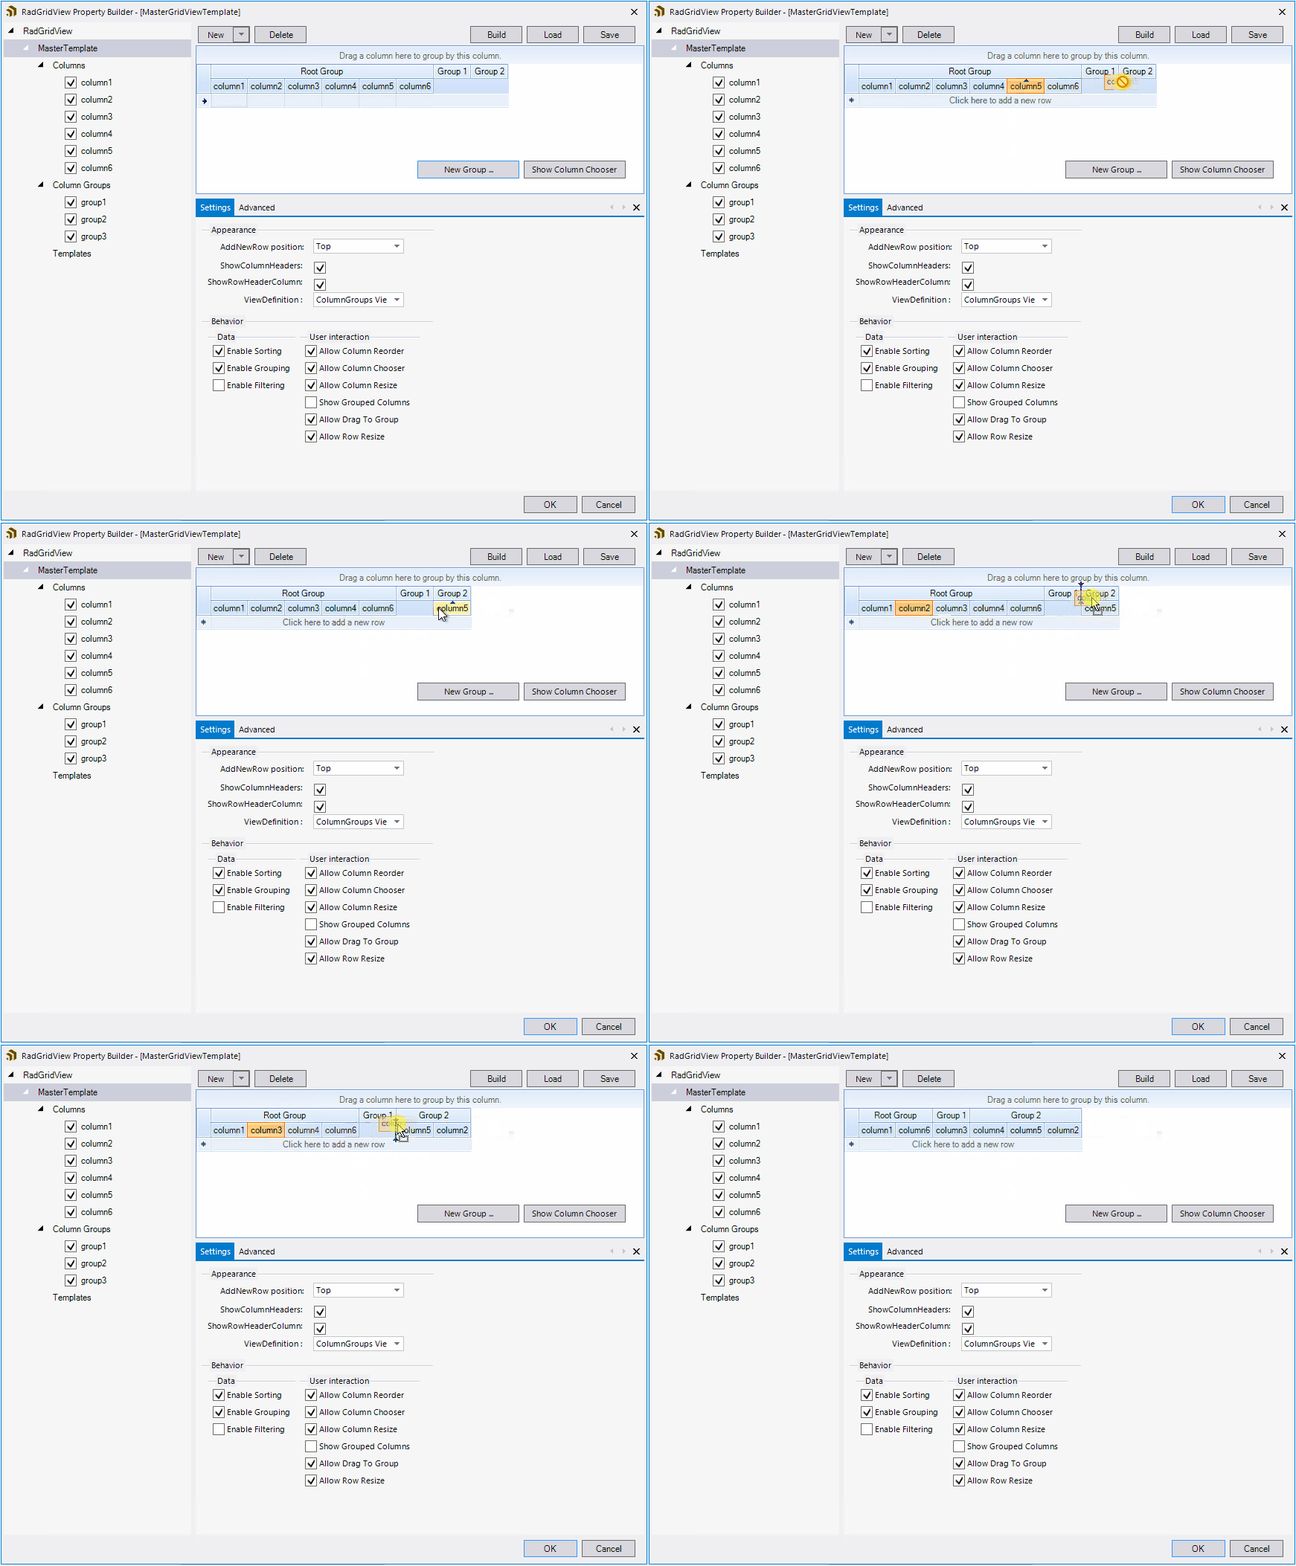
The final step is to arrange the groups. This can easily achieved by just drag and drop columns or groups to the desired position.
Figure 5: Arrange the columns and groups
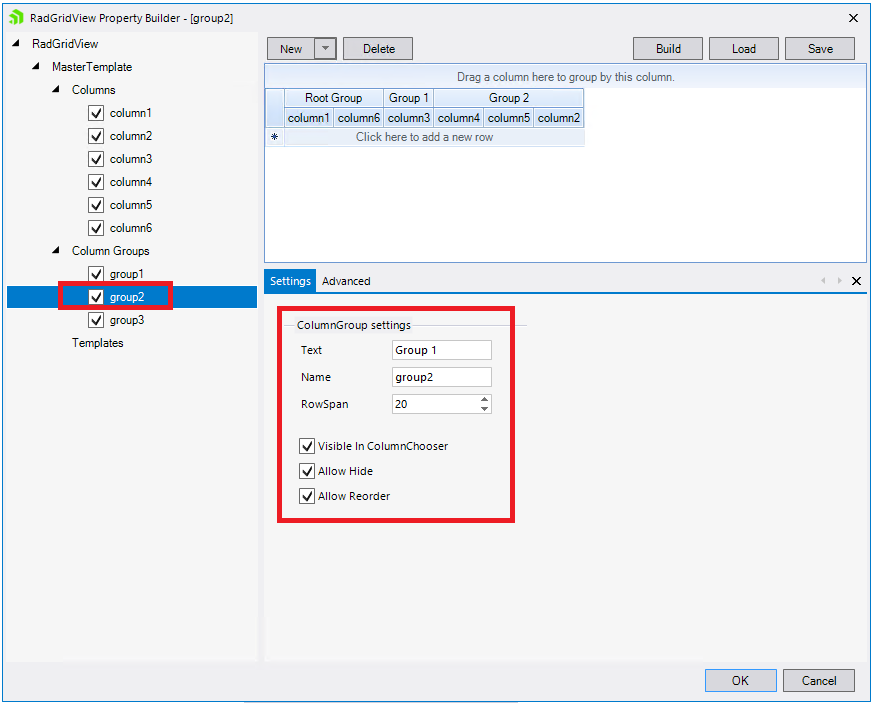
The property builder allows you to edit the groups properties as well. Once a particular group is selected you will be able to change its properties.
Figure 6 Change the group properties
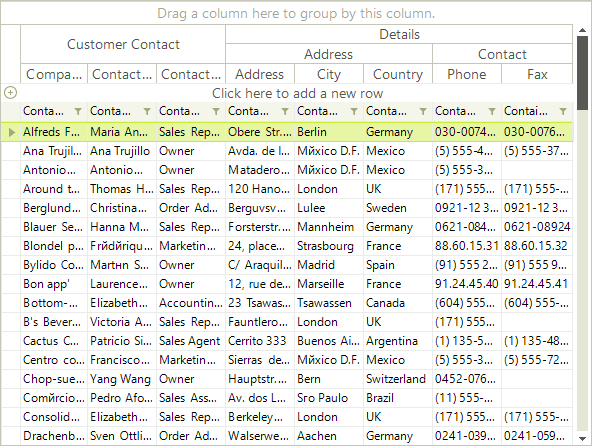
Just as its name says, this view enables grouping of columns. Every column group can have an unlimited number of subgroups or rows containing columns. In the following example, the grid is bound to the Customers table from the Northwind data base.
First instantiate ColumnGroupsViewDefinition and add some groups.
Create groups
ColumnGroupsViewDefinition view = new ColumnGroupsViewDefinition();
view.ColumnGroups.Add(new GridViewColumnGroup("Customer Contact"));
view.ColumnGroups.Add(new GridViewColumnGroup("Details"));
view.ColumnGroups[1].Groups.Add(new GridViewColumnGroup("Address"));
view.ColumnGroups[1].Groups.Add(new GridViewColumnGroup("Contact"));
Dim view As New ColumnGroupsViewDefinition()
view.ColumnGroups.Add(New GridViewColumnGroup("Customer Contact"))
view.ColumnGroups.Add(New GridViewColumnGroup("Details"))
view.ColumnGroups(1).Groups.Add(New GridViewColumnGroup("Address"))
view.ColumnGroups(1).Groups.Add(New GridViewColumnGroup("Contact"))
Then add at least one row. This row will contain the desired columns.
Add rows to groups
view.ColumnGroups[0].Rows.Add(new GridViewColumnGroupRow());
view.ColumnGroups[0].Rows[0].ColumnNames.Add("CompanyName");
view.ColumnGroups[0].Rows[0].ColumnNames.Add("ContactName");
view.ColumnGroups[0].Rows[0].ColumnNames.Add("ContactTitle");
view.ColumnGroups[1].Groups[0].Rows.Add(new GridViewColumnGroupRow());
view.ColumnGroups[1].Groups[0].Rows[0].ColumnNames.Add("Address");
view.ColumnGroups[1].Groups[0].Rows[0].ColumnNames.Add("City");
view.ColumnGroups[1].Groups[0].Rows[0].ColumnNames.Add("Country");
view.ColumnGroups[1].Groups[1].Rows.Add(new GridViewColumnGroupRow());
view.ColumnGroups[1].Groups[1].Rows[0].ColumnNames.Add("Phone");
view.ColumnGroups[1].Groups[1].Rows[0].ColumnNames.Add("Fax");
view.ColumnGroups(0).Rows.Add(New GridViewColumnGroupRow())
view.ColumnGroups(0).Rows(0).ColumnNames.Add("CompanyName")
view.ColumnGroups(0).Rows(0).ColumnNames.Add("ContactName")
view.ColumnGroups(0).Rows(0).ColumnNames.Add("ContactTitle")
view.ColumnGroups(1).Groups(0).Rows.Add(New GridViewColumnGroupRow())
view.ColumnGroups(1).Groups(0).Rows(0).ColumnNames.Add("Address")
view.ColumnGroups(1).Groups(0).Rows(0).ColumnNames.Add("City")
view.ColumnGroups(1).Groups(0).Rows(0).ColumnNames.Add("Country")
view.ColumnGroups(1).Groups(1).Rows.Add(New GridViewColumnGroupRow())
view.ColumnGroups(1).Groups(1).Rows(0).ColumnNames.Add("Phone")
view.ColumnGroups(1).Groups(1).Rows(0).ColumnNames.Add("Fax")
At the end simply set the ViewDefinitions property to the newly created ViewDefinition instance.
Set the ViewDefinition property of RadGridView
radGridView1.ViewDefinition = view;
RadGridView1.ViewDefinition = view
The result is:
Figure 1: ColumnGroups ViewDefinition
In order to pin a certain group, you should do it after the RadGridView.ViewDefinition property is set and the grid is populated with data.
Important properties
-
GridViewColumnGroup
- ShowHeader: Gets or sets a value indicating whether group header is visible. Works only for top level groups.
- RowSpan: Gets or set the vertical span of the group (the height) in pixels.
-
GridViewColumnGroupRow
- MinHeight: Gets or sets the minimum height of the row. If the property is not set, the row height will be equal to the maximum RowSpan of the columns in that row.