Getting Started with WinForms ButtonTextBox
This article shows how you can start using RadButtonTextBox.
Adding Telerik Assemblies Using NuGet
To use RadButtonTextBox when working with NuGet packages, install the Telerik.UI.for.WinForms.AllControls package. The package target framework version may vary.
Read more about NuGet installation in the Install using NuGet Packages article.
With the 2025 Q1 release, the Telerik UI for WinForms has a new licensing mechanism. You can learn more about it here.
Adding Assembly References Manually
When dragging and dropping a control from the Visual Studio (VS) Toolbox onto the Form Designer, VS automatically adds the necessary assemblies. However, if you're adding the control programmatically, you'll need to manually reference the following assemblies:
- Telerik.Licensing.Runtime
- Telerik.WinControls
- Telerik.WinControls.UI
- TelerikCommon
The Telerik UI for WinForms assemblies can be install by using one of the available installation approaches.
Defining the RadButtonTextBox
RadButtonTextBox is used to get input from the user or to display text. It exposes left/right StackLayoutPanels which host button elements on the left/right side of the text box.
The text displayed by the control resides in the Text property. It can be set at design time via the Properties window in Visual Studio, at run time in code, or by the user's input at run time. The current contents of a text box can be retrieved at run time by the Text property.
The following tutorial demonstrates how to add buttons with images to a RadButtonTextBox and how to handle the clicking of the button elements.
- Add a RadButtonTextBox to a form.
- Add three images to the project as resources.
-
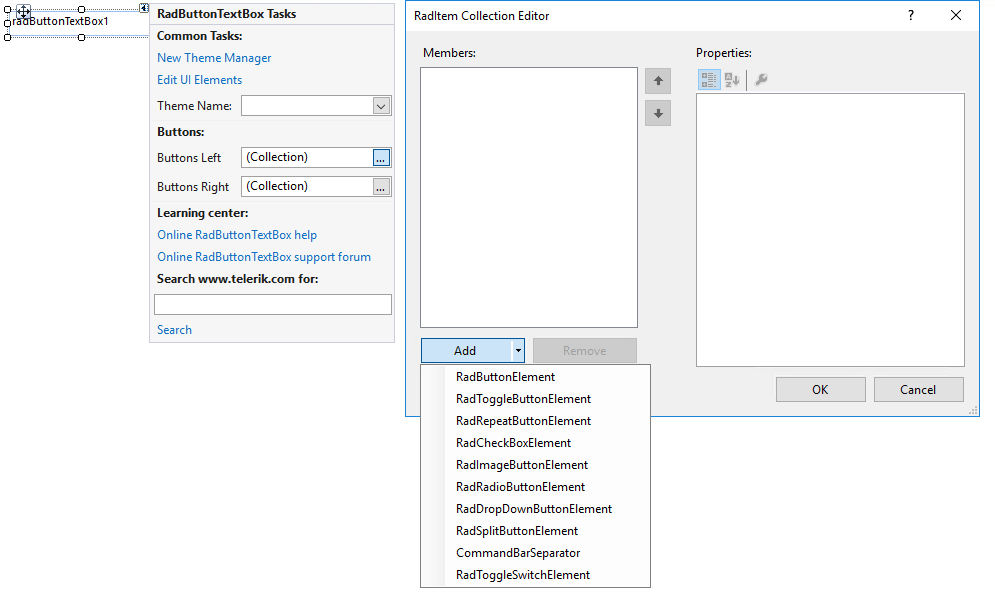
Select the RadButtonTextBox and click the small arrow on the top right position in order to open the Smart Tag. Find the Buttons Left property and click the ellipsis button to open the RadItem Collection Editor.

-
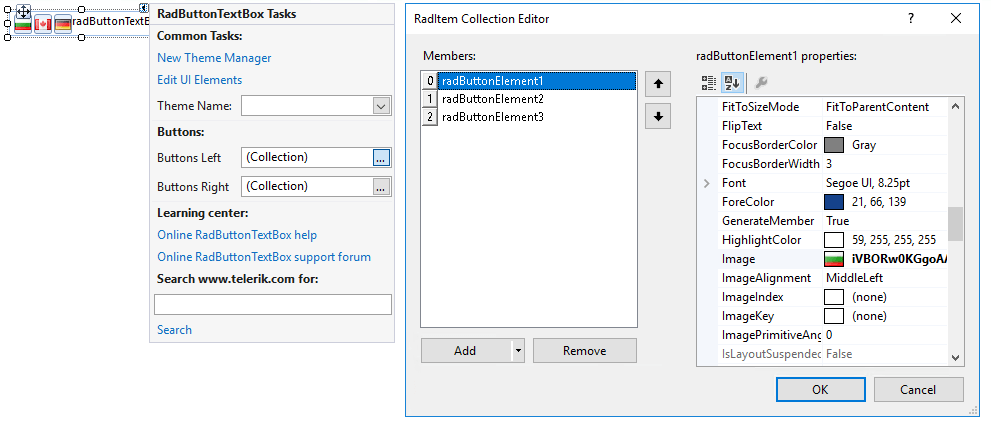
Click the Add button three times to create three RadButtonElements. Clear the text of the first, second and third button elements respectively. Set the resource images to the Image property of the items.

Click OK to close the RadItem Collection Editor.
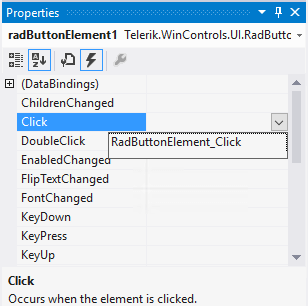
In the Properties Window select the Events button.
-
Locate and double-click the RadButtonElement. Click the event to create an event handler.

You can place any custom code that you wish to be performed when the user clicks the first button element in RadButtonTextBox.
Telerik UI for WinForms Learning Resources
- Telerik UI for WinForms ButtonTextBox Component
- Getting Started with Telerik UI for WinForms Components
- Telerik UI for WinForms Setup
- Telerik UI for WinForms Application Modernization
- Telerik UI for WinForms Visual Studio Templates
- Deploy Telerik UI for WinForms Applications
- Telerik UI for WinForms Virtual Classroom(Training Courses for Registered Users)
- Telerik UI for WinForms License Agreement)