Accessing and Customizing Elements
Accessing and customizing elements can be performed either at design time, or at run time. Before proceeding with this topic, it is recommended to get familiar with the visual structure of the RadButton.
Design time
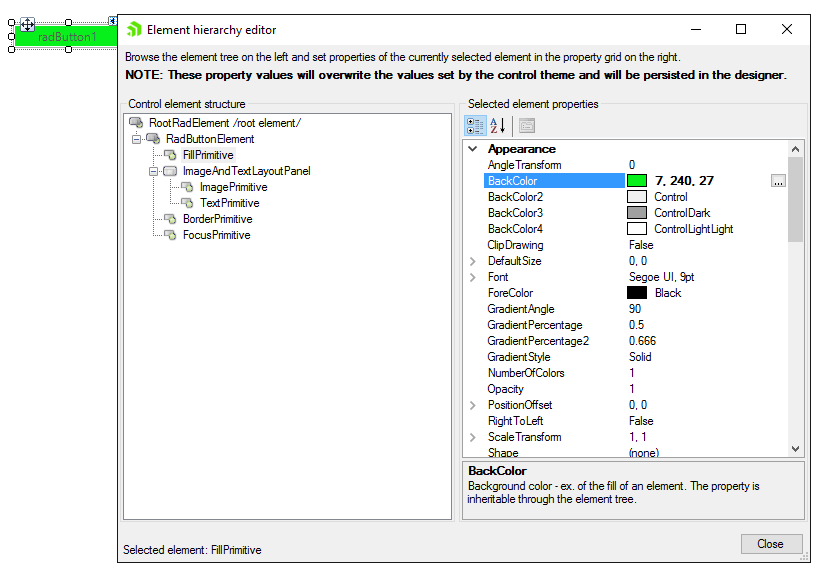
You can access and modify the style for different elements in RadButton by using the Element hierarchy editor. It can be accessed by selecting the Edit UI Elements item from the Smart Tag.
Figure 1: Element hierarchy editor
Programmatically
You can customize the nested elements at run time as well:
Figure 2: Customize elements
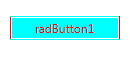
Customize elements
this.radButton1.ButtonElement.TextElement.ForeColor = Color.Red;
this.radButton1.ButtonElement.ButtonFillElement.BackColor = Color.Aqua;
this.radButton1.ButtonElement.BorderElement.BoxStyle = Telerik.WinControls.BorderBoxStyle.FourBorders;
this.radButton1.ButtonElement.BorderElement.TopColor = Color.Aqua;
this.radButton1.ButtonElement.BorderElement.BottomColor = Color.Aqua;
this.radButton1.ButtonElement.BorderElement.LeftColor = Color.Red;
this.radButton1.ButtonElement.BorderElement.RightColor = Color.Red;
Me.radButton1.ButtonElement.TextElement.ForeColor = Color.Red
Me.radButton1.ButtonElement.ButtonFillElement.BackColor = Color.Aqua
Me.radButton1.ButtonElement.BorderElement.BoxStyle = Telerik.WinControls.BorderBoxStyle.FourBorders
Me.radButton1.ButtonElement.BorderElement.TopColor = Color.Aqua
Me.radButton1.ButtonElement.BorderElement.BottomColor = Color.Aqua
Me.radButton1.ButtonElement.BorderElement.LeftColor = Color.Red
Me.radButton1.ButtonElement.BorderElement.RightColor = Color.Red