Dynamo DB
This article will show you how to create a WinForms application and access data stored in a DynamoDB table. It shows how you can connect to the AWS DynamoDB service from a blank WinForms project as well.
Please note that you can use the local version of DynamoDB to setup and test your application. This article shows a real example.
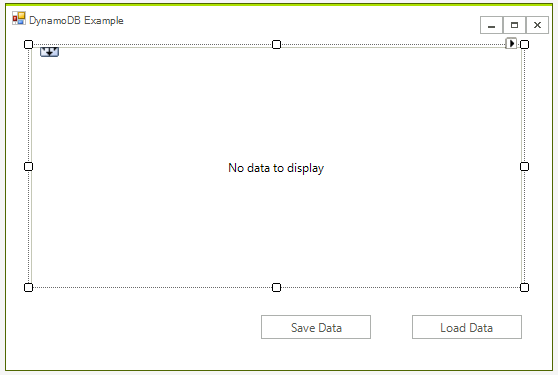
Step 1: Create a WinForms project.
First create the WinForms project, to do that create a blank Telerik UI for WinForms project and add a RadGridView and two buttons to it. The application design should look like this:
Step 2: Install the NuGet package
In Visual Studio open the NuGet package manager and install the DynamoDB module:
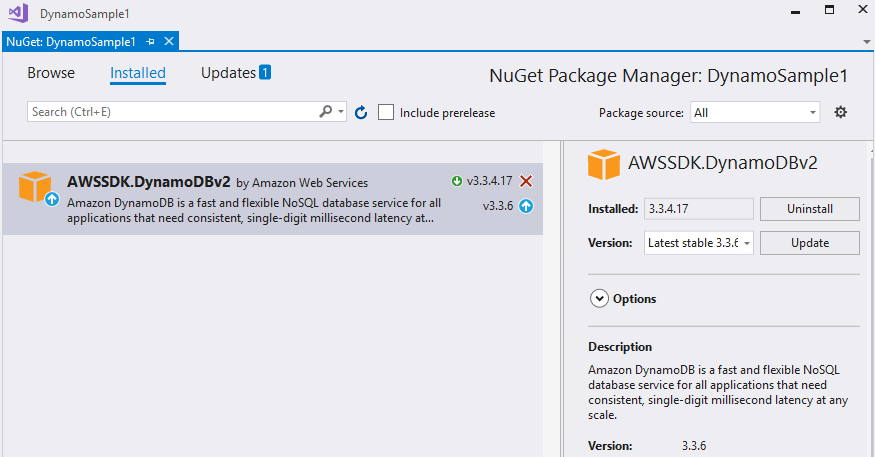
Another option is to to type the following command in the NuGet Package Manager Console: PM> Install-Package AWSSDK.DynamoDBv2
In addition you need to add the following to your App.config file:
<?xml version="1.0" encoding="utf-8" ?>
<configuration>
  <appSettings>
    <add key="AWSProfileName" value="Telerik"/>
    <add key="AWSRegion" value="eu-west-3" />
  </appSettings>
</configuration>
If you do not have a AWS account in Visual Studio please check the Getting Started article.
Step 3: Create the AWS manager class
Add a class called AWS_Manager to the example. You will use this class to add all functionality for managing the DynamoDB database. For now you can create the method that crates the table:
class AWS_Manager
{
    AmazonDynamoDBClient client;
    public AWS_Manager()
    {
        try
        {
            client = new AmazonDynamoDBClient();
        }
        catch (Exception ex)
        {
            RadMessageBox.Show("Error: failed to create a DynamoDB client; " + ex.Message);
        }
    }

    public void CreateTable()
    {
        List<string> currentTables = client.ListTables().TableNames;

        if (!currentTables.Contains("Customers"))
        {
            CreateTableRequest createRequest = new CreateTableRequest
            {
                TableName = "Customers",
                AttributeDefinitions = new List<AttributeDefinition>()
        {
            new AttributeDefinition
            {
                AttributeName = "Id",
                AttributeType = "N"
            },
            new AttributeDefinition
            {
                AttributeName = "Name",
                AttributeType = "S"
            }
        },
                KeySchema = new List<KeySchemaElement>()
        {
            new KeySchemaElement
            {
                AttributeName = "Id",
                KeyType = "HASH"
            },
            new KeySchemaElement
            {
                AttributeName = "Name",
                KeyType = "RANGE"
            }
        },
            };

            createRequest.ProvisionedThroughput = new ProvisionedThroughput(1, 1);

            CreateTableResponse createResponse;
            try
            {
                createResponse = client.CreateTable(createRequest);
            }
            catch (Exception ex)
            {
                RadMessageBox.Show("Error: failed to create the new table; " + ex.Message);

                return;
            }
        }
    }
}
Friend Class AWS_Manager
    Private client As AmazonDynamoDBClient
    Public Sub New()
        Try
            client = New AmazonDynamoDBClient()
        Catch ex As Exception
            RadMessageBox.Show("Error: failed to create a DynamoDB client; " & ex.Message)
        End Try
    End Sub

    Public Sub CreateTable()
        Dim currentTables As List(Of String) = client.ListTables().TableNames

        If Not currentTables.Contains("Customers") Then
            Dim createRequest As CreateTableRequest = New CreateTableRequest With {.TableName = "Customers", .AttributeDefinitions = New List(Of AttributeDefinition)() _
                From {
                    New AttributeDefinition With {
                        .AttributeName = "Id",
                        .AttributeType = "N"
                    },
                    New AttributeDefinition With {
                        .AttributeName = "Name",
                        .AttributeType = "S"
                    }
                }, .KeySchema = New List(Of KeySchemaElement)()
                From {
                    New KeySchemaElement With {
                        .AttributeName = "Id",
                        .KeyType = "HASH"
                    },
                    New KeySchemaElement With {
                        .AttributeName = "Name",
                        .KeyType = "RANGE"
                    }
                }}

            createRequest.ProvisionedThroughput = New ProvisionedThroughput(1, 1)

            Dim createResponse As CreateTableResponse
            Try
                createResponse = client.CreateTable(createRequest)
            Catch ex As Exception
                RadMessageBox.Show("Error: failed to create the new table; " & ex.Message)

                Return
            End Try
        End If
    End Sub
End Class
Now when the table is ready you can add some data, add the following method to the AWS_Manager class:
public void AddData()
{
    Table table = Table.LoadTable(client, "Customers");
    if (table.Keys.Count == 0)
    {
        Document dataObj1 = new Document();
        dataObj1["Name"] = "Telerik";
        dataObj1["Id"] = 2;
        dataObj1["Employees"] = 46;
        dataObj1["State"] = "NY";
        table.PutItem(dataObj1);

        Document dataObj2 = new Document();
        dataObj2["Name"] = "Progress";
        dataObj2["Id"] = 13;
        dataObj2["Employees"] = 54;
        dataObj2["State"] = "IL";
        table.PutItem(dataObj2);
    }
}
Public Sub AddData()
    Dim table As Table = Table.LoadTable(client, "Customers")
    If table.Keys.Count = 0 Then
        Dim dataObj1 As New Document()
        dataObj1("Name") = "Telerik"
        dataObj1("Id") = 2
        dataObj1("Employees") = 46
        dataObj1("State") = "NY"
        table.PutItem(dataObj1)

        Dim dataObj2 As New Document()
        dataObj2("Name") = "Progress"
        dataObj2("Id") = 13
        dataObj2("Employees") = 54
        dataObj2("State") = "IL"
        table.PutItem(dataObj2)
    End If
End Sub
If you run the code at this point you will be able to see the data in your AWS console:

Step 4: Get the Data from DynamoDb
Now you are ready to populate the grid with the data. Although you can directly populate the grid from the data I believe that is better to have a local business object to store the data.
First you need to get the data. The following method will return a List<Document>, each document represents an entry from the database.
public List<Document> GetData()
{
    Table table = Table.LoadTable(client, "Customers");
    ScanFilter scanFilter = new ScanFilter();
    ScanOperationConfig config = new ScanOperationConfig()
    {
        Filter = scanFilter,
        Select = SelectValues.AllAttributes,
    };
    Search search = table.Scan(config);

    List<Document> documentList = new List<Document>();
    do
    {
        documentList.AddRange(search.GetNextSet());

    } while (!search.IsDone);

    return documentList;
}
Public Function GetData() As List(Of Document)
    Dim table As Table = Table.LoadTable(client, "Customers")
    Dim scanFilter As New ScanFilter()
    Dim config As New ScanOperationConfig() With {
        .Filter = scanFilter,
        .Select = SelectValues.AllAttributes
    }
    Dim search As Search = table.Scan(config)

    Dim documentList As New List(Of Document)()
    Do
        documentList.AddRange(search.GetNextSet())

    Loop While Not search.IsDone

    Return documentList
End Function
We can use the above method to iterate the documents and get the data. Here is the code along with the business object.
private void radButton1_Click(object sender, EventArgs e)
{
    var data = manager.GetData();
    var gridData = new List<Customer>();

    foreach (Document doc in data)
    {
        var customer = new Customer();
        foreach (var attribute in doc.GetAttributeNames())
        {
            var value = doc[attribute];
            if (attribute == "Id")
            {
                customer.Id = Convert.ToInt32(value.AsPrimitive().Value);
            }
            else if (attribute == "Name")
            {
                customer.Name = value.AsPrimitive().Value.ToString();
            }
            else if (attribute == "Employees")
            {
                customer.Employees = Convert.ToInt32(value.AsPrimitive().Value);
            }
            else if (attribute == "State")
            {
                customer.State = value.AsPrimitive().Value.ToString();
            }
        }
        gridData.Add(customer);
    }
    radGridView1.DataSource = gridData;
}
class Customer
{
    public int Id { get; set; }
    public string Name { get; set; }

    public int Employees { get; set; }

    public string State { get; set; }
}
Private Sub radButton1_Click(ByVal sender As Object, ByVal e As EventArgs)
    Dim data = manager.GetData()
    Dim gridData = New List(Of Customer)()

    For Each doc As Document In data
        Dim customer = New Customer()
        For Each attribute In doc.GetAttributeNames()
            Dim value = doc(attribute)
            If attribute Is "Id" Then
                customer.Id = Convert.ToInt32(value.AsPrimitive().Value)
            ElseIf attribute Is "Name" Then
                customer.Name = value.AsPrimitive().Value.ToString()
            ElseIf attribute Is "Employees" Then
                customer.Employees = Convert.ToInt32(value.AsPrimitive().Value)
            ElseIf attribute Is "State" Then
                customer.State = value.AsPrimitive().Value.ToString()
            End If
        Next attribute
        gridData.Add(customer)
    Next doc
    radGridView1.DataSource = gridData
End Sub
Friend Class Customer
    Public Property Id() As Integer
    Public Property Name() As String

    Public Property Employees() As Integer

    Public Property State() As String
End Class
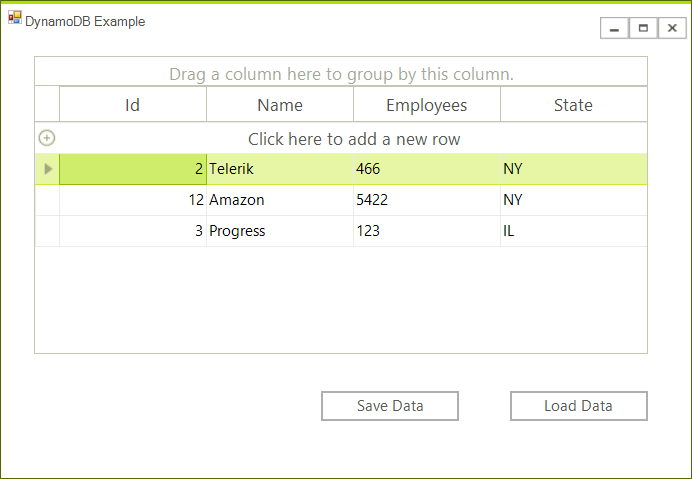
The grid is now populated.
Step: 5 Save the Changes
The final steps is to save the changes. Upon a button click we will iterate all rows and update the items in the database. We will need a function that updates an item in the manager class. Here is the code.
// Main form class
private void radButton2_Click(object sender, EventArgs e)
{
    foreach (GridViewDataRowInfo item in radGridView1.Rows)
    {
        manager.UpdateCustomerEntry(item.DataBoundItem as Customer);
    }
}

// AWS_Manager class
public void UpdateCustomerEntry(Customer customer)
{
    Table table = Table.LoadTable(client, "Customers");
    var entry = new Document();
    entry["Id"] = customer.Id;
    entry["Name"] = customer.Name;
    entry["Employees"] = customer.Employees;
    entry["State"] = customer.State;
    table.UpdateItem(entry);
}
' Main form class
Private Sub radButton2_Click(ByVal sender As Object, ByVal e As EventArgs)
    For Each item As GridViewDataRowInfo In radGridView1.Rows
        manager.UpdateCustomerEntry(TryCast(item.DataBoundItem, Customer))
    Next item
End Sub

' AWS_Manager class
Public Sub UpdateCustomerEntry(ByVal customer As Customer)
    Dim table As Table = Table.LoadTable(client, "Customers")
    Dim entry = New Document()
    entry("Id") = customer.Id
    entry("Name") = customer.Name
    entry("Employees") = customer.Employees
    entry("State") = customer.State
    table.UpdateItem(entry)
End Sub