Create New Projects
This article demonstrates how to use the Telerik Extension for Visual Studio Code to create a new project that is pre-configured for the Progress® Telerik® UI for .NET MAUI components.
Get the Extension
To use the Telerik UI for .NET MAUI Template Wizard, install the Telerik UI for .NET MAUI Productivity Tools extension. You can get the extension from:
The Extensions tab in Visual Studio Code—search for
Telerik UI for .NET MAUI Productivity Tools, select the extension, and then click Install.
Start the Wizard
You can start the Telerik UI for .NET MAUI Template Wizard in either of the following ways:
-
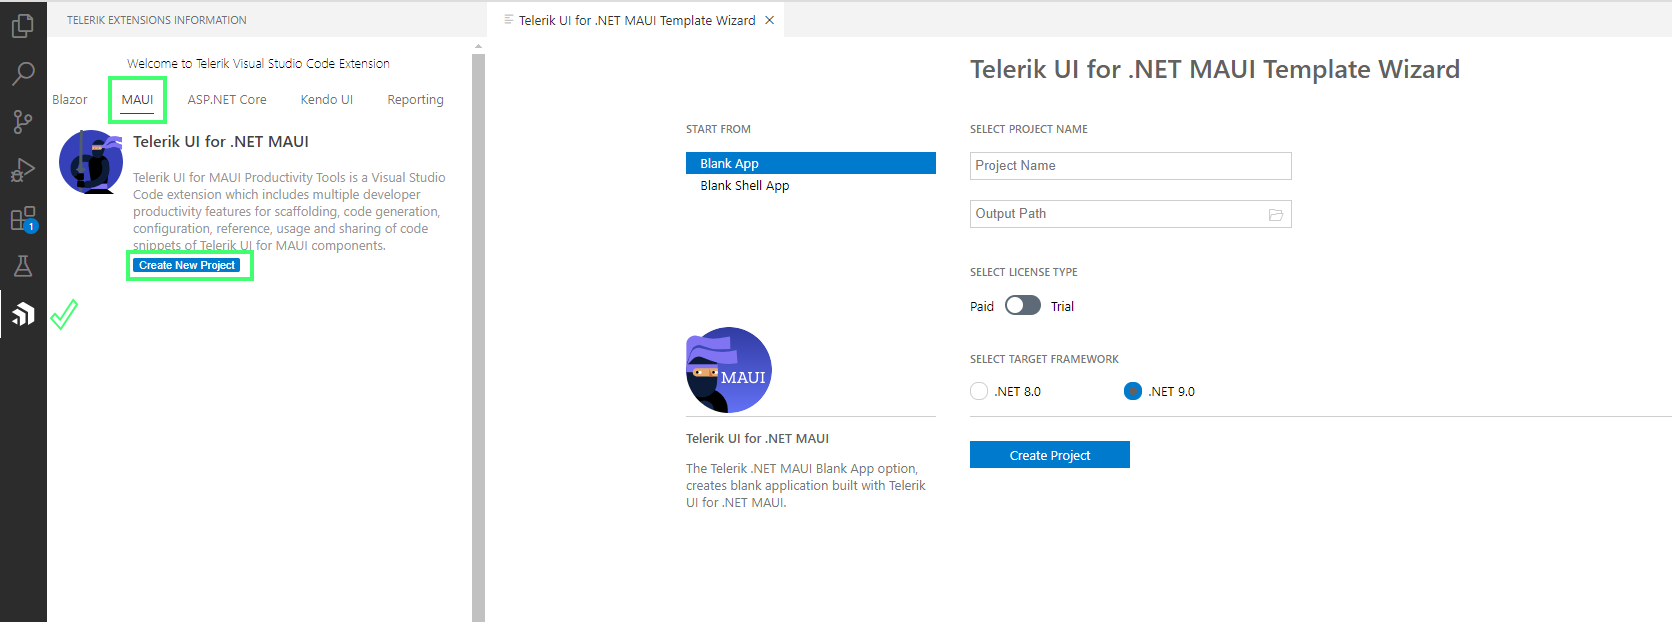
Click the Telerik Extensions Information icon in the Visual Studio Code activity bar.
- Click on the Telerik Extensions Information icon
- Select MAUI tab
- Click Create New Project.
- The Telerik UI for .NET MAUI Template Wizard opens
- Using the Template Wizard you can create a new Blank App or Blank Shell App.
-
From the Visual Studio Code Extensions menu
-
To open the menu, use:
-
Ctrl+Shift+Pon Windows/Linux -
Cmd+Shift+Pon Mac.
-
Select Telerik UI for .NET MAUI Template Wizard: Launch from the menu and press Enter.
- The Telerik UI for .NET MAUI Template Wizard opens
- Using the Template Wizard you can create a new Blank App or Blank Shell App.
-
Select a Project
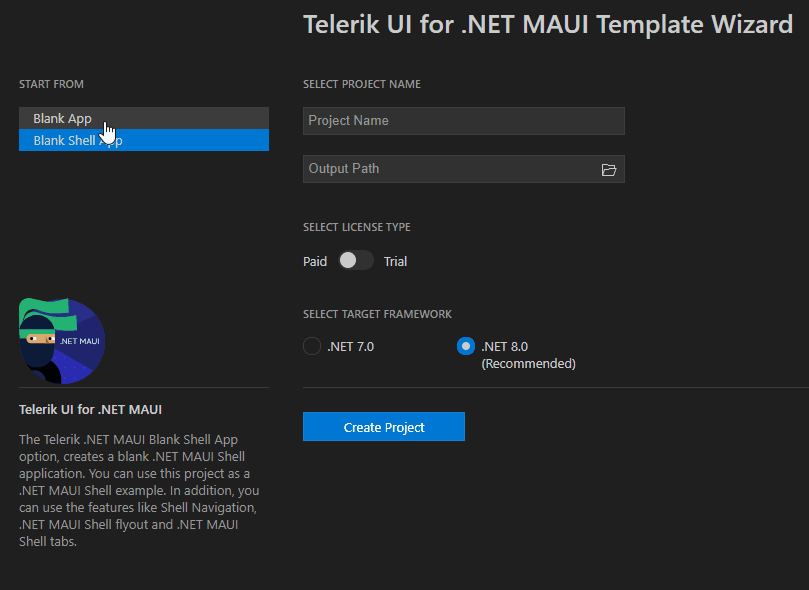
The Create New Project wizard provides two options to start you project:
- Blank App—Allows you to create a blank project that is pre-configured for the Progress® Telerik® UI for .NET MAUI components.
- Blank Shell App—Allows you to create a blank shell project that is pre-configured for the Progress® Telerik® UI for .NET MAUI components.
Add a Theme to the Project
You can add a theme to the project by enabling the USE TELERIK THEMING option from the Wizard.
Choose between two themes—the Platform and the Telerik, and the available swatches for each.
Configure the Project
The wizard allows you to configure the following options:
- Project name
- Location of the created project (Output Path)
- License key file—the Telerik Visual Studio Code extension notifies you about a missing or outdated license key, and lets you install or update it.
- Your Telerik license (trial or commercial)
- The .NET version you want to use