Worksheet Page Setup
There are cases, such as printing or exporting scenarios, when you need to present the Worksheet's content on a set of pages. In these cases, particularly handy comes the WorksheetPageSetup class which provides you with the needed properties for controlling how the content is split and presented into pages. This article presents the WorksheetPageSetup API and demonstrates how to use it.
WorksheetPageSetup Properties
Through the Worksheet's WorksheetPageSetup property you can change the following worksheet's page setup properties:
PaperType: Specify paper type using the PaperTypes enumeration.
PageOrientation: Specify whether the page orientation should be Portrait or Landscape.
Margins: Specify the sizes of the page margins.
HeaderFooterSettings: Allows you to specify a header and/or a footer for a worksheet. For more information on how to achieve this, please check the Headers and Footers topic.
PageOrder: Specify whether the page order should be "Down, then over" or "Over, then down".
CenterHorizontally: Specify whether the print content should be centered horizontally within the area between the page margins.
CenterVertically: Specify whether the print content should be centered vertically within the area between the page margins.
-
ScaleFactor: Specify the scale factor to print with value in the range from 50% to 400%.
In case you need to calculate the custom scale factor in order for the worksheet to fit in a specific number of pages when printed, you can use the methods provided by the PageScaleFactorCalculator static class:
CalculateScaleAccordingToFitToPages(Worksheet worksheet): Calculates the maximum scale factor that can be set to a worksheet in order for it to fit into the number of pages specified in the FitToPagesWide and FitToPagesTall properties.
CalculateScaleAccordingToFitToPages(Worksheet worksheet, IEnumerable<CellRange> includedRanges): Calculates the maximum scale factor that can be set to a worksheet in order for the specified ranges to fit into the number of pages specified in the FitToPagesWide and FitToPagesTall properties.
FitToPagesTall: Specify the number of pages tall the worksheet will be scaled to when it's printed. The default value is 1.
FitToPagesWide: Specify the number of pages wide the worksheet will be scaled to when it's printed. The default value is 1.
FitToPages: Allows you to specify whether the worksheet will be scaled according to a number of pages. If the value of this property is true, the worksheet will be scaled according to the FitToPagesWide and FitToPagesTall values. Otherwise, it will be scaled according to the ScaleFactor value. Additionally, if FitToPagesTall is 0, it will only fit to width, and if FitToPagesWide has value of 0, it will fit to height only.
PrintOptions: Specify print options such as whether to print gridlines or row and column headings.
PrintArea: Change the print area in the selected worksheet.
PageBreaks: Change the page breaks collection in the selected worksheet.
PrintTitles: Enables you to specify rows and/or columns that should be repeated on each page for the worksheet.
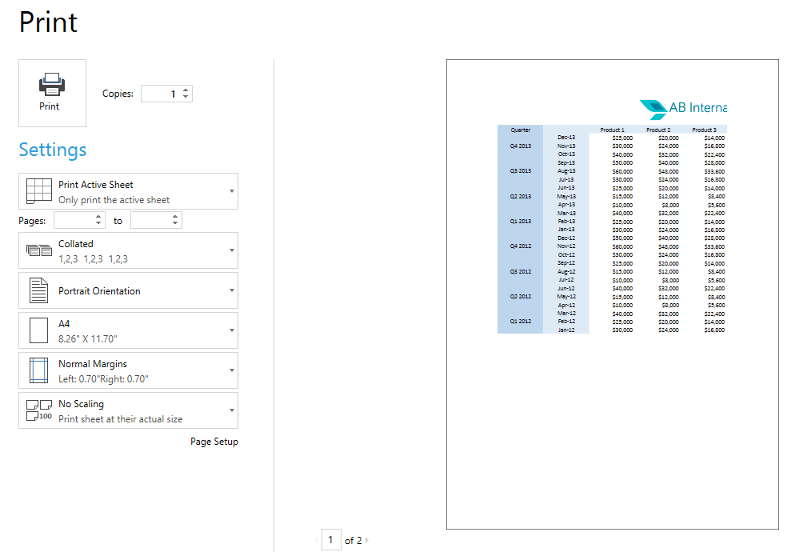
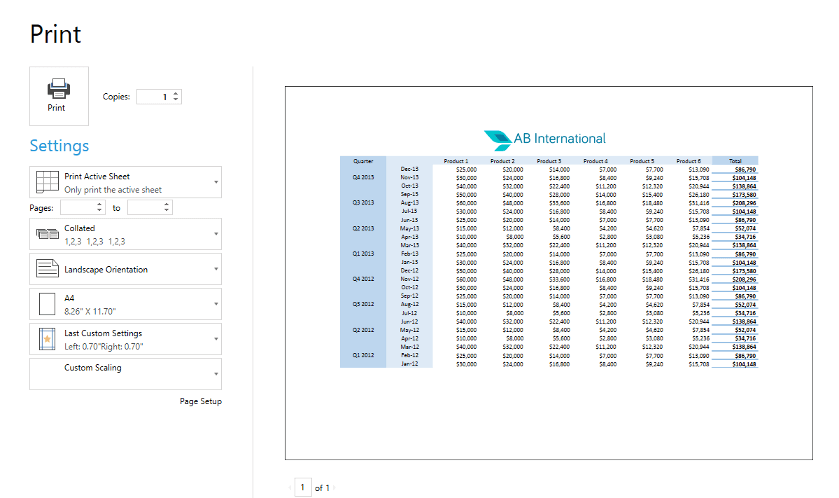
Figures 1 and 2 show an example of Worksheet's page setup usage. In the example, we have spreadsheet data that has bigger width than height. Previewing the print pages with the default settings we can see that it doesn't fit well as the print content is split into two pages.
Figure 1: Initial print preview of data

In order to fit the print content better, we use the Worksheet's page setup and change the page orientation as well as the scale factor and some additional print settings. Example 1 shows the code that needs to be executed.
Example 1: Use WorksheetPageSetup
WorksheetPageSetup pageSetup = workbook.ActiveWorksheet.WorksheetPageSetup;

pageSetup.PaperType = PaperTypes.A4;
pageSetup.PageOrientation = PageOrientation.Landscape;
pageSetup.ScaleFactor = new Size(0.9, 0.9);
pageSetup.CenterHorizontally = true;
Figure 2: Result after page setup

Using Print Area
When printing a worksheet, by default the whole used cell range is used for printing. If you do not need to print the whole content of the worksheet, you can set a print area by specifying a list of ranges to print.
Through WorksheetPageSetup's PrintArea property you can access the print area of a worksheet and change its print ranges with the following methods:
SetPrintArea(): Sets the print area ranges using a given set of CellRange instances. This method clears all previously set ranges.
CanAddToPrintArea(): Returns a Boolean indicating whether the passed set of print ranges can be added in the existing print area. If some of the given ranges intersects with an already existing print area range, the result is false.
TryAddToPrintArea(): Tries to add a given set of CellRange instances to the collection of areas and returns a Boolean indicating the success of this operation.
Clear(): Clears the existing print area ranges.
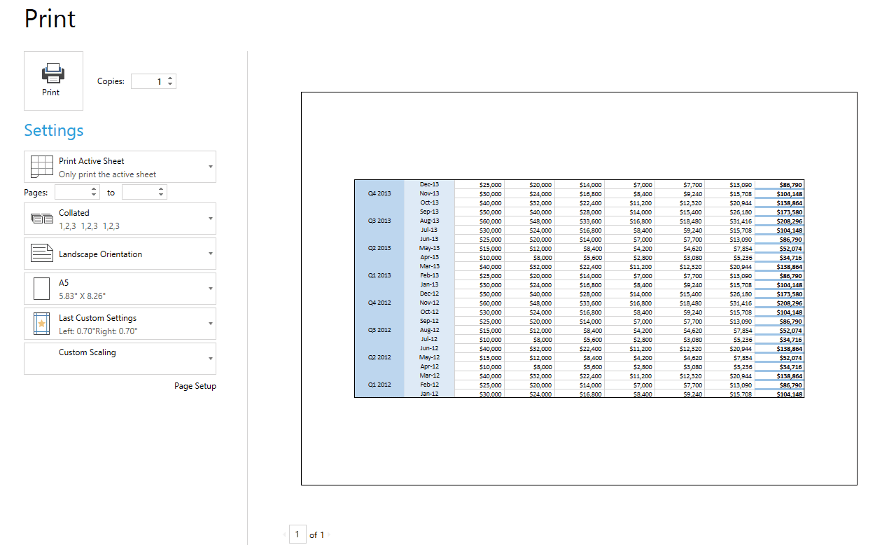
The example shown in Figure 3 demonstrates how to use Worksheet's print area. In this example, we have a big table with data and we want to print only two specific ranges. To achieve that, the print area is set with these cell ranges in the code snippet from Example 2.
Example 2: Set PrintArea
PrintArea printArea = workbook.ActiveWorksheet.WorksheetPageSetup.PrintArea;

printArea.SetPrintArea(new CellRange[]
{
    new CellRange(0, 0, 4, 8),
    new CellRange(1, 1, 25, 3)
});
Figure 3: Resulting PrintArea preview

Using Page Breaks
When a big cell range cannot fit into a single page, it gets split into multiple pages. If you need your pages to be split at some concrete places, you can specify these places by inserting a PageBreak.
Through WorksheetPageSetup's PageBreaks property you can manipulate the page breaks collection of a worksheet using the following methods:
TryInsertHorizontalPageBreak(): Tries to insert a horizontal page break at some specific index. Returns true when a page break is inserted.
TryInsertVerticalPageBreak(): Tries to insert a vertical page break at some specific index. Returns true when a page break is inserted.
TryRemoveHorizontalPageBreak(): Tries to remove a horizontal page break at some specific index. Returns true when a page break is removed.
TryRemoveVerticalPageBreak(): Tries to remove a vertical page break at some specific index. Returns true when a page break is removed.
TryInsertPageBreaks(): Tries to insert horizontal and vertical page break at some specific index. Returns true when at least one page break is inserted.
TryRemovePageBreaks(): Tries to remove horizontal and vertical page break at some specific index. Returns true when at least one page break is removed.
Clear(): Clears all existing page breaks from the page breaks collection.
Figure 4 shows a preview of large amount of data.
Figure 4: Initial preview of data

In order to separate semantically-correct the print data onto several pages, we are going to place horizontal page breaks at the place where we need the splitting to happen. Example 3 shows how this can be achieved.
Example 3: Insert PageBreaks
PageBreaks pageBreaks = workbook.ActiveWorksheet.WorksheetPageSetup.PageBreaks;

pageBreaks.TryInsertHorizontalPageBreak(5, 0);
pageBreaks.TryInsertHorizontalPageBreak(8, 0);
pageBreaks.TryInsertHorizontalPageBreak(11, 0);
pageBreaks.TryInsertHorizontalPageBreak(14, 0);
pageBreaks.TryInsertHorizontalPageBreak(17, 0);
pageBreaks.TryInsertHorizontalPageBreak(20, 0);
pageBreaks.TryInsertHorizontalPageBreak(23, 0);
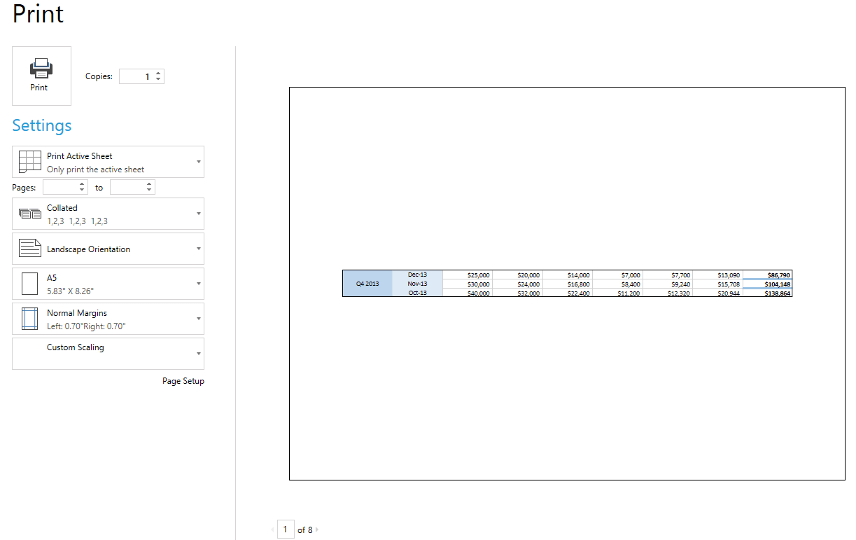
As a result of inserting these horizontal page breaks we have eight pages to print. The first one is shown in Figure 5.
Figure 5: Result of PageBreaks

Repeating Rows/Columns
The PrintTitles property of WorksheetPageSetup enables you to set rows and/or columns to be repeated on each page when printing or exporting the worksheet to PDF. The property is of type PrintTitles and exposes the following properties:
- RepeatedColumns: Gets or sets a value of type ColumnRange that represents the range of columns that should be repeated.
- RepeatedRows: Gets or sets a value of type RowRange that represents the range of rows that should be repeated.
Example 4: Repeat the first two rows and two columns of the worksheet on each page
WorksheetPageSetup pageSetup = workbook.ActiveWorksheet.WorksheetPageSetup;
pageSetup.PrintTitles.RepeatedRows = new RowRange(0, 1);
pageSetup.PrintTitles.RepeatedColumns = new ColumnRange(0, 1);