Modifying the User Profile
The contents of the HTTP requests that will be sent to the application server can be modified. In this view you can only modify the content of the existing headers, in the case when the headers content is supposed to be static (not changing while simulating different users). You cannot add or delete headers of an existing transaction. Also, you cannot modify the expected response since this will be received from the website under test during the test execution.
User Profile Edit Mode
Note! This should only be attempted by someone who is an expert at the HTTP protocol.
-
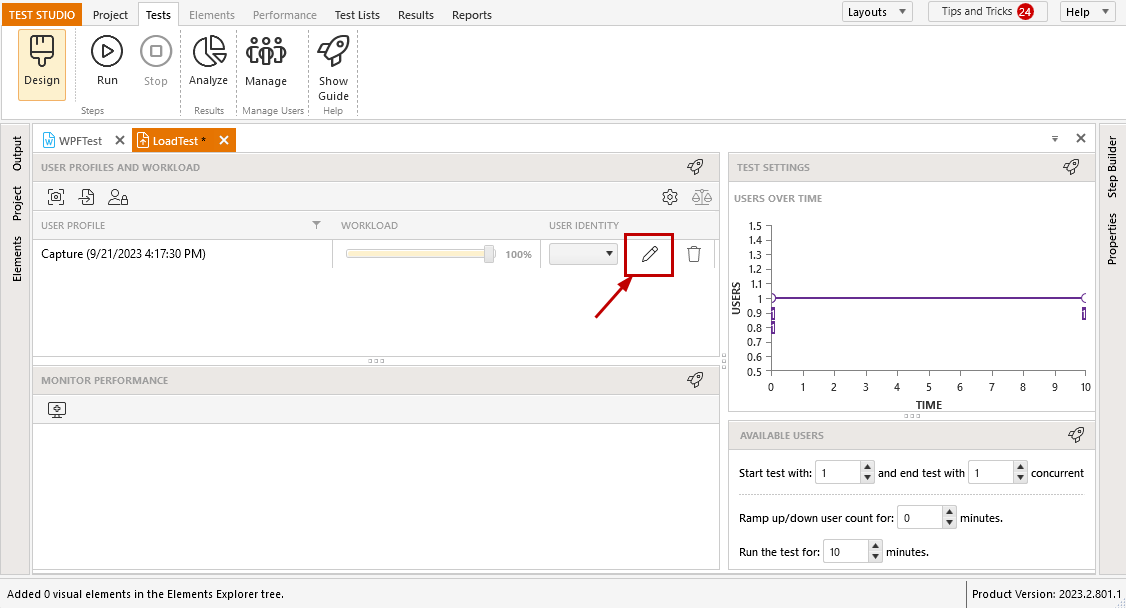
To open the Edit User Profile dialog click the 'pencil' icon on the row of the user profile you want to change. The same will be opened if you double click the same row.
Click on the particular HTTP transaction you want to modify.
-
Select a specific HTTP header and change the value as needed.
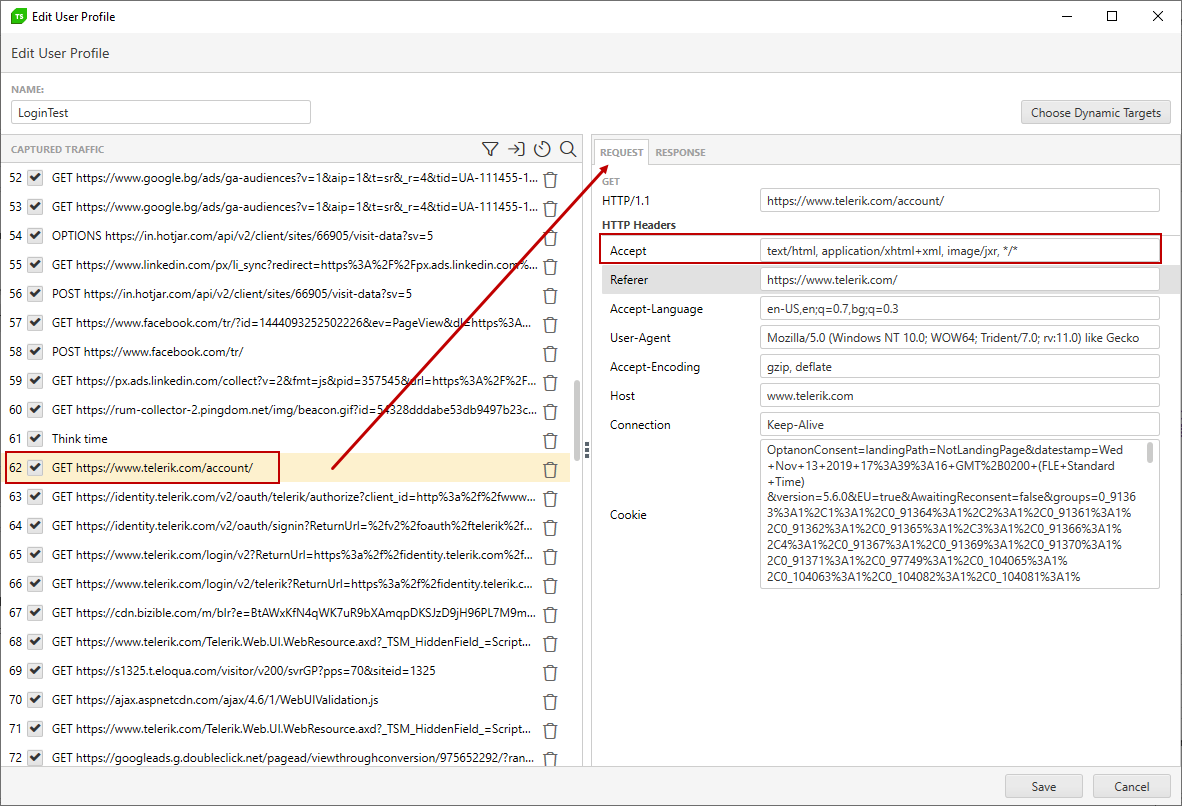
Click the Save button to confirm the changes.
Optionally, you can delete a particular HTTP transaction using the 'X' button on the row with the HTTP request you want to delete.
![Delete Http request][3]
Note! You cannot restore an HTTP transaction if you have accidentally deleted it.
Filter User Profile
Click the 'funnel' icon in the Edit User Profile window to expand the Filtering options. All available domains in the user profile are listed and any of these can be unchecked. That will disable all steps with that domain in the HTTP request.
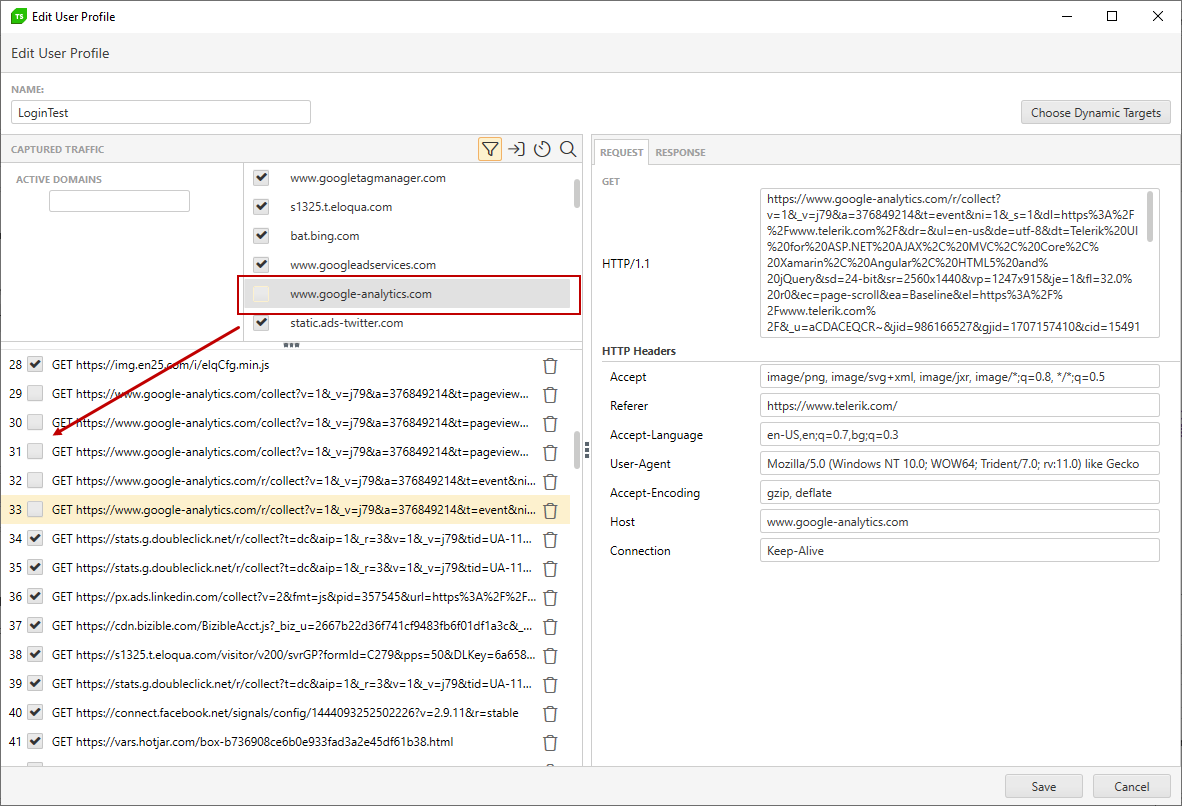
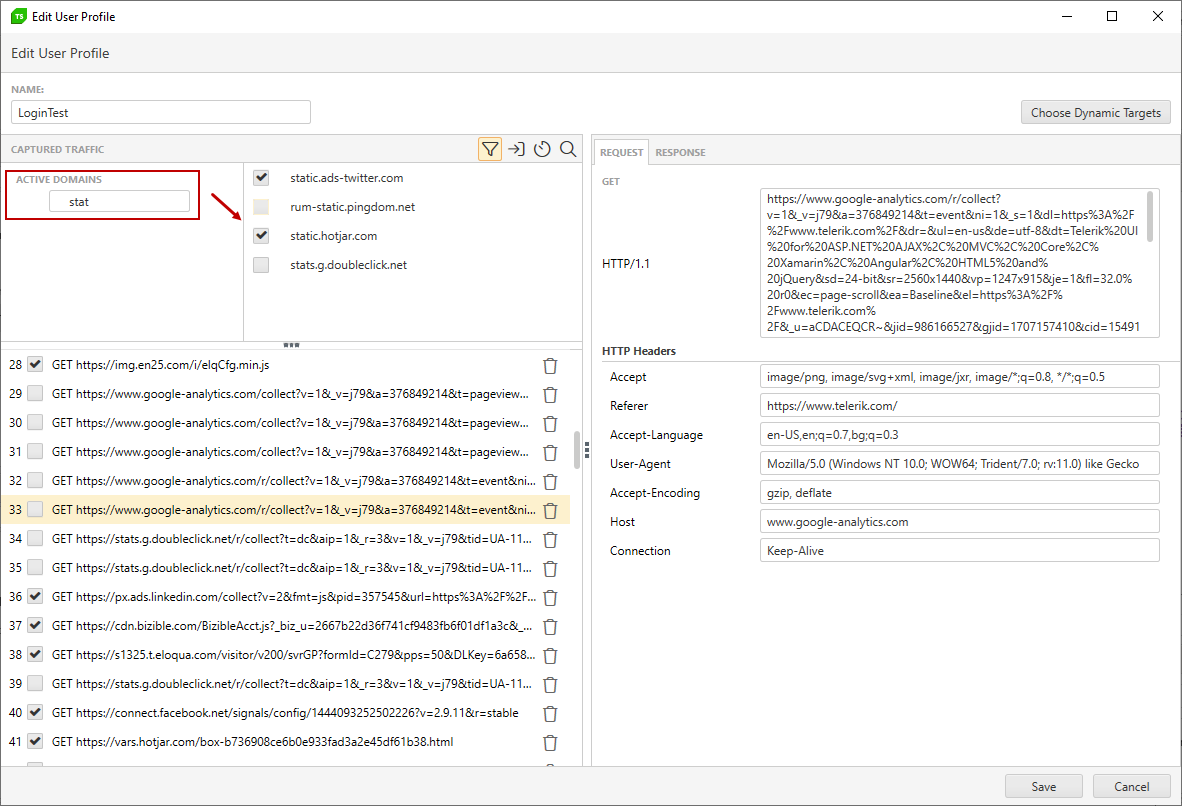
In case there are multiple different domains captured in the user profile you can use the search bar to filter these and disable or enable the requests using that domain.
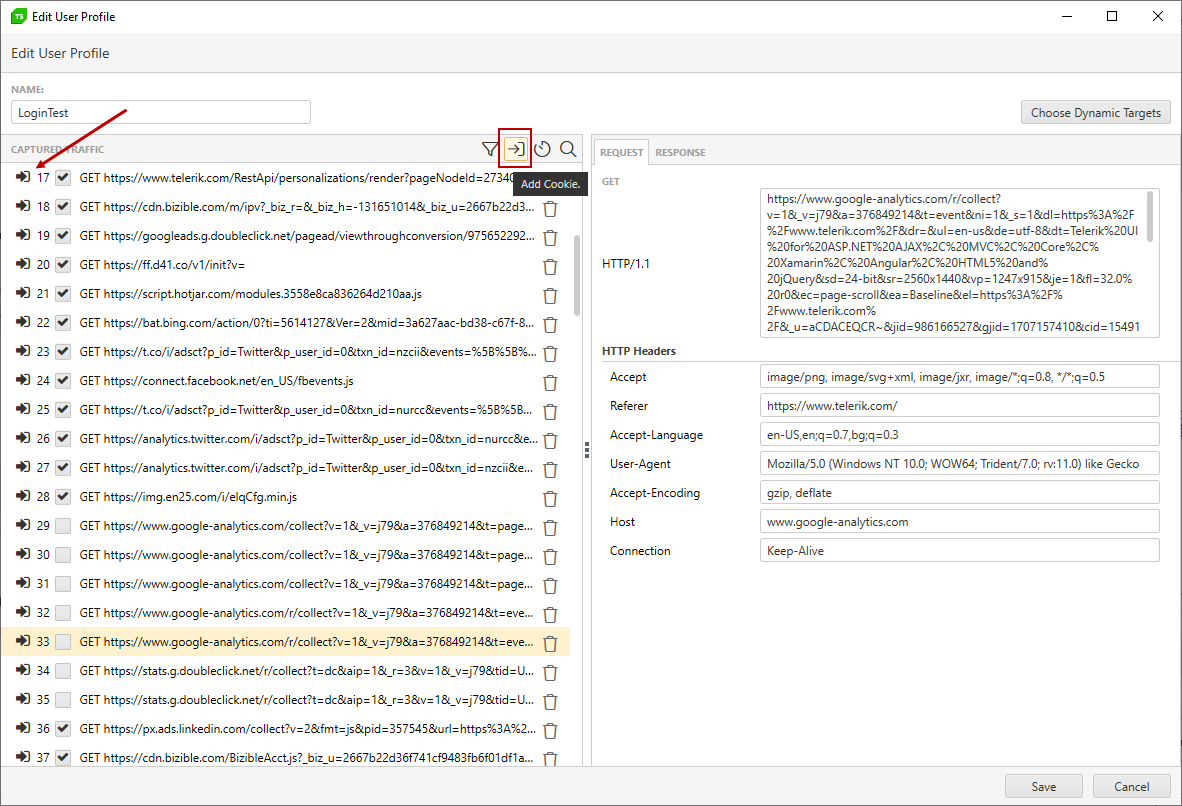
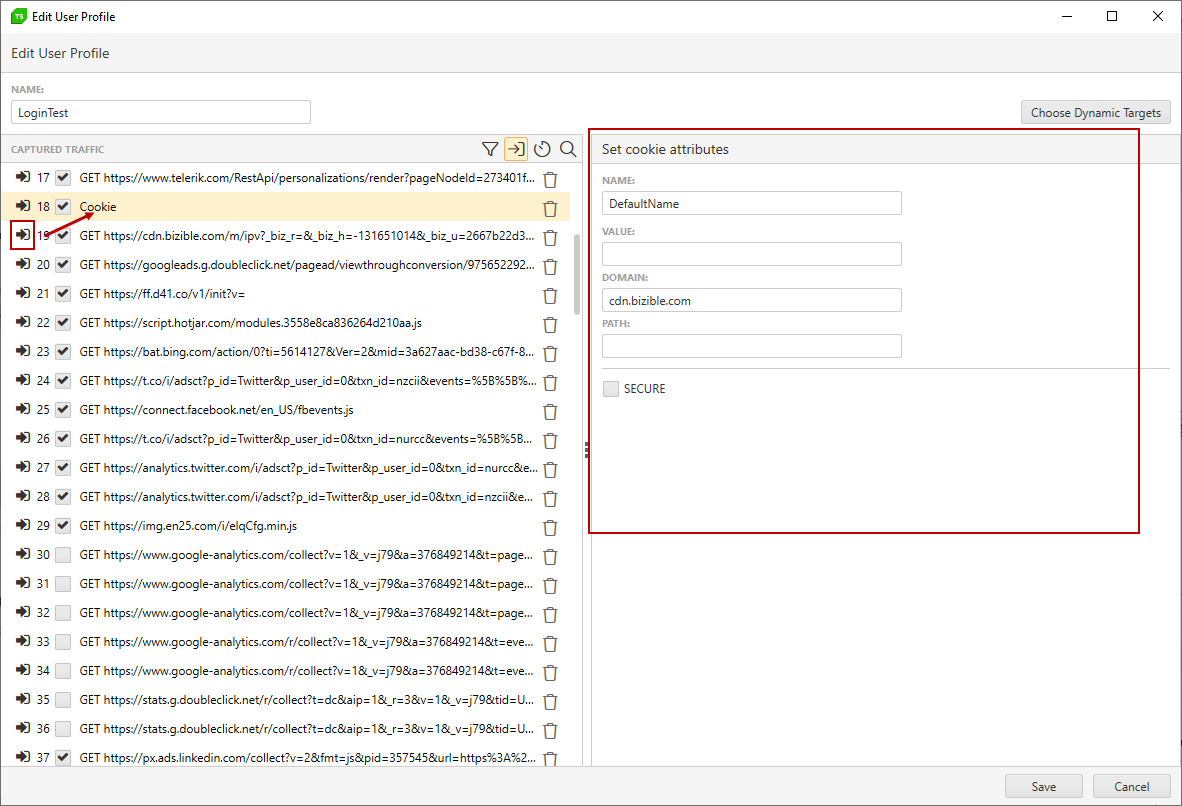
Insert a Custom Cookie into a User Profile
Optionally you can insert a cookie with custom attributes into the recorded user profile. These can be added again in the Edit User Profile window.
-
Click the 'Insert Cookie' icon in the Captured Traffic pane and the same icon will appear next to each HTTP request step.
-
To add a cookie step, click the icon on the HTTP request, which should follow the cookie. The cookie attributes can be edited when the inserted step is selected.
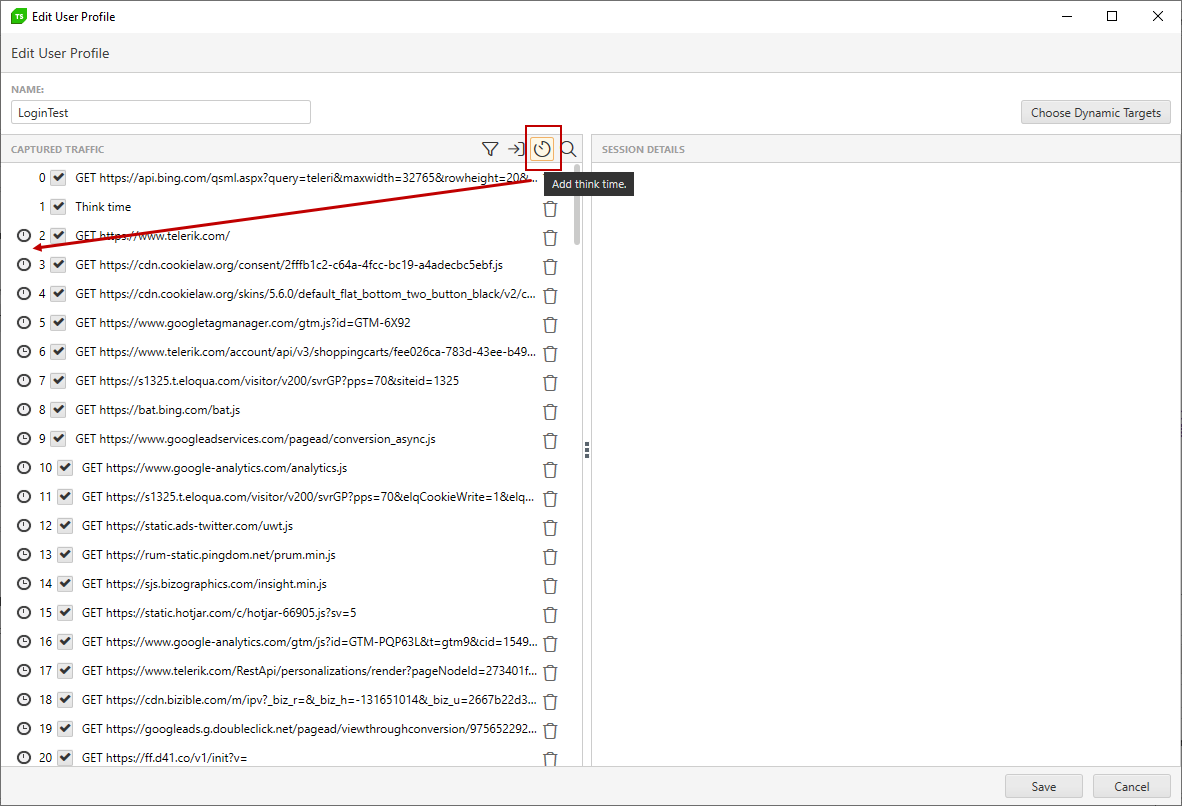
Add/Remove/Change the Think Times
"Think Time" is the time it takes a person to process the information received from the application and decide what to do next. It is also the amount of time spent filling in a form before clicking on Submit or Next. Because every user is different, to have accurate load tests it is important to use a good Think Time range. Some users take longer to read and/or enter data into a form than others. Test Studio can automatically vary the Think Time based a deviation time specified with the Think Time. This will more accurately replicate the length of time from when a person receives a response (a webpage) from your server to the time that person requests a new page.
Think Times simulate delays between requests in your User Profile. If you recorded new HTTP traffic via Capture New, Test Studio will automatically detect and record Think Times and add them to the new User Profile. Similarly, if you imported a Fiddler trace, Test Studio will insert Think Times based on the time stamps of the HTTP requests contained in the trace. When you capture traffic from an existing Web Test, Test Studio will execute it as fast as possible and add default Think Times into the recorded HTTP transactions that correspond to the delay between test steps.
Once your recording or import is complete you can optionally insert or modify the existing think times.
-
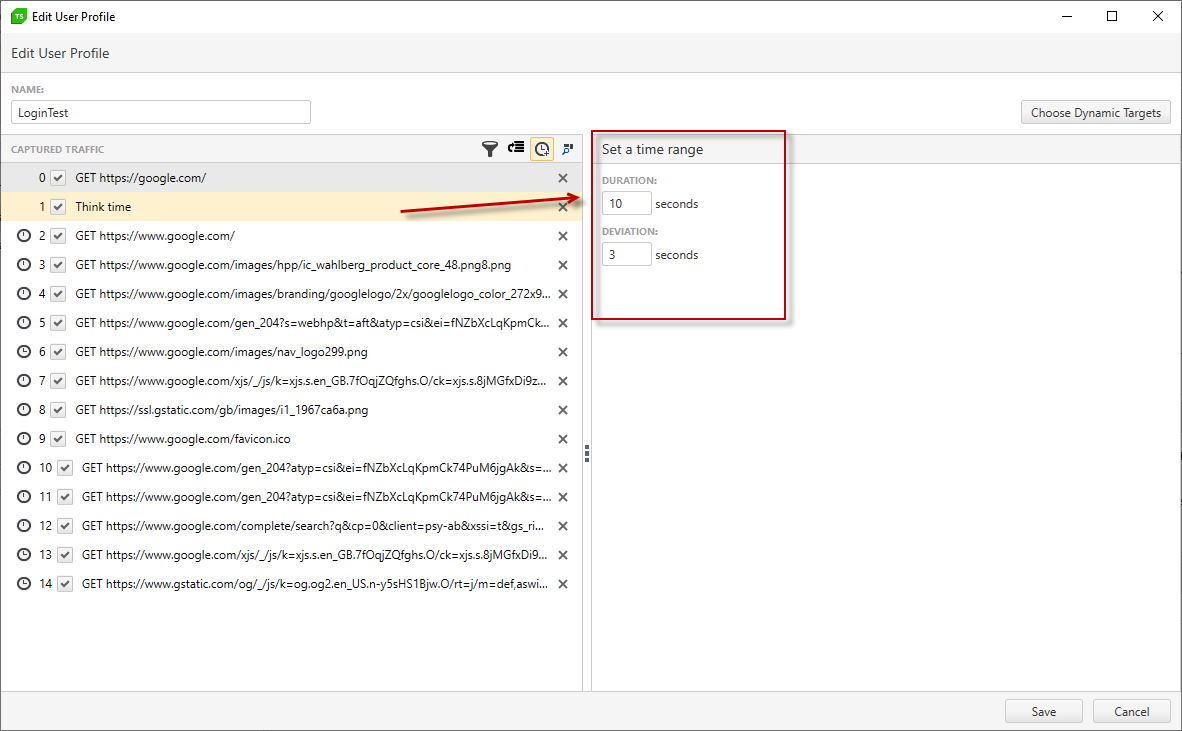
Click the 'clock' icon in the Edit User Profile window to be able to adjust additional think times. This will add a 'clock' icon in front of every HTTP transaction that doesn't already have a think time.
-
Click the 'clock' next to the HTTP transaction where you would like to add a think time and a new Think Time step appears right after that HTTP request.
-
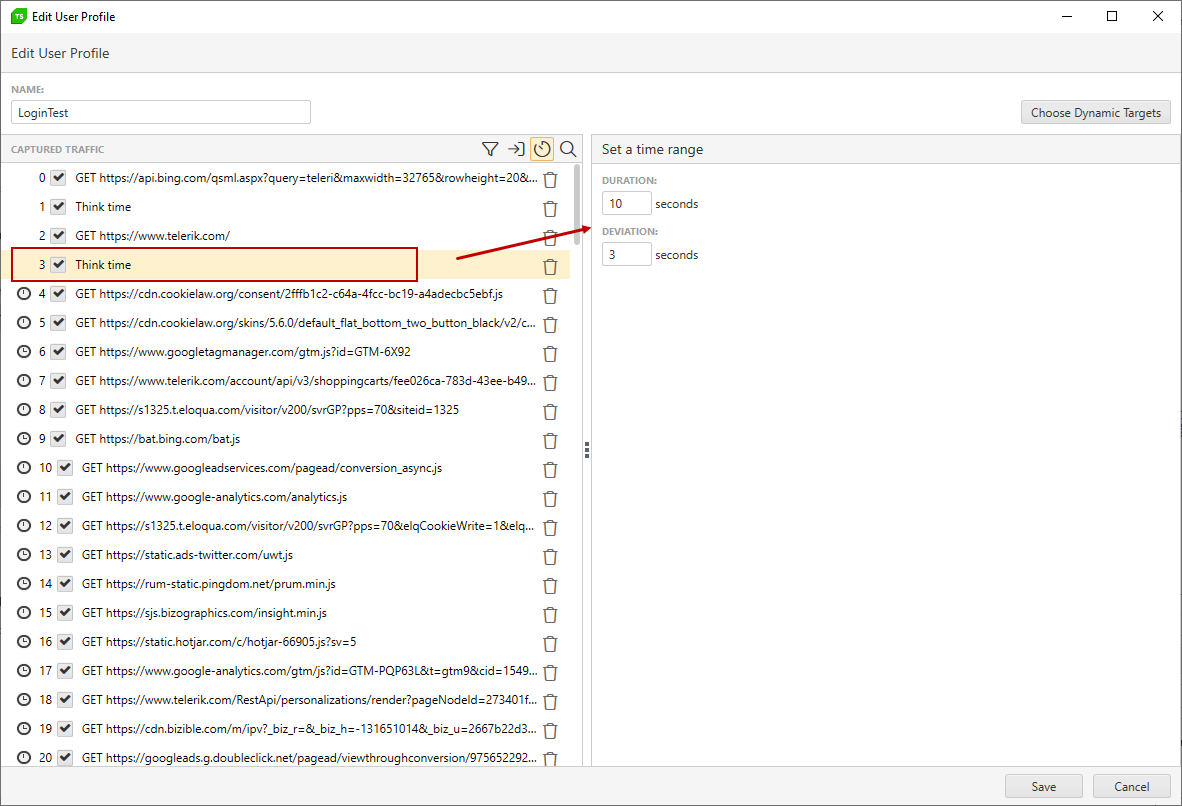
Click that new Think Time step to show its current settings. You can change the default 10 seconds duration time for this wait step and change its deviation. The deviation specifies the range of random variation from the duration. The default is 3. A deviation of 3 means the think time will randomly vary by up to 3 seconds while the load test is running; that is, it will assume a random distribution of values between 7 seconds and 13 seconds.
See Also
Find & Replace URL
Click the 'magnifier' icon in the Edit User Profile window to expand the Find & Replace options. You can search a portion of the URL for all steps and replace it with something else - the BaseUrl for example. This way you can easily run an existing Load Test against another server without recapturing or importing new traffic. Click the Save button to confirm the changes.
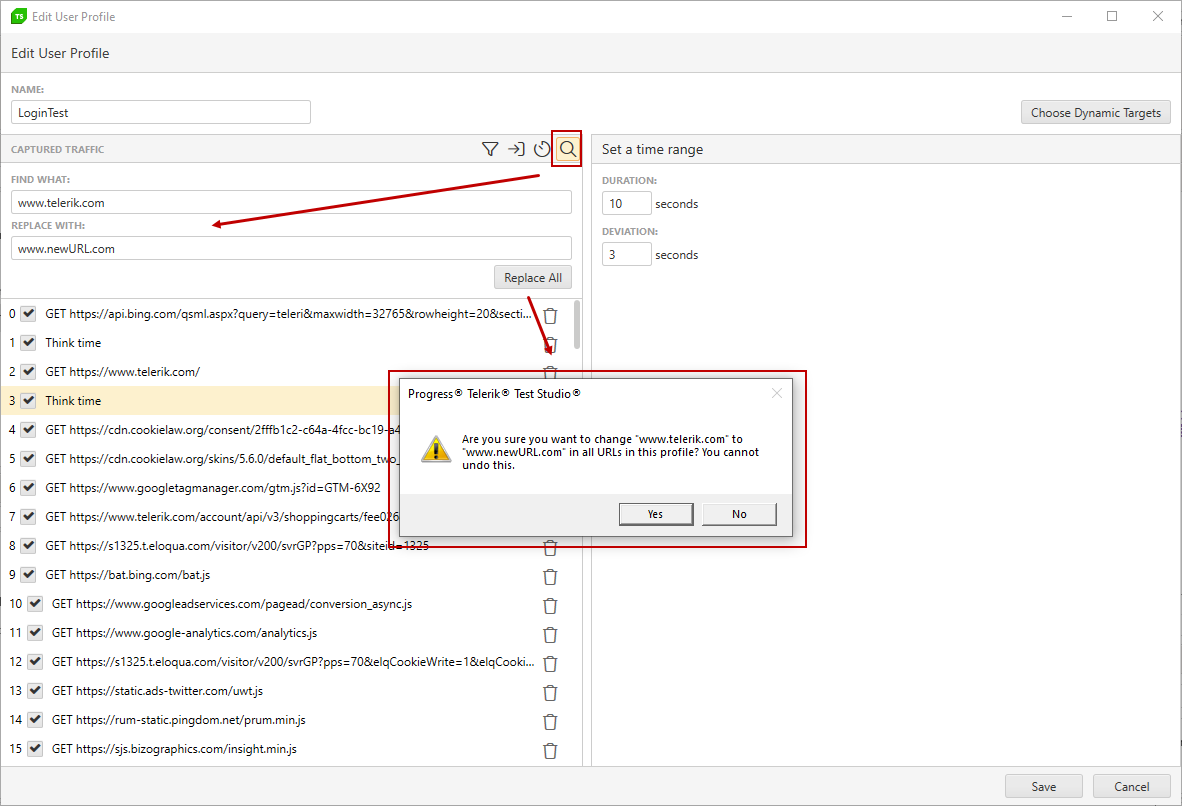
Note! You will be prompted to confirm or decline the change. Once confirmed the user profile cannot be restored to its previous state.