Capture Application Window
The Capture Window feature allows you to visually capture states at any point in a test and export them as PNG files to a specified folder. These images are larger and with higher quality than what is presented in the Storyboard.
This article demonstrates how to add this type of step into the test and use its properties.
Add Capture Window Step
Choose the Capture Window option from the Step Builder and click on the Add Step button in the lower right corner of the pane.

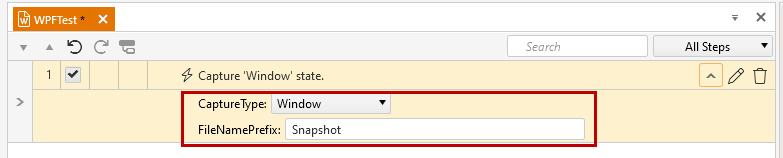
Capture Window Step Properties
Expand the Capture step and toggle the CaptureType to Desktop or Window depending on what you need to capture. The FileNamePrefix property lets you choose the file name for the images.
Find the Images from Capture Window Step
The images from Capture Window step are generated and stored when the test is executed as part of a test list.
Important!
Images from Capture Window step are not stored to disk when the test is executed through the Quick Execution mode. The following message appears in the log:Image not captured to disk. CreateLogFile is set to 'false'.
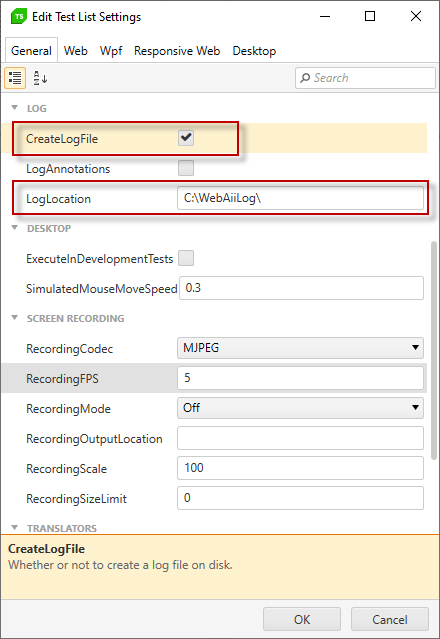
To store the Window and Desktop Capture images to disk include the test in a test list and edit its settings. Ensure CreateLogFile is enabled and, optionally, specify the output directory for the image captures in the LogLocation setting.
Note!
If the user running the Test Studio process does not have permissions to write in the folder specified in the test list settings, the execution process automatically saves the images in %PUBLIC%\WebAiiLog.
Find the Images from Capture Browser Step in Visual Studio Execution
In the VS plugin the images are output to ProjectsFolder\ProjectName\TestResults\User_MachineName_Date_Time\Out.