Adding the Native Angular Report Viewer with the Project Item Generator
This tutorial demonstrates how to add the Native Angular Report Viewer component to an Angular application using the Project Item Generator from the Telerik Reporting Productivity Tools Visual Studio Code extension.
Prerequisites
The following list describes the prerequisites for completing the tutorial:
- Review the Angular Report Viewer Requirements.
- Angular CLI Project.
- The Telerik Reporting Productivity Tools Visual Studio Code extension.
- A running application that hosts a Reporting REST service at address
/api/reports. For more information, see Telerik Reporting REST Services.
Steps:
-
Install the Native Angular Report Viewer Schematic NPM package with the following command:
npm install @progress/telerik-reporting-schematicsIf you receive a 403 Forbidden Error, you need to register and log in at npmjs.com before performing this step.
npm login --registry=https://registry.npmjs.org --scope=@progress -
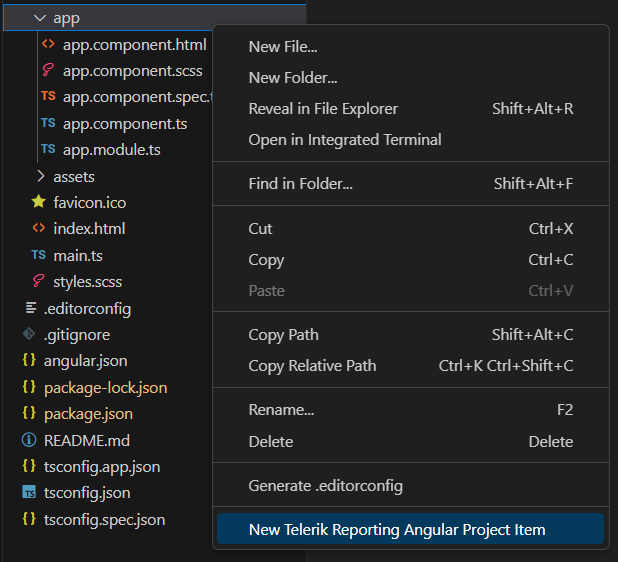
Right-click where you want to add the new report viewer component and select the "New Telerik Reporting Angular Project Item" option.
-
The scaffolding wizard will open, showing the available component options. Set the
Service urloption to the URL of your Reporting REST Service API, theReportoption to the report you wish to preview, and clickCreate. If you do not set these options, the Public Reporting Demos API will be used and the report will be "Report Catalog.trdx".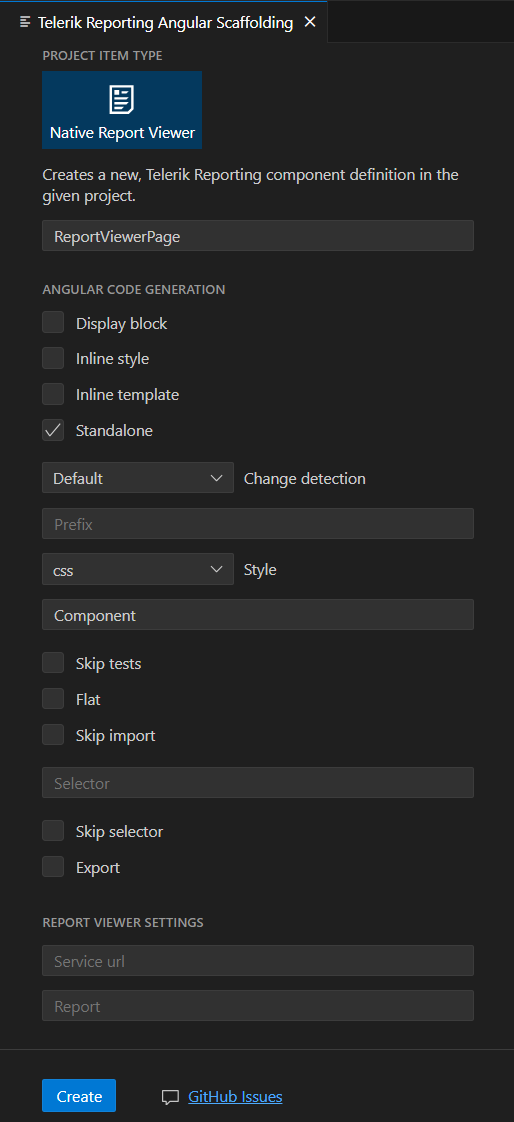
-
Import the new component generated by the wizard.
If you have an Angular 16 (or earlier) application, you may import the component in your application root module. Ensure the
BrowserAnimationsModuleis imported as well.import { NgModule } from '@angular/core'; import { BrowserModule } from '@angular/platform-browser'; import { BrowserAnimationsModule } from '@angular/platform-browser/animations'; import { ReportViewerPageComponent } from './report-viewer-page/report-viewer-page.component'; import { AppComponent } from './app.component'; @NgModule({ declarations: [ AppComponent ], imports: [ BrowserModule, BrowserAnimationsModule, ReportViewerPageComponent ], providers: [], bootstrap: [AppComponent] }) export class AppModule { }If you have an Angular 17 application, you can import the component in your
app.component.tsfile.import { Component } from '@angular/core'; import { RouterOutlet } from '@angular/router'; import { ReportViewerPageComponent } from './report-viewer-page/report-viewer-page.component'; @Component({ selector: 'app-root', standalone: true, imports: [ RouterOutlet, ReportViewerPageComponent ], templateUrl: './app.component.html', styleUrl: './app.component.scss' }) export class AppComponent { title = 'my-angular-application'; } -
If you have an Angular 17 application, import
provideAnimationsfrom@angular/platform-browser/animationsinapp.config.ts.import { ApplicationConfig } from '@angular/core'; import { provideRouter } from '@angular/router'; import { provideAnimations } from '@angular/platform-browser/animations' import { routes } from './app.routes'; export const appConfig: ApplicationConfig = { providers: [provideRouter(routes), provideAnimations()] }; Utilize the selector of the new report viewer component somewhere in the application.
-
Run the application
startscript:npm run start