Using Telerik UI for Xamarin on Mac
This article aims to help you set up your application to use Telerik UI for Xamarin suite on Mac OS.
Please, make sure you have already read the System Requirements article before you proceed.
1. Start with Xamarin.Forms app
Depending on your scenario, you either have an existing app where you will add our components, or you have to create a new blank app.
Add Telerik components to an already existing app
You can manually reference the Telerik UI for Xamarin assemblies in each of the projects (Xamarin.Forms, Android, iOS) or use the Telerik Nuget packages. For detailed instructions, go to Step 3: Add references to Telerik Components.
2. Getting the latest platform SDK versions
Make sure that your Xamarin.Forms packages are up to date.
You can either use the Visual Studio UI to update all packages to the required versions, or you can do it manually by editing the .csproj file in each project.
Update packages using Visual Studio UI
You have to make sure that you have the right version of Xamarin and all related packages.
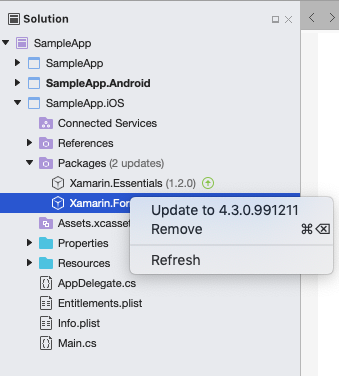
To update specific package to the latest version, right-click on it and select "Update to ...":

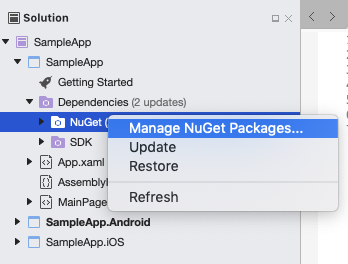
If your application requires specific version of a package, you can right-click directly on the packages folder and choose "Manage NuGet Packages...". This will work even if newer version of the package is already added.

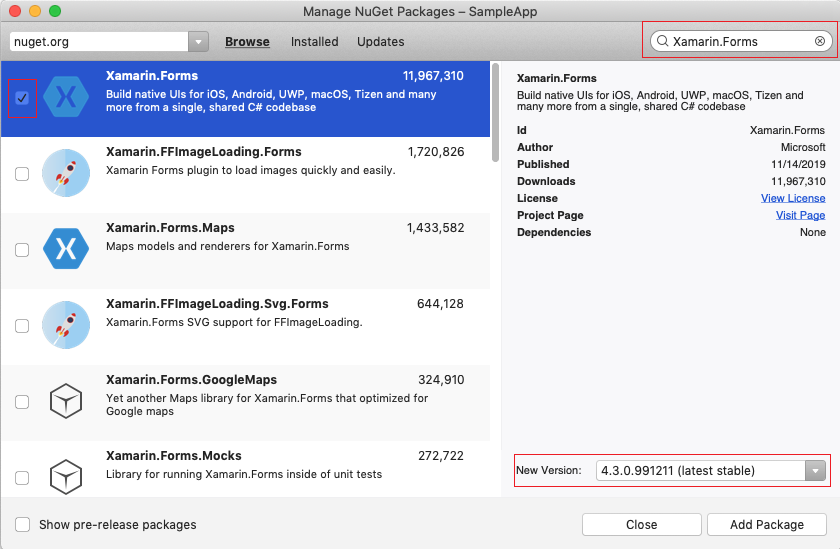
You have to search for the package and select the correct version:

The minimum required version of Xamarin.Forms package is 5.0.0.2083.
The Android project requires multiple packages with specific versions. The Xamarin.Forms package will install most of the required packages as its dependencies. You can then go to Required Android Support Libraries article and check if you have all required files and versions.
3. Add references to Telerik Components
You have two options:
Telerik NuGet package server
You can use our Telerik NuGet package server to include our suite in your solution and/or update to the latest available version.
Manually add required assemblies
If you prefer to manually reference the required Telerik UI for Xamarin assemblies into your solution, you can get them in the following ways:
-
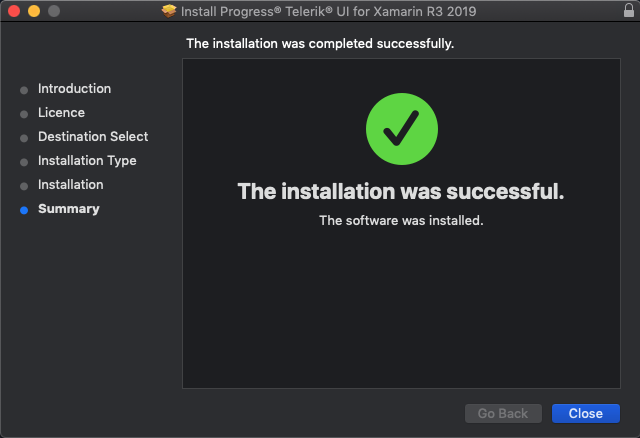
Download the .pkg file, then install it on the Mac machine. After successful installation you will get the following screen:

When the installation is completed the assemblies can be found in the Binaries folder.

Download a ZIP file containing all the assemblies, for more details on this go to Download Product Files topic. You can then unzip the file to any location on your machine and reference the assemblies from that location.
Exploring the installation folder
If you open the installation folder you will probably note the following sub directories:
- Binaries
- Examples - here you can find the SDK Browser application as well as sample applications demonstrating our controls for Xamarin.Android and Xamarin.iOS.
- LicenseAgreements - provides the product EULA.
- QSF - includes the full source of Telerik UI for Xamarin Samples Application.
If you're planning to use only a few components, you can add references to part of the assemblies. There is a special section in each control documentation that lists all the required assemblies. The section is called "Adding the required Telerik references" and is located in the Getting Started article for each control.
As some of the controls included in Telerik UI for Xamarin suite rely on the SkiaSharp rendering library, you should either install SkiaSharp.Views.Forms in all projects included in the Xamarin solution (portable, android, ios, etc.) or in case you do not intend to use any of the Skia-dependent components (Gauges, Rating, BusyIndicator), you could reference the Lite assemblies.