Styling
The RadPath element exposes the following properties you can use to customize the look of the path figures:
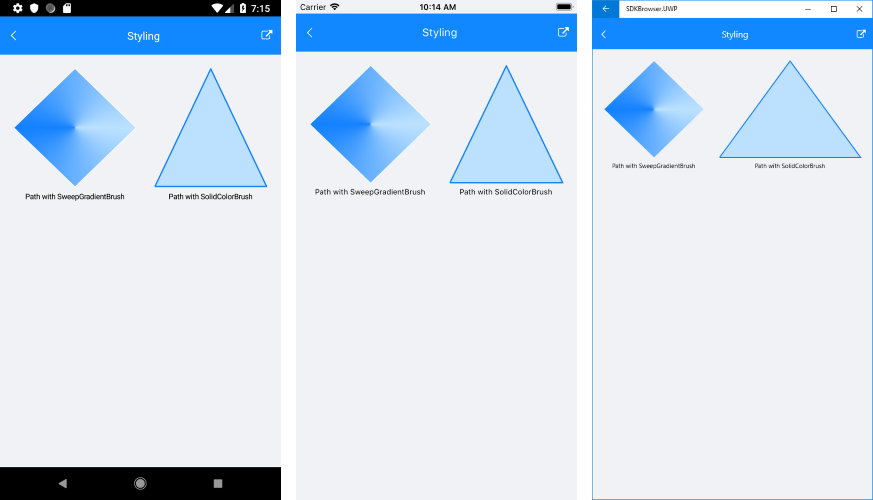
- Fill: Used for setting up the color within the figures. You should set an object of type RadBrush. This can be a RadSolidColorBrush or a RadSweepGradientBrush
- Stroke: You can use this property to set the stroke color.
- StrokeThickness: You can use this property to set the thickness of the stroke.
- BackgroundColor: You can use this property to modify the color of the rectangle which contains the specific figure.
Here is an example with RadSweepGradientBrush:
<telerikPrimitives:RadPath x:Name="gradientPath"
                           StrokeThickness="1"
                           Stroke="White"
                           Geometry="{x:Static telerikInput:Geometries.Diamond}">
    <telerikPrimitives:RadPath.Fill>
        <telerikCommon:RadSweepGradientBrush>
            <x:Arguments>
                <Point>0.5, 0.5</Point>
            </x:Arguments>
            <telerikCommon:RadSweepGradientStop>
                <x:Arguments>
                    <Color>#1481FF</Color>
                    <x:Double>180</x:Double>
                </x:Arguments>
            </telerikCommon:RadSweepGradientStop>
            <telerikCommon:RadSweepGradientStop>
                <x:Arguments>
                    <Color>#BCE1FF</Color>
                    <x:Double>360</x:Double>
                </x:Arguments>
            </telerikCommon:RadSweepGradientStop>
        </telerikCommon:RadSweepGradientBrush>
    </telerikPrimitives:RadPath.Fill>
</telerikPrimitives:RadPath>
Below you can check an example with RadSolidColorBrush:
<telerikPrimitives:RadPath x:Name="solidPath"
                           Grid.Row="0"
                           StrokeThickness="2"
                           Stroke="#1481FF"
                           Fill="#BCE1FF">
    <telerikCommon:RadPathGeometry>
        <telerikCommon:RadPathFigure StartPoint="0, 1">
            <telerikCommon:RadLineSegment Point="1, 1" />
            <telerikCommon:RadLineSegment Point="0.5, 0" />
            <telerikCommon:RadLineSegment Point="0, 1" />
        </telerikCommon:RadPathFigure>
    </telerikCommon:RadPathGeometry>
</telerikPrimitives:RadPath>
And the result is shown below: