Save Snapshot to File
This article shows how to take and save a snapshot to a file.
Setting up the Control
Add the control to the logical tree of the view and subscribe to the SnapshotTaken event.
Defining RadWebCam
<telerik:RadWebCam x:Name="radWebCam" SnapshotTaken="RadWebCam_SnapshotTaken"/>
BitmapSource object holding the snapshot. You can use this to save it to the file system.
Opening a file dialog in the SnapshotTaken event handler and saving it to a file
private void RadWebCam_SnapshotTaken(object sender, RoutedEventArgs e)
{
    var args = (SnapshotTakenEventArgs)e;
    SaveFileDialog dialog = new SaveFileDialog();
    dialog.Filter = "Images|.png;.bmp;*.jpg";
    dialog.DefaultExt = ".png";
    dialog.FilterIndex = 0;
    if (dialog.ShowDialog() == true)
    {
        using (var fileStream = dialog.OpenFile())
        {
            BitmapEncoder encoder = new PngBitmapEncoder();
            encoder.Frames.Add(BitmapFrame.Create(args.Snapshot));
            encoder.Save(fileStream);
        }
    }
}
Taking Snapshot
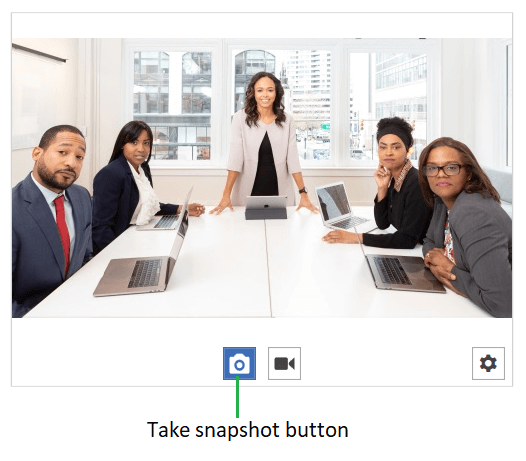
To take the snapshot press the "Take snapshot" button. Or call the TakeSnapshot method. This will fire the SnapshotTaken event.
By default a preview of the snapshot will be shown that allows you to choose if it should be saved or not. If you choose to save it the SnapshotTaken event will fire. To disable the preview set the
IsPreviewingSnapshotproperty of RadWebCam toFalse.
Take snapshot button
Take Snapshot
this.radWebCam.TakeSnapshot();