Styling the Lines
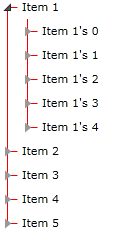
The purpose of this tutorial is to show you how to change the color of the connected lines between the nodes of a RadTreeView. The final result should look like the one on the snapshot below:
In order to style the lines, you should edit the RadTreeViewItem's Template and change the TreeView_LineColor resource. This tutorial illustrates you a step by step example on how to do that.
Open your application in Expression Blend.
Add a dummy RadTreeViewItem control to the artboard - from the Assets pane select Controls->All->RadTreeViewItem and draw it somewhere on the scene.
Select the just drawn RadTreeViewItem, and from the menu choose Object->Edit Template->Edit a Copy. You will be prompted for the name of the style and where to be placed within your application.
After clicking OK, a style for your RadTreeViewItem control will be created. Go to the Resources pane and see all of the resources generated for your style.

-
Modify the TreeView_LineColor resource, which represents the Stroke of the horizontal and vertical lines connecting the nodes. For example, change the color to Red.

-
Finally, go back to your XAML and set the ItemContainerStyle property to the just created style.
    <telerik:RadTreeView x:Name="radTreeView" IsLineEnabled="True"
        ItemContainerStyle="{StaticResource RadTreeViewItemStyle}"
        ItemTemplate="{StaticResource RadTreeViewItemTemplate}"/>
Don't forget to delete the created dummy control.
Note that the provided solution is valid in the cases when your RadTreeView is data bound to a business object. If your RadTreeView is populated declaratively in XAML (with static data), then you should set the Style property of each RadTreeViewItem!