VirtualizingWrapPanel
This article will describe the VirtualizingWrapPanel and how it can be used as an ItemsPanel for a RadListBox.
Key Properties
- ItemHeight: Gets or sets a value that specifies the Height of all items that are contained within a VirtualizingWrapPanel.
- ItemWidth: Gets or sets a value that specifies the Width of all items that are contained within a VirtualizingWrapPanel.
-
ScrollStep: Gets or sets a value for the amount that will be scrolled when using the mouse wheel or the scrollbar buttons (Not supported when grouping is enabled).
Scrolling with the Page up and Page down keys and navigating with the Left and Right arrow keys is not supported when grouping is enabled.
VirtualizingPanel.ScrollUnit : The possible values are Pixel (the scrolling is pixel based) and Item (the scrolling is item based). (When grouping is enabled, only Pixel is supported). The default value is Item.
- VirtualizingPanel.IsVirtualizingWhenGrouping : Set this property to True to enable virtualizing when grouping.
-
VirtualizingPanel.VirtualizationMode: Specifies the method the panel will use to manage virtualizing its child items. The possible values are Standard (create and discard the item containers) and Recycling (reuse the item containers).
The ScrollUnit, IsVirtualizingWhenGroupinga and VirtualizationMode properties are available in .NET 4.6.2 and later.
VirtualizingWrapPanel
In order to demonstrate how the VirtualizingWrapPanel can be used, we will setup some sample data as demonstrated in Example 1.
Example 1: Setting up the model and viewmodel
public class ViewModel : ViewModelBase
{
    private ObservableCollection<Customer> customers;
    private CollectionViewSource collectionViewSource = new CollectionViewSource();
    private ICollectionView customersView;

    public ViewModel()
    {
        this.Customers = new ObservableCollection<Customer>()
        {
            new Customer { Id = 1, Name = "Customer 1" },
            new Customer { Id = 2, Name = "Customer 2" },
            new Customer { Id = 3, Name = "Customer 3" },
            new Customer { Id = 4, Name = "Customer 4" },
            new Customer { Id = 5, Name = "Customer 5" }
        };

        this.collectionViewSource.Source = this.Customers;

        this.collectionViewSource.View.GroupDescriptions.Add(new PropertyGroupDescription("Name"));
        this.CustomersView = this.collectionViewSource.View;
    }

    public ObservableCollection<Customer> Customers
    {
        get { return this.customers; }
        set
        {
            if (this.customers != value)
            {
                this.customers = value;
                this.OnPropertyChanged(() => this.Customers);
            }
        }
    }

    public ICollectionView CustomersView
    {
        get
        {
            return this.customersView;
        }
        set
        {
            if(this.customersView != value)
            {
                this.customersView = value;
                this.OnPropertyChanged(() => this.CustomersView);
            }
        }
    }
}
Public Class Customer
    Public Property Name() As String
    Public Property Id() As Integer
End Class

Public Class ViewModel
Inherits ViewModelBase
    Private _customers As ObservableCollection(Of Customer)
    Private collectionViewSource As New CollectionViewSource()
    Private _customersView As ICollectionView

    Public Sub New()
        Me.Customers = New ObservableCollection(Of Customer)() From {
            New Customer With {
                .Id = 1,
                .Name = "Customer 1"
            },
            New Customer With {
                .Id = 2,
                .Name = "Customer 2"
            },
            New Customer With {
                .Id = 3,
                .Name = "Customer 3"
            },
            New Customer With {
                .Id = 4,
                .Name = "Customer 4"
            },
            New Customer With {
                .Id = 5,
                .Name = "Customer 5"
            }
        }

        'This will be needed in order to group the data
        Me.collectionViewSource.Source = Me.Customers

        Me.collectionViewSource.View.GroupDescriptions.Add(New PropertyGroupDescription("Name"))
        Me.CustomersView = Me.collectionViewSource.View
    End Sub

    Public Property Customers() As ObservableCollection(Of Customer)
        Get
            Return Me._customers
        End Get
        Set(ByVal value As ObservableCollection(Of Customer))
            If Me._customers IsNot value Then
                Me._customers = value
                Me.OnPropertyChanged(Function() Me.Customers)
            End If
        End Set
    End Property

    Public Property CustomersView() As ICollectionView
        Get
            Return Me._customersView
        End Get
        Set(ByVal value As ICollectionView)
            If Me._customersView IsNot value Then
                Me._customersView = value
                Me.OnPropertyChanged(Function() Me.CustomersView)
            End If
        End Set
    End Property
End Class
Setting up the RadListBox
Example 2 demonstrates how the VirtualizingWrapPanel can be used as an ItemsPanel for a RadListBox. You can read some more about the benefits of UI Virtualization in the following article.
Example 2: RadListBox with VirtualizingWrapPanel as ItemsPanel
<UserControl>
    <UserControl.Resources>
        <local:ViewModel x:Key="ViewModel" />
    </UserControl.Resources>
    <Grid DataContext="{StaticResource ViewModel}">
        <telerik:RadListBox ItemsSource="{Binding CustomersView}"
                            DisplayMemberPath="Name">
            <telerik:RadListBox.ItemContainerStyle>
                <!-- If you are using the NoXaml binaries, you will have to base the style on the default one for the theme like so:
                <Style TargetType="telerik:RadListBoxItem" BasedOn="{StaticResource RadListBoxItemStyle}">-->

                <Style TargetType="telerik:RadListBoxItem">
                    <Setter Property="Background" Value="Red" />
                </Style>
            </telerik:RadListBox.ItemContainerStyle>
            <telerik:RadListBox.ItemsPanel>
                <ItemsPanelTemplate>
                    <telerik:VirtualizingWrapPanel  />
                </ItemsPanelTemplate>
            </telerik:RadListBox.ItemsPanel>
        </telerik:RadListBox>
    </Grid>
</UserControl>
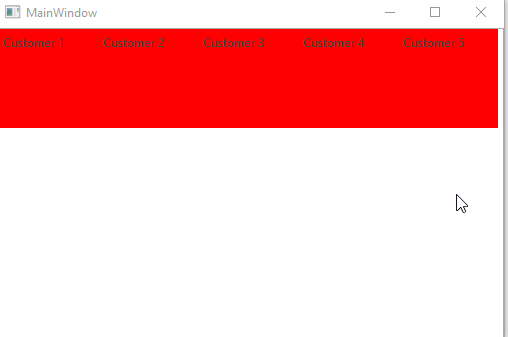
Figure 1: Result from Example 2 in the Office2016 theme
Grouping
Example 3 demonstrates how you can apply grouping to the data by setting the GroupStyle property. Otherwise, the example uses the same setup as Example 2.
Example 3: Grouped RadListBox with VirtualizingWrapPanel as ItemsPanel
<telerik:RadListBox.GroupStyle>
    <GroupStyle>
        <GroupStyle.HeaderTemplate>
            <DataTemplate>
                <TextBlock Text="{Binding Name}" Background="Green" />
            </DataTemplate>
        </GroupStyle.HeaderTemplate>
    </GroupStyle>
</telerik:RadListBox.GroupStyle>
Grouping and Virtualization
The VirtualizingWrapPanel supports virtualization when the data is grouped. This feature is only available for .NET 4.6.2 and above.
In order to turn on this feature, you have to set the VirtualizingPanel.IsVirtualizingWhenGrouping attached property to True.
Additionally, you have to set the VirtualizingPanel.ScrollUnit to Pixel, since VirtualizingPanel.ScrollUnit="Item" is not supported while grouping. Optionally, you can also set the VirtualizingPanel.VirtualizationMode property to Recycling in order for the item containers to be recycled during scrolling.
Example 4: Turning on virtualization while grouping
<telerik:RadListBox VirtualizingPanel.ScrollUnit="Pixel"
                    VirtualizingPanel.IsVirtualizingWhenGrouping="True"
                    VirtualizingPanel.VirtualizationMode="Recycling">
    <telerik:RadListBox.GroupStyle>
        <GroupStyle>
            <GroupStyle.HeaderTemplate>
                <DataTemplate>
                    <TextBlock Text="{Binding Name}" Background="Green" />
                </DataTemplate>
            </GroupStyle.HeaderTemplate>
            <GroupStyle.Panel>
                <ItemsPanelTemplate>
                    <VirtualizingWrapPanel
                        VirtualizingPanel.IsVirtualizing="True"
                        VirtualizingPanel.IsVirtualizingWhenGrouping="True"
                        VirtualizingPanel.ScrollUnit="Pixel"
                        VirtualizingPanel.VirtualizationMode="Recycling"/>
                </ItemsPanelTemplate>
            </GroupStyle.Panel>
        </GroupStyle>
    </telerik:RadListBox.GroupStyle>
</telerik:RadListBox>
Note that you also need to set the attached properties on the panel in the GroupStyle as they will not be transferred automatically.
When the VirtualizingPanel.IsVirtualizingWhenGrouping property is set to True, the VirtualizingPanel.ScrollUnit needs to be Pixel, since VirtualizingPanel.ScrollUnit="Item" is not supported.