Getting Started with WPF Legend
This tutorial will walk you through the creation of a sample application that contains RadLegend.
- Adding Telerik Assemblies Using NuGet
- Adding Assembly References Manually
- Defining RadLegend and Adding Items
- Customizing the Legend Items
- Changing the Items Panel
Adding Telerik Assemblies Using NuGet
To use RadLegend when working with NuGet packages, install the Telerik.Windows.Controls.for.Wpf.Xaml package. The package name may vary slightly based on the Telerik dlls set - Xaml or NoXaml
Read more about NuGet installation in the Installing UI for WPF from NuGet Package article.
With the 2025 Q1 release, the Telerik UI for WPF has a new licensing mechanism. You can learn more about it here.
Adding Assembly References Manually
If you are not using NuGet packages, you can add a reference to the following assemblies:
- Telerik.Licensing.Runtime
- Telerik.Windows.Controls
You can find the required assemblies for each control from the suite in the Controls Dependencies help article.
Defining RadLegend and Adding Items
The RadLegend control is populated with data via its Items collection. The collection is of type LegendItemCollection and can be populated only with LegendItem objects. By default the Items property is null.
Example 1: Defining RadLegend in XAML
Example 2: Defining RadLegend in code
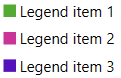
Figure 1: RadLegend
Customizing the Legend Items
The most straightforward way to customize the legend items is to set the properties of the LegendItem objects added in the Items collection of the control.
To change the fill of the item's marker set the MarkerFill property of the LegendItem object.
To change the text of the items set the Title property of the LegendItem object.
To change the geometry of the marker set the MarkerGeometry property. Read about this in the Marker Geometry article.
The control also allows you to fully replace its items' template and define a custom visualization. To do so, set the ItemTemplate property of the RadLegend control. Read more about this in the ItemTemplate article.
Changing the Items Panel
By default the RadLegend control uses a StackPanel to render its items. To change this you can replace the panel via the ItemsPanel property. Read more about this in the ItemsPanel article.
Telerik UI for WPF Learning Resources
- Getting Started with Telerik UI for WPF Components
- Telerik UI for WPF Installation
- Telerik UI for WPF and WinForms Integration
- Telerik UI for WPF Visual Studio Templates
- Setting a Theme with Telerik UI for WPF
- Telerik UI for WPF Virtual Classroom (Training Courses for Registered Users)
- Telerik UI for WPF License Agreement