Customize Cell Content
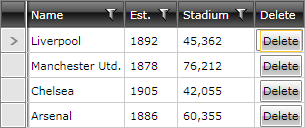
This article demonstrates how to add a column with a delete button for each row. We will benefit from the static RadGridViewCommands class to automatically delete the corresponding row item upon clicking the button. Figure 1 illustrates the desired result.
Figure 1: RadGridView with custom button column
There are several ways to achieve this. Let's look at some of them.
Create a Custom Column
This approach involves inheriting from GridViewColumn and overriding the CreateCellElement method. In this method, you can create the button (if it has not already been created) and set its properties as demonstrated in Example 1.
In order to automatically export a custom column, it should implement the IExportableColumn interface.
Example 1: Override the CreateCellElement method
public class MyButtonColumn : Telerik.Windows.Controls.GridViewColumn
{
    public override FrameworkElement CreateCellElement(GridViewCell cell, object dataItem)
    {
        RadButton button = new RadButton();
        button.Content = "Delete";
        button.Command = RadGridViewCommands.Delete;
        button.CommandParameter = dataItem;
        return button;
    }
}
Public Class MyButtonColumn
Inherits Telerik.Windows.Controls.GridViewColumn

    Public Overrides Function CreateCellElement(ByVal cell As GridViewCell, ByVal dataItem As Object) As FrameworkElement
        Dim button As RadButton = TryCast(cell.Content, RadButton)
        If button Is Nothing Then
            button = New RadButton()
            button.Content = "Delete"
            button.Command = RadGridViewCommands.Delete
        End If

        button.CommandParameter = dataItem

        Return button
    End Function
End Class
Now you need to add this custom column to our RadGridView's Columns collection. Example 2 shows how to do this in XAML.
Example 2: Define the custom column in XAML
<telerik:RadGridView.Columns>
    <!-- ... -->
    <my:MyButtonColumn Header="Delete" />
</telerik:RadGridView.Columns>
The same can be achieved in code-behind as illustrated in Example 3.
Example 3: Define the custom column in code-behind
private void clubsGrid_DataLoaded(object sender, EventArgs e)
{
    this.clubsGrid.Columns.Add(new MyButtonColumn()
    {
        Header = "Delete"
    });
}
Private Sub clubsGrid_DataLoaded(ByVal sender As Object, ByVal e As EventArgs)
    Me.clubsGrid.Columns.Add(New MyButtonColumn() With {.Header = "Delete"})
End Sub
Use the GridViewColumn's CellTemplate Property
With this approach we will re-define the template of the cells for that column. In this case, we specify a simple DataTemplate which contains our delete button.
Specify the GridViewColumn's CellTemplate
<telerik:RadGridView.Columns>
    <!-- ... -->
    <telerik:GridViewColumn Header="Delete" >
        <telerik:GridViewColumn.CellTemplate>
            <DataTemplate>
                <telerik:RadButton Content="Delete"
                        Command="telerik:RadGridViewCommands.Delete"
                        CommandParameter="{Binding}" />
            </DataTemplate>
        </telerik:GridViewColumn.CellTemplate>
    </telerik:GridViewColumn>
</telerik:RadGridView.Columns>
Notice that we've set the Command of the button to the RadGridViewCommands.Delete command and passed in the current row item (the DataContext of the cell) as the CommandParameter.