Getting Started with WPF ExpressionEditor
This tutorial will walk your through the creation of a sample application containing RadExpressionEditor and will show you how to:
Use RadExpressionEditor in your project;
Utilize RadExpressionEditor with other controls.
Assembly References
To use the RadExpressionEditor in your projects you have to add references to the following assemblies:
- Telerik.Windows.Controls
- Telerik.Windows.Controls.Data
- Telerik.Windows.Controls.Input
- Telerik.Windows.Controls.Expressions
- Telerik.Windows.Controls.Navigation
- Telerik.Windows.Data
- Telerik.Windows.Documents
- Telerik.Windows.Documents.Core
- Telerik.Windows.Documents.Flow
You can find the required assemblies for each control from the suite in the Controls Dependencies help article.
Adding Telerik Assemblies Using NuGet
To use RadExpressionEditor when working with NuGet packages, install the Telerik.Windows.Controls.Expressions.for.Wpf.Xaml
package. The package name may vary slightly based on the Telerik dlls set - Xaml or NoXaml
Read more about NuGet installation in the Installing UI for WPF from NuGet Package article.
Adding RadExpressionEditor to the project
- Create a new project;
If you are using .NET 6 and later, please note that instead of the Telerik.Windows.Documents.dll you need to use the new Telerik.Windows.Controls.RichTextBox.dll assembly.
In case you use Implicit Styles, please make sure all the needed resource dictionaries are merged:
- System.Windows.xaml
- Telerik.Windows.Controls.xaml
- Telerik.Windows.Controls.Expressions.xaml
- Telerik.Windows.Controls.Navigation.xaml
- Telerik.Windows.Documents.xaml
- Define RadExpressionEditor as demonstrated below:
Example 1
<telerik:RadExpressionEditor x:Name="expressionEditor" />
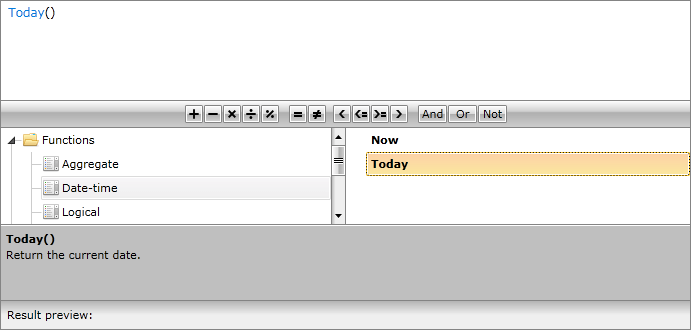
Now, when running the application, RadExpressionEditor will be displayed:
Binding RadExpressionEditor
The scenario we will try to create here would be to implement RadExpressionEditor as an advanced manual filter for RadGridView. For that purpose, we will firstly create a new class Employee with a couple of exposed properties and a method creating sample data:
Example 2
public class Employee
{
public string FirstName
{
get;
set;
}
public string LastName
{
get;
set;
}
public string Occupation
{
get;
set;
}
public DateTime StartingDate
{
get;
set;
}
public bool IsMarried
{
get;
set;
}
public int Salary
{
get;
set;
}
public Employee()
{
}
public static ObservableCollection<Employee> GetEmployees()
{
ObservableCollection<Employee> employees = new ObservableCollection<Employee>();
employees.Add(new Employee() { FirstName = "Sarah", LastName = "Blake", Occupation = "Supplied Manager", StartingDate = new DateTime(2005, 04, 12), IsMarried = true, Salary = 3500 });
employees.Add(new Employee() { FirstName = "Jane", LastName = "Simpson", Occupation = "Security", StartingDate = new DateTime(2008, 12, 03), IsMarried = true, Salary = 2000 });
employees.Add(new Employee() { FirstName = "John", LastName = "Peterson", Occupation = "Consultant", StartingDate = new DateTime(2005, 04, 12), IsMarried = false, Salary = 2600 });
employees.Add(new Employee() { FirstName = "Peter", LastName = "Bush", Occupation = "Cashier", StartingDate = new DateTime(2005, 04, 12), IsMarried = true, Salary = 2300 });
return employees;
}
}
Public Class Employee
Public Property FirstName() As String
Get
Return m_FirstName
End Get
Set
m_FirstName = Value
End Set
End Property
Private m_FirstName As String
Public Property LastName() As String
Get
Return m_LastName
End Get
Set
m_LastName = Value
End Set
End Property
Private m_LastName As String
Public Property Occupation() As String
Get
Return m_Occupation
End Get
Set
m_Occupation = Value
End Set
End Property
Private m_Occupation As String
Public Property StartingDate() As DateTime
Get
Return m_StartingDate
End Get
Set
m_StartingDate = Value
End Set
End Property
Private m_StartingDate As DateTime
Public Property IsMarried() As Boolean
Get
Return m_IsMarried
End Get
Set
m_IsMarried = Value
End Set
End Property
Private m_IsMarried As Boolean
Public Property Salary() As Integer
Get
Return m_Salary
End Get
Set
m_Salary = Value
End Set
End Property
Private m_Salary As Integer
Public Sub New()
End Sub
Public Shared Function GetEmployees() As ObservableCollection(Of Employee)
Dim employees As New ObservableCollection(Of Employee)()
employees.Add(New Employee() With { _
Key .FirstName = "Sarah", _
Key .LastName = "Blake", _
Key .Occupation = "Supplied Manager", _
Key .StartingDate = New DateTime(2005, 4, 12), _
Key .IsMarried = True, _
Key .Salary = 3500 _
})
employees.Add(New Employee() With { _
Key .FirstName = "Jane", _
Key .LastName = "Simpson", _
Key .Occupation = "Security", _
Key .StartingDate = New DateTime(2008, 12, 3), _
Key .IsMarried = True, _
Key .Salary = 2000 _
})
employees.Add(New Employee() With { _
Key .FirstName = "John", _
Key .LastName = "Peterson", _
Key .Occupation = "Consultant", _
Key .StartingDate = New DateTime(2005, 4, 12), _
Key .IsMarried = False, _
Key .Salary = 2600 _
})
employees.Add(New Employee() With { _
Key .FirstName = "Peter", _
Key .LastName = "Bush", _
Key .Occupation = "Cashier", _
Key .StartingDate = New DateTime(2005, 4, 12), _
Key .IsMarried = True, _
Key .Salary = 2300 _
})
Return employees
End Function
End Class
In our case we will create a simple ViewModel taking care for the connection between the model and view. It will be set as DataContext of the application.
Example 3
public class MyViewModel
{
private ObservableCollection<Employee> employees;
public ObservableCollection<Employee> Employees
{
get
{
if (this.employees == null)
{
this.employees = Employee.GetEmployees();
}
return this.employees;
}
}
}
Public Class MyViewModel
Private m_employees As ObservableCollection(Of Employee)
Public ReadOnly Property Employees() As ObservableCollection(Of Employee)
Get
If Me.m_employees Is Nothing Then
Me.m_employees = Employee.GetEmployees()
End If
Return Me.m_employees
End Get
End Property
End Class
Once we declared the business object and the corresponding ViewModel, we can define RadExpressionEditor and bind it appropriately.
Example 4
<Window x:Class="RadExpressionEditor_WPF.MainPage"
xmlns="http://schemas.microsoft.com/winfx/2006/xaml/presentation"
xmlns:x="http://schemas.microsoft.com/winfx/2006/xaml"
xmlns:d="http://schemas.microsoft.com/expression/blend/2008"
xmlns:mc="http://schemas.openxmlformats.org/markup-compatibility/2006"
xmlns:telerik="http://schemas.telerik.com/2008/xaml/presentation"
xmlns:my="clr-namespace:RadExpressionEditor_WPF"
mc:Ignorable="d" d:DesignHeight="700" d:DesignWidth="700">
<Window.Resources>
<my:MyViewModel x:Key="MyViewModel" />
</Window.Resources>
<Grid DataContext="{StaticResource MyViewModel}">
<Grid.RowDefinitions>
<RowDefinition Height="" />
<RowDefinition Height=""/>
<RowDefinition Height="Auto"/>
</Grid.RowDefinitions>
<telerik:RadGridView x:Name="GridView" ItemsSource="{Binding Employees}" CanUserFreezeColumns="False" RowIndicatorVisibility="Collapsed" />
<telerik:RadExpressionEditor Item="{Binding Employees[0]}" Grid.Row="1"
x:Name="ExpressionEditor"
ExpressionChanged="ExpressionEditor_ExpressionChanged"/>
</Grid>
</Window>
The functionality for defining a filter for RadGridView will be implemented in the handler of ExpressionChanged event:
Example 5
private FilterDescriptor<Employee> genericFilterDescriptor = new FilterDescriptor<Employee>();
private void ExpressionEditor_ExpressionChanged(object sender, Telerik.Windows.RadRoutedEventArgs e)
{
if (this.ExpressionEditor.Expression != null && this.ExpressionEditor.Expression.GetType() == typeof(Expression<Func<Employee, bool>>))
{
this.genericFilterDescriptor.FilteringExpression = (Expression<Func<Employee, bool>>)this.ExpressionEditor.Expression;
if (!this.GridView.FilterDescriptors.Contains(this.genericFilterDescriptor))
{
this.GridView.FilterDescriptors.Add(this.genericFilterDescriptor);
}
}
else if (this.ExpressionEditor.Expression == null)
{
if (this.GridView.FilterDescriptors.Contains(this.genericFilterDescriptor))
{
this.GridView.FilterDescriptors.Remove(this.genericFilterDescriptor);
}
}
}
Private genericFilterDescriptor As New FilterDescriptor(Of Employee)()
Private Sub ExpressionEditor_ExpressionChanged(sender As Object, e As Telerik.Windows.RadRoutedEventArgs)
If Me.ExpressionEditor.Expression IsNot Nothing AndAlso Me.ExpressionEditor.Expression.GetType = GetType(Expression(Of Func(Of Employee, Boolean))) Then
Me.genericFilterDescriptor.FilteringExpression = DirectCast(Me.ExpressionEditor.Expression, Expression(Of Func(Of Employee, Boolean)))
If Not Me.GridView.FilterDescriptors.Contains(Me.genericFilterDescriptor) Then
Me.GridView.FilterDescriptors.Add(Me.genericFilterDescriptor)
End If
ElseIf Me.ExpressionEditor.Expression Is Nothing Then
If Me.GridView.FilterDescriptors.Contains(Me.genericFilterDescriptor) Then
Me.GridView.FilterDescriptors.Remove(Me.genericFilterDescriptor)
End If
End If
End Sub
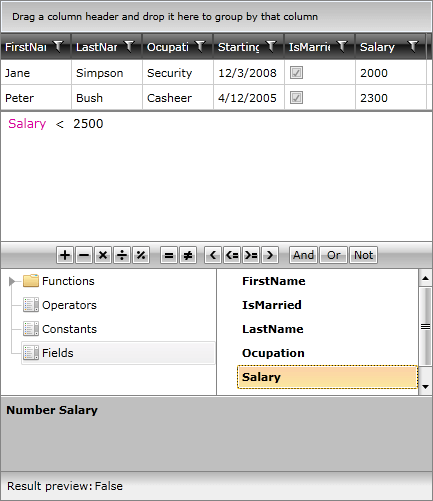
On running the application and testing the functionality of adding a filter descriptor for RadGridView, you should see a similar result:
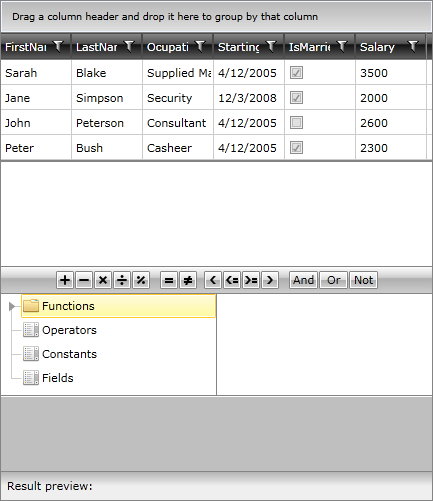
Still, using the Calculation Panel and the items in each Category, you are empowered to create far more complex filtering expressions.
You can access ExpressionEditor.Expression.Type.
RadExpressionEditor provides support for dynamic objects with ICustomTypeProvider or ICustomTypeDescriptor implementation. It will scan the object's properties and show them in the Fields list.
Customizing the editor
You can edit the template of the control, extend its default editor and use your custom version of it to serve your requirements. The default editor for the ExpressionEditor is an ExpressionTextBox.
Pasting
By default pasting in the editor is not supported. This is the behavior as the inner ExpressionTextBox is configured to not accept returns. You can resolve this with the following approach ensuring the pasting will be executed in code:
Example 7
void MainWindow_Loaded(object sender, RoutedEventArgs e)
{
this.expressionEditor.OnApplyTemplate();
ExpressionTextBox expressionTextBox = ((ExpressionTextBox)this.expressionEditor.Template.FindName("PART_ExpressionNodeEditor", this.expressionEditor));
RadRichTextBox radRichTextBox = ((RadRichTextBox)expressionTextBox.Template.FindName("RichTextBox", expressionTextBox));
radRichTextBox.CommandExecuting += radRichTextBox_CommandExecuting;
}
void radRichTextBox_CommandExecuting(object sender, CommandExecutingEventArgs e)
{
RadRichTextBox radRichTextBox = (RadRichTextBox)sender;
if (e.Command is PasteCommand)
{
e.Cancel = true;
radRichTextBox.Insert(Clipboard.GetText());
}
}
Setting a Theme
The controls from our suite support different themes. You can see how to apply a theme different than the default one in the Setting a Theme help article.
Changing the theme using implicit styles will affect all controls that have styles defined in the merged resource dictionaries. This is applicable only for the controls in the scope in which the resources are merged.
To change the theme, you can follow the steps below:
Choose between the themes and add reference to the corresponding theme assembly (ex: Telerik.Windows.Themes.Windows8.dll). You can see the different themes applied in the Theming examples from our WPF Controls Examples application.
-
Merge the ResourceDictionaries with the namespace required for the controls that you are using from the theme assembly. For the RadExpressionEditor, you will need to merge the following resources:
- System.Windows.xaml
- Telerik.Windows.Controls.xaml
- Telerik.Windows.Controls.Expressions.xaml
- Telerik.Windows.Controls.Navigation.xaml
- Telerik.Windows.Documents.xaml
Example 8 demonstrates how to merge the ResourceDictionaries so that they are applied globally for the entire application.
Example 8: Merge the ResourceDictionaries
<Application.Resources>
<ResourceDictionary>
<ResourceDictionary.MergedDictionaries>
<ResourceDictionary Source="/Telerik.Windows.Themes.Windows8;component/Themes/System.Windows.xaml"/>
<ResourceDictionary Source="/Telerik.Windows.Themes.Windows8;component/Themes/Telerik.Windows.Controls.xaml"/>
<ResourceDictionary Source="/Telerik.Windows.Themes.Windows8;component/Themes/Telerik.Windows.Controls.Navigation.xaml"/>
<ResourceDictionary Source="/Telerik.Windows.Themes.Windows8;component/Themes/Telerik.Windows.Controls.Expressions.xaml"/>
<ResourceDictionary Source="/Telerik.Windows.Themes.Windows8;component/Themes/Telerik.Windows.Documents.xaml"/>
</ResourceDictionary.MergedDictionaries>
</ResourceDictionary>
</Application.Resources>
Alternatively, you can use the theme of the control via the StyleManager.
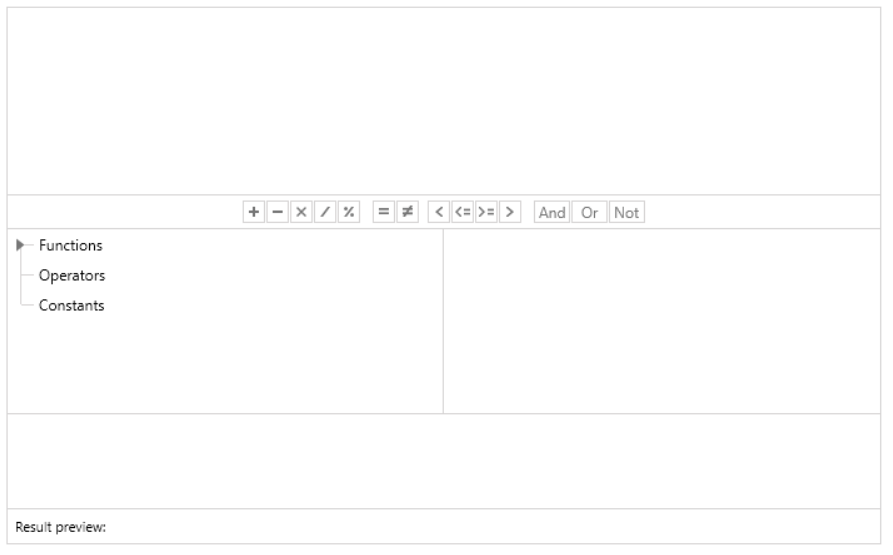
Figure 14 shows a RadExpressionEditor with the Windows8 theme applied.
Figure 14: RadExpressionEditor with the Windows8 theme
Telerik UI for WPF Learning Resources
- Telerik UI for WPF ExpressionEditor Component
- Getting Started with Telerik UI for WPF Components
- Telerik UI for WPF Installation
- Telerik UI for WPF and WinForms Integration
- Telerik UI for WPF Visual Studio Templates
- Setting a Theme with Telerik UI for WPF
- Telerik UI for WPF Virtual Classroom (Training Courses for Registered Users)
- Telerik UI for WPF License Agreement