MVVM Usage
This article shows how to create a database using the code first approach and display data with the help of RadEntityFrameworkCoreDataSource and RadGridView.
Before proceeding with this tutorial, you should follow the "Getting Started" article up until the end of the Adding References section.
Adding the Models and DbContext
We will create two classes, which will serve as our models: Customer and Order, where each customer will have a collection of orders. We will also define a DbContext and setup our connection string.
Example 1: Defining the Models and DbContext
public class Customer
{
    [Key]
    [DatabaseGenerated(DatabaseGeneratedOption.Identity)]
    public int CustomerId { get; set; }
    public string FirstName { get; set; }
    public string LastName { get; set; }
    public virtual List<Order> Orders { get; set; }
}

public class Order
{
    [Key]
    [DatabaseGenerated(DatabaseGeneratedOption.Identity)]
    public int Id { get; set; }
    public DateTime Date { get; set; }

    public int CustomerId { get; set; }

    [ForeignKey("CustomerId")]
    public virtual Customer Customer { get; set; }
}

public class MyContext : DbContext
{
    protected override void OnConfiguring(DbContextOptionsBuilder optionsBuilder)
    {
        // You might need to update the connection string to suit the setup on your machine
        optionsBuilder.UseSqlServer(@"Data Source=.\SQLEXPRESS;Initial Catalog=CustomerDB;Integrated security=true");
    }

    public DbSet<Customer> Customers { get; set; }
    public DbSet<Order> Orders { get; set; }
}
Creating the Database
For this tutorial we are going to use the code first approach for generating a database. In order to generate it, you can follow these steps:
- Start SQL Server Management Studio and connect to your localhost server.
- Open the Package Manager Console in the Visual Studio instance, where you created the WPF project.
-
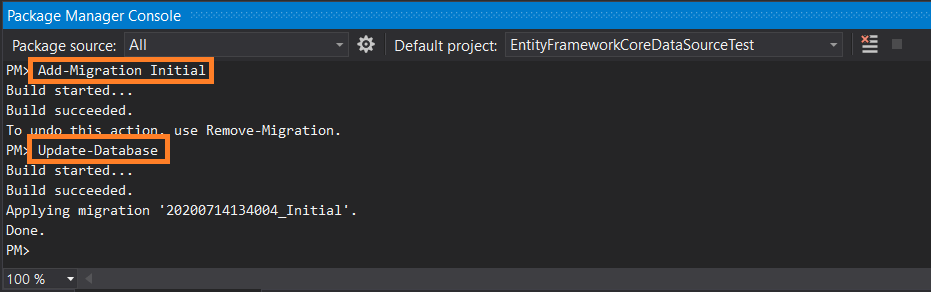
Execute the "Add-Migration Initial" command followed by the "Update-Database" command. After that you should have a "CustomerDB" database created, if you expand the Databases node in SQL Server Management Studio.
Figure 3: Package Manager Console Commands
Learn more about migrations in EF Core in the following article.
Populating the Database
We will create a viewmodel that will populate our database and also hold an instance of a QueryableEntityCoreCollectionView that will be the bridge between the RadGridView and our database. We will also introduce a command that will execute the SaveChanges method of the DbContext on a button's click.
Example 2: Defining the viewmodel
public class ViewModel : ViewModelBase
{
    private QueryableEntityCoreCollectionView<Customer> entityCollectionView;

    private MyContext context;

    public ViewModel()
    {
        this.context = new MyContext();
        this.SaveCommand = new DelegateCommand(Save);

        this.AddData(context);
        this.EntityCollectionView = new QueryableEntityCoreCollectionView<Customer>(context, context.Customers, new Collection<string>() { "Orders"});
    }

    public DelegateCommand SaveCommand { get; }

    public QueryableEntityCoreCollectionView<Customer> EntityCollectionView
    {
        get { return entityCollectionView; }
        set
        {
            this.entityCollectionView = value;
            this.OnPropertyChanged(() => this.EntityCollectionView);
        }
    }

    private void AddData(MyContext context)
    {
        for (int i = 1; i <= 25; i++)
        {
            var customer = new Customer() { FirstName = "First Name " + i, LastName = "Last Name" + i };

            for (int j = 1; j <= 10; j++)
            {
                var order = new Order() { CustomerId = i, Customer = customer, Date = DateTime.Today.AddDays(-j)};
                context.Orders.Add(order);
            }
            context.Customers.Add(customer);
        }

        context.SaveChanges();
    }

    public void Save(object obj)
    {
        this.context.SaveChanges();
    }
}
Displaying the Data
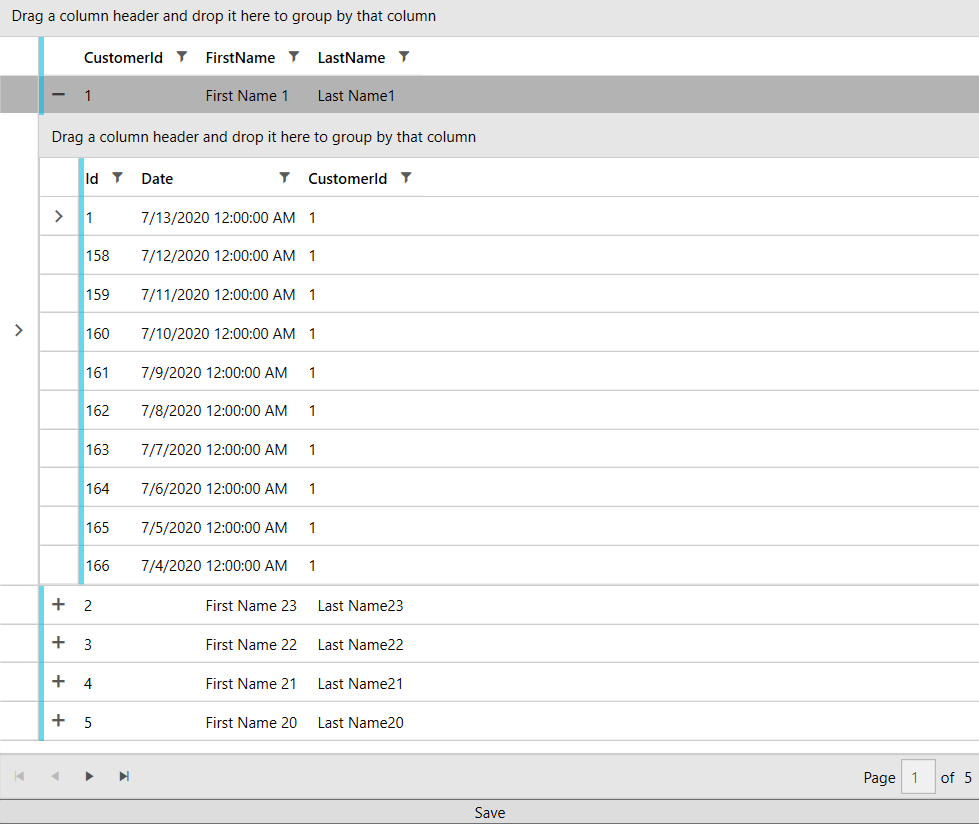
All that is left is to declare our xaml and wire up the viewmodel. We will display the data in a RadGridView with a Row Details Template and use a RadDataPager to add paging functionality.
Example 3: Seting up the xaml
<Grid xmlns:local="clr-namespace:EntityFrameworkCoreDataSourceTest"
    xmlns:telerik="http://schemas.telerik.com/2008/xaml/presentation">
    <Grid.DataContext>
        <local:ViewModel />
    </Grid.DataContext>
    <Grid.RowDefinitions>
        <RowDefinition />
        <RowDefinition Height="Auto"/>
        <RowDefinition Height="Auto"/>
    </Grid.RowDefinitions>
    <telerik:RadGridView GroupRenderMode="Flat" ItemsSource="{Binding PagedSource, ElementName=pager}" AutoGenerateColumns="False">
        <telerik:RadGridView.Columns>
            <telerik:GridViewToggleRowDetailsColumn />
            <telerik:GridViewDataColumn DataMemberBinding="{Binding CustomerId}" />
            <telerik:GridViewDataColumn DataMemberBinding="{Binding FirstName}" />
            <telerik:GridViewDataColumn DataMemberBinding="{Binding LastName}" />
        </telerik:RadGridView.Columns>
        <telerik:RadGridView.RowDetailsTemplate>
            <DataTemplate>
                <telerik:RadGridView GroupRenderMode="Flat"  ItemsSource="{Binding Orders}" AutoGenerateColumns="False">
                    <telerik:RadGridView.Columns>
                        <telerik:GridViewDataColumn DataMemberBinding="{Binding Id}" />
                        <telerik:GridViewDataColumn DataMemberBinding="{Binding Date}" />
                        <telerik:GridViewDataColumn DataMemberBinding="{Binding CustomerId}" />
                    </telerik:RadGridView.Columns>
                </telerik:RadGridView>
            </DataTemplate>
        </telerik:RadGridView.RowDetailsTemplate>
    </telerik:RadGridView>
    <telerik:RadDataPager x:Name="pager" Source="{Binding EntityCollectionView}" PageSize="5"  Grid.Row="1" />
    <Button Content="Save" Grid.Row="2">
        <telerik:EventToCommandBehavior.EventBindings>
            <telerik:EventBinding EventName="Click" Command="{Binding SaveCommand}" />
        </telerik:EventToCommandBehavior.EventBindings>
    </Button>
</Grid>
Figure 4: Result from running the example in the Fluent theme