Use Callout with RadMap
This tutorial will walk you through the steps to integrate the RadCallout control inside the RadMap. In this example, we will show how to open a RadCallout with additional information regarding the clicked PushPin element on the map.
First, we will set-up our RadMap control. We will create a collection of business objects, which represent the desired data and populate the visualization layer.
So let's define the business class that represents our objects:
Example 1: Set-up our map object
public class MapItem : ViewModelBase
{
    private string caption = string.Empty;
    private Telerik.Windows.Controls.Map.Location location = Location.Empty;

    public MapItem( string caption,Location location)
    {
        Caption = this.caption;
        Location = this.location;
    }

    public string Caption
    {
        get => this.caption;

        set
        {
            this.caption = value;
            this.OnPropertyChanged("Caption");
        }
    }

    public Location Location
    {
        get => this.location;

        set
        {
            this.location = value;
            this.OnPropertyChanged("Location");
        }
    }
}
Example 2: Declare RadMap in XAML
<telerik:RadMap x:Name="radMap" MouseClickMode="SelectItem"
    MouseSelectionMode="RaiseEvent"
    ZoomLevel="7"
    Center="42.7957539183824, 25.3427663758679">
    <telerik:RadMap.Provider>
        <telerik:BingRestMapProvider ApplicationId="Your Application Key" Mode="Aerial" />
    </telerik:RadMap.Provider>
    <telerik:VisualizationLayer x:Name="visualizationLayer"
                            ItemSelectionMode="MouseClick"
                            ClusteringEnabled="True"
                            ItemsSource="{Binding Data}">
        <telerik:VisualizationLayer.ItemTemplate>
            <DataTemplate>
                <telerik:Pushpin telerik:MapLayer.Location="{Binding Location}" Background="Red" Cursor="Hand" />
            </DataTemplate>
        </telerik:VisualizationLayer.ItemTemplate>
    </telerik:VisualizationLayer>
</telerik:RadMap>
Example 3: Create map items
public class ViewModel
{
    public ObservableCollection<MapItem> Data { get; set; }
    public ViewModel()
    {
        Data = GetMapData();
    }

    private ObservableCollection<MapItem> GetMapData()
    {
        ObservableCollection<MapItem> data = new ObservableCollection<MapItem>
        {
            new MapItem("Sofia", new Location(42.6957539183824, 23.3327663758679)),
            new MapItem("Plovdiv", new Location(42.1429369264591, 24.7498095849434)),
            new MapItem("Burgas", new Location(42.5131732087098, 27.4611884843576)),
            new MapItem("Varna", new Location(43.2073941930888, 27.9275176988258))
        };

        return data;
    }
}
Example 4: Set DataContext of the MainWindow
public MainWindow()
{
    InitializeComponent();
    this.DataContext = new ViewModel();
}
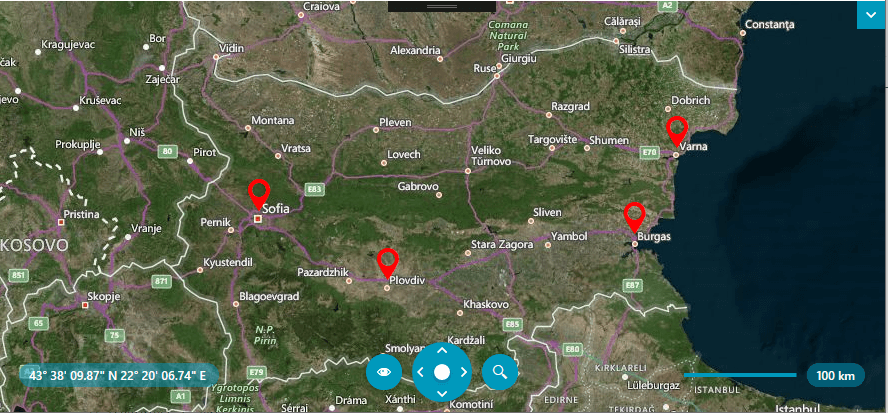
Figure 1: RadMap sample
Now to show the RadCallout when the PushPin map element is clicked, we can subscribe to the SelectionChanged event of the VisualizationLayer. In the event handler, we can get the FrameworkElement container that holds the map element and use it as a placement target element for the RadCallout.
Example 5:
public partial class MainWindow : Window
{
    public MainWindow()
    {
        InitializeComponent();
        DataContext = new ViewModel();
        visualizationLayer.SelectionChanged += VisualizationLayer_SelectionChanged;
    }

    private void VisualizationLayer_SelectionChanged(object sender, SelectionChangedEventArgs e)
    {
        VisualizationLayer layer = sender as VisualizationLayer;
        layer.ClearSelection(true);

        if (e.AddedItems != null && e.AddedItems.Count > 0)
        {
            MapItem item = (MapItem)e.AddedItems[0];
            UIElement container = layer.GetContainerFromItem(item);
            if (container != null)
            {
                FrameworkElement placementTarget = (FrameworkElement)container;
                ShowCalloutPopup(placementTarget, item);
            }
        }
    }

    private void ShowCalloutPopup(FrameworkElement placementTarget, MapItem item)
    {
        CalloutPopupService.CloseAll();

        DataTemplate calloutContentTemplate = TryFindResource("CalloutContentTemplate") as DataTemplate;
        if (calloutContentTemplate != null)
        {
            var radCallout = new RadCallout()
            {
                DataContext = item,
                ContentTemplate = calloutContentTemplate,
                ArrowAnchorPoint = new Point(0.18, 1.2),
                ArrowBasePoint1 = new Point(0.15, 0.5),
                ArrowBasePoint2 = new Point(0.45, 0.5),
                TextAlignment = TextAlignment.Left,
                UseLayoutRounding = true,
                Width = 280
            };

            radCallout.SetBinding(ContentProperty, new Binding());
            CalloutPopupSettings popupSettings = new CalloutPopupSettings() { AutoClose = false, HorizontalOffset = radCallout.Width / 3, VerticalOffset = -2 };

            CalloutPopupService.Show(radCallout, placementTarget, popupSettings);
        }
    }
}
Example 6:
<Window.Resources>
    <DataTemplate x:Key="CalloutContentTemplate">
        <StackPanel>
            <TextBlock Text="{Binding Caption}" />
            <StackPanel Orientation="Horizontal">
                <TextBlock Text="Location: "/>
                <TextBlock Text="{Binding Location}"/>
            </StackPanel>
        </StackPanel>
    </DataTemplate>
</Window.Resources>
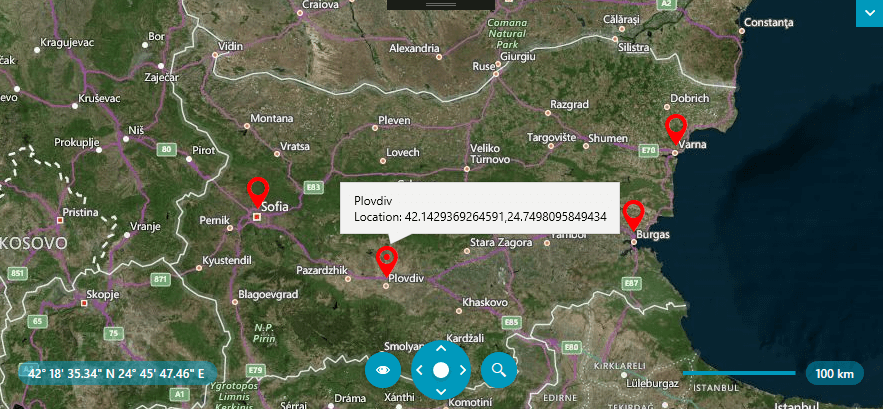
Figure 2: RadCallout integrated in RadMap