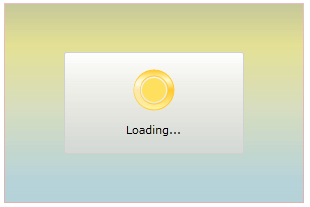
Setting the OverlayStyle
Before reading this topic, you might find it useful to get familiar with the Template Structure of the RadBusyIndicator control.
The RadBusyIndicator exposes a OverlayStyle property which allows you to apply a style to the Rectangle element overlaying the RadBusyIndicator's content while the indicator is active.
To do this, first you have to define your RadBusyIndicator control:
Defining RadBusyIndicator
<Grid x:Name="LayoutRoot"
      Background="White">
    <telerik:RadBusyIndicator OverlayStyle="{StaticResource OverlayStyle}"
                              IsBusy="True"/>
</Grid>
In the RadBusyIndicator's definition you have indicated the OverlayStyle, that's why you have to define this style in the resources of your UserControl. Here is an example:
OverlayStyle declaration
<UserControl.Resources>
    <Style x:Key="OverlayStyle"
           TargetType="Rectangle">
        <Setter Property="Stroke"
                Value="#FFDA8282" />
        <Setter Property="Fill">
            <Setter.Value>
                <LinearGradientBrush EndPoint="0.5,1"
                                     MappingMode="RelativeToBoundingBox"
                                     StartPoint="0.5,0">
                    <GradientStop Color="#FF6BBDD2"
                                  Offset="0" />
                    <GradientStop Color="#FFD2CC34"
                                  Offset="0.209" />
                    <GradientStop Color="#FFC2CE8E"
                                  Offset="0.512" />
                    <GradientStop Color="#FF86C0CE"
                                  Offset="0.897" />
                    <GradientStop Color="#FF8E9334"
                                  Offset="0" />
                </LinearGradientBrush>
            </Setter.Value>
        </Setter>
        <Setter Property="Opacity"
                Value="0.5" />
    </Style>
</UserControl.Resources>
Notice that in the OverlayStyle the Opacity property is also specified. As a result if the RadBusyIndicator had any content, it would still be visible while the indicator was active.
You can remove the RadBusyIndicator busy content's background by setting the control's Background property to Transparent.
Remove the BusyContent's Background
<telerik:RadBusyIndicator Background="Transparent"/>
Here is the result:
