New to Telerik UI for WPF? Download free 30-day trial

Cloud Storage

Google Cloud Storage allows world-wide storage and retrieval of any amount of data at any time. It can be used for a range of scenarios including serving website content, storing data for archival and disaster recovery, or distributing large data objects to users via direct download.

Enable APIs

For the purposes of this article, you will have to enable the Google Cloud Storage API and Google Cloud Storage JSON API. Please read the Getting Started for more information on how you can achieve that.

Step 1: Create the WPF Application

Create a standard WPF application and add 3 RadButtons and a RadListBox to it. The first button will list all of the files uploaded in our storage. The second button will upload a file and the third one will delete the selected file in the RadListBox.

Example 1: Defining the view

<Grid> 
    <Grid.ColumnDefinitions> 
        <ColumnDefinition Width="250" /> 
        <ColumnDefinition /> 
    </Grid.ColumnDefinitions> 
 
    <telerik:RadListBox x:Name="radListBox" ItemsSource="{Binding FileNames}" SelectedItem="{Binding SelectedItem, Mode=TwoWay}" /> 
 
    <Grid Grid.Column="1"> 
        <Grid.RowDefinitions> 
            <RowDefinition Height="Auto" /> 
            <RowDefinition Height="Auto"/> 
            <RowDefinition Height="Auto"/> 
        </Grid.RowDefinitions> 
 
        <telerik:RadButton Command="{Binding ListItemsCommand}"  Content="List Items"/> 
        <telerik:RadButton Command="{Binding UploadItemCommand}" Content="Upload Item" Grid.Row="1"/> 
        <telerik:RadButton Command="{Binding DeleteItemCommand}" Content="Delete item" Grid.Row="2"/> 
    </Grid> 
</Grid> 

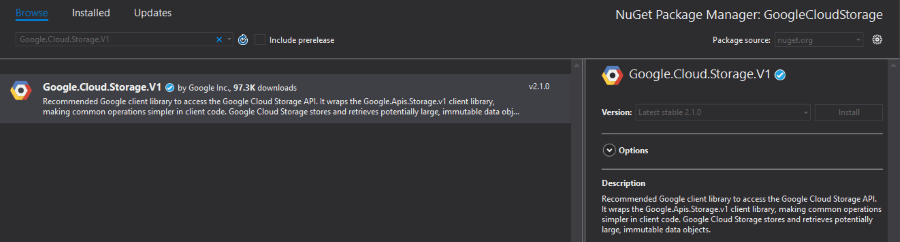
Step 2: Install the NuGet package

Open the NuGet Package Manager and install the Google.Cloud.Storage.V1 package.

Google Cloud Storage Nuget

Step 3: Define the ViewModel

The next step is to create the ViewModel. It will need an StorageClient object which will be used for uploading, deleting and listing files. We also need to implement all of the commands that the RadButtons are bound to.

Example 2: Defining the ViewModel

public class ViewModel 
{ 
    private StorageClient storageClient; 
 
    private const string ProjectId = "myprojectId"; 
    private const string BucketName = ProjectId + "-test-bucket"; 
 
    private object selectedItem; 
    private ObservableCollection<string> fileNames; 
    private IFileDialogService fileDialogService; 
 
    public ViewModel(IFileDialogService fileDialogService) 
    { 
        this.storageClient = StorageClient.Create(); 
        storageClient.CreateBucket(ProjectId, BucketName); 
 
        this.fileNames = new ObservableCollection<string>(); 
        this.ListItemsCommand = new DelegateCommand(OnListItems); 
        this.UploadItemCommand = new DelegateCommand(OnUploadItem); 
        this.DeleteItemCommand = new DelegateCommand(OnDeleteItem); 
        this.fileDialogService = fileDialogService; 
    } 
 
    public object SelectedItem 
    { 
        get { return this.selectedItem; } 
        set { this.selectedItem = value; } 
    } 
 
    public ObservableCollection<string> FileNames 
    { 
        get { return this.fileNames; } 
        set { this.fileNames = value; } 
    } 
 
    private ICommand listItemsCommand; 
 
    public ICommand ListItemsCommand 
    { 
        get { return this.listItemsCommand; } 
        set { this.listItemsCommand = value; } 
    } 
 
    private ICommand deleteItemCommand; 
 
    public ICommand DeleteItemCommand 
    { 
        get { return this.deleteItemCommand; } 
        set { this.deleteItemCommand = value; } 
    } 
 
    private ICommand uploadItemCommand; 
 
    public ICommand UploadItemCommand 
    { 
        get { return this.uploadItemCommand; } 
        set { this.uploadItemCommand = value; } 
    } 
 
    private void OnDeleteItem(object obj) 
    { 
        if (this.SelectedItem == null) 
        { 
            MessageBox.Show("Please select an Item"); 
            return; 
        } 
 
        storageClient.DeleteObject(BucketName, this.SelectedItem.ToString()); 
    } 
 
    private void OnUploadItem(object obj) 
    { 
        var fileName = fileDialogService.OpenFileDialog(); 
 
        Stream fileStream = File.OpenRead(fileName); 
 
        var test = storageClient.UploadObject(BucketName, fileName, null, fileStream); 
    } 
 
    private void OnListItems(object obj) 
    { 
        var items = storageClient.ListObjects(BucketName); 
 
        this.FileNames.Clear(); 
 
        foreach (Google.Apis.Storage.v1.Data.Object item in items) 
        { 
            this.FileNames.Add(item.Name); 
        } 
    } 
} 

In order to locate your project id, please read the Locate the project ID help article.

Step 4: Define the OpenFileDialogService

The only thing left is to define the interface through which we are opening the RadOpenFileDialog. We also need to define the implementation of that interface which will simply open a RadOpenFileDialog and return the path of the opened file.

Example 3: Defining the OpenFileDialogService and IFileDialogService

public interface IFileDialogService 
{ 
    string OpenFileDialog(); 
} 
 
public class OpenFileDialogService : IFileDialogService 
{ 
    public string OpenFileDialog() 
    { 
        RadOpenFileDialog choosefiledialog = new RadOpenFileDialog(); 
        choosefiledialog.Filter = "All Files (.)|."; 
        choosefiledialog.FilterIndex = 1; 
        choosefiledialog.Multiselect = false; 
        choosefiledialog.ShowDialog(); 
 
        if (choosefiledialog.DialogResult == true) 
        { 
            return choosefiledialog.FileName; 
        } 
 
        return string.Empty; 
    } 
} 

All that is left is to set the DataContext to our ViewModel and pass an instance of the OpenFileDialogService.

Example 4: Set the DataContext

public MainWindow() 
{ 
    InitializeComponent(); 
 
    this.DataContext = new ViewModel(new OpenFileDialogService()); 
} 

Figure 1: Example after uploading a file and listing it in the Office2016 theme

Google Cloud Storage Upload

See Also