RadOpenFileDialog
RadOpenFileDialog is a modal dialog box that allows you to specify one or multiple filenames to open.
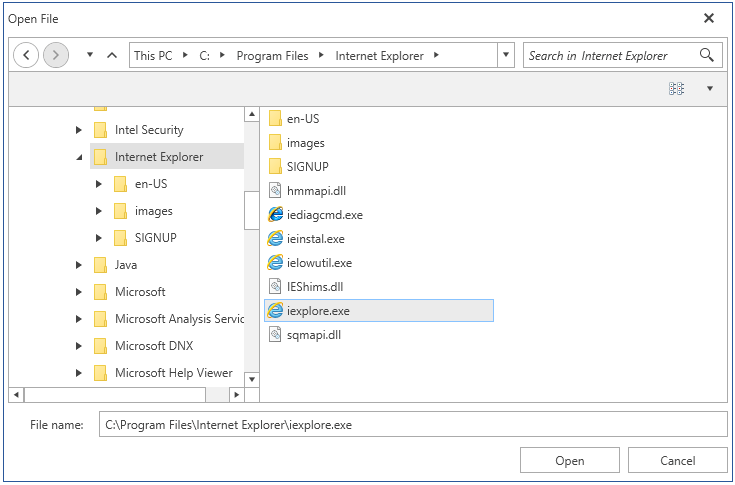
Figure 1: RadOpenFileDialog in single selection mode

Showing the Dialog
To show the dialog call its ShowDialog method. If a valid file is opened when you press OK, the DialogResult property will return True and the FileName, and FileNames properties will be set. You can use FileName and FileNames to get the names of the selected items.
Note that when the ShowDialog method is called the UI of the host application will freeze until the dialog closes.
Example 1: Show a open file dialog
public partial class MainWindow : Window
{
    public MainWindow()
    {
        InitializeComponent();
        ShowOpenFileDialog();
    }

    private void ShowOpenFileDialog()
    {
        RadOpenFileDialog openFileDialog = new RadOpenFileDialog();
        openFileDialog.Owner = this;
        openFileDialog.ShowDialog();
        if (openFileDialog.DialogResult == true)
        {
            string fileName = openFileDialog.FileName;
        }
    }
}
The Owner property holds a reference of the Window which owned the dialog. Before calling the ShowDialog() method, the Owner property should be set to ensure correct behavior. Ownership is established when this property is set.
Opening the Selected File
You can open a read-only file stream for the selected file using the OpenFile method. Or alternatively you can use the FileName and FileNames properties and open the file manually.
Example 2: Open a file stream
public partial class MainWindow : Window
{
    public MainWindow()
    {
        InitializeComponent();
        ShowOpenFileDialog();
    }

    private void ShowOpenFileDialog()
    {
        RadOpenFileDialog openFileDialog = new RadOpenFileDialog();
        openFileDialog.Owner = this;
        openFileDialog.ShowDialog();
        if (openFileDialog.DialogResult == true)
        {
            Stream fileStream = openFileDialog.OpenFile();
        }
    }
}
Enabling Multiple Selection
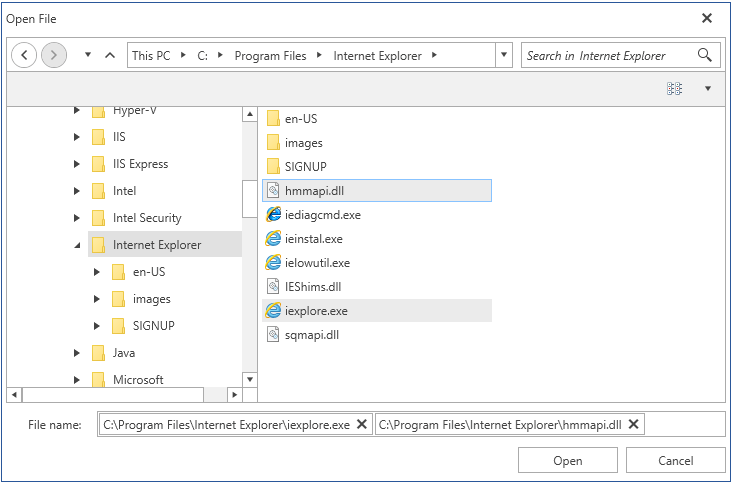
The dialog supports single and multiple selection modes. By default you can select only one file at a time. To alter this you can set the Multiselect property of RadOpenFileDialog.
Example 3: Enable multiple selection
private void ShowOpenFileDialog()
{
    RadOpenFileDialog openFileDialog = new RadOpenFileDialog();
    openFileDialog.Owner = this;
    openFileDialog.Multiselect = true;
    openFileDialog.ShowDialog();
}
Figure 2: Multiple selection

Working with the Selected Files
You can get the paths of the selected files via the FileName and FileNames properties. Note that the properties are empty until the DialogResult is valid. When you open file(s) the properties will return the corresponding paths.
You can get only the name of the selected files, without the full path, via the SafeFileNames collection property.
Example 3: Get the selected file names
public partial class MainWindow : Window
{
    public MainWindow()
    {
        InitializeComponent();
        ShowOpenFileDialog();
    }

    private void ShowOpenFileDialog()
    {
        RadOpenFileDialog openFileDialog = new RadOpenFileDialog();
        openFileDialog.Owner = this;
        openFileDialog.Multiselect = true;
        openFileDialog.ShowDialog();
        if (openFileDialog.DialogResult == true)
        {
            string filePath = openFileDialog.FileName;
            IEnumerable<string> filePaths = openFileDialog.FileNames;
            IEnumerable<string> fileNames = openFileDialog.SafeFileNames;
        }
    }
}
The FileName property can be set manually. This will change the value displayed in the selected file autocomplete box area. Note that setting this won't change the selected item in the list with the files.
Saving the Last Used Directory
You can save the last used directory by setting the RestoreDirectory property of the RadOpenFileDialog. After setting this property to True and opening a file the InitialDirectory of this RadOpenFileDialog instance will be set to the parent folder of the opened file.
The RestoreDirectory property will save the last used directory only for the scope of its RadOpenFileDialog class instance. Clicking Cancel or X instead of Open in the RadOpenFileDialog, will not save the last used directory.
Example 4: Set RestoreDirectory property
RadOpenFileDialog openFileDialog = new RadOpenFileDialog();
openFileDialog.RestoreDirectory = true;
Enabling ReadOnly CheckBox
You can display a checkbox to control whether the file should be opened in readonly mode with the ShowReadOnly property of the RadOpenFileDialog. You can control the state of that checkbox by using the ReadOnlyChecked property of the RadOpenFileDialog.
Example 4: Enabling the ReadOnly CheckBox
public partial class MainWindow : Window
{
    public MainWindow()
    {
        InitializeComponent();
        ShowOpenFileDialog();
    }

    private void ShowOpenFileDialog()
    {
        RadOpenFileDialog openFileDialog = new RadOpenFileDialog();
        openFileDialog.Owner = this;
        openFileDialog.ShowReadOnly = true;
        openFileDialog.ReadOnlyChecked = true;
        openFileDialog.ShowDialog();
    }
}
Figure 3: RadOpenFileDialog with Checked ReadOnly CheckBox

DereferenceLinks
As of R1 2018, the RadOpenFileDialog exposes a DereferenceLinks property indicating whether a file dialog returns the location of the file referenced by a shortcut or the location of the actual shortcut file (with the .lnk extension).
Example 5: Using the DereferenceLinks property
public partial class MainWindow : Window
{
    public MainWindow()
    {
        InitializeComponent();
        ShowOpenFileDialog();
    }

    private void ShowOpenFileDialog()
    {
        RadOpenFileDialog openFileDialog = new RadOpenFileDialog();
        openFileDialog.Owner = this;
        openFileDialog.DereferenceLinks = true;
        openFileDialog.ShowDialog();
        if (openFileDialog.DialogResult == true)
        {
            string filePath = openFileDialog.FileName;
            // If the selected file was C:\Users\<user>\Desktop\Shortcut.lnk, for example,
            // the FileName property will now contain the actual location of the file,
            // for example - C:\Program Files\Program\Shortcut.exe.
        }
    }
}
If in multiple or single selection the first selected item is a link to a directory and DereferenceLinks is set to True, clicking the Open button will actually navigate to this directory.