Tutorial: Binding to Hierarchical Data
| RELATED VIDEOS | |
|---|---|
|
RadGridView for WinForms Hierarchy Overview In this video you will learn the various ways you can display hierarchical data in a RadGridView. (Runtime: 12:13) |
 |
The following tutorial demonstrates configuring the grid to display multiple tables in a hierarchy. The example below uses the Northwind Categories table as the parent table and lists the appropriate Product table records below each category. The tutorial only uses the two tables, but the example can be extended to larger numbers of child tables.
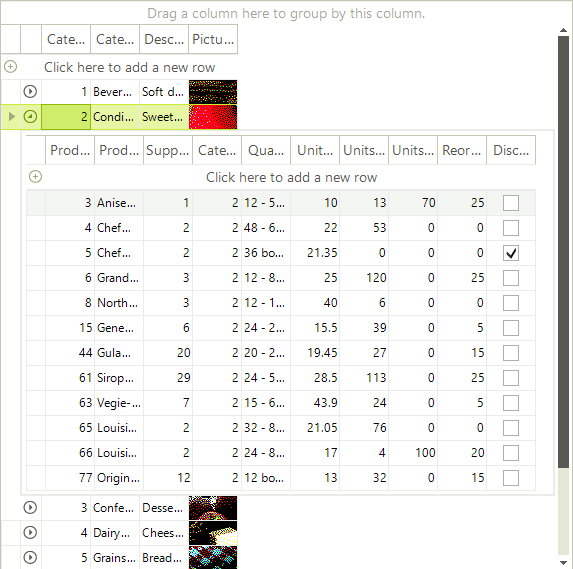
The task has 3 basic steps:
Configure data sources.
Define child grid view templates, one for each level in the hierarchy.
Define relations between parent and child tables.
Configure Data Sources
Place a RadGridView component on a form. Set the Dock property to Fill.
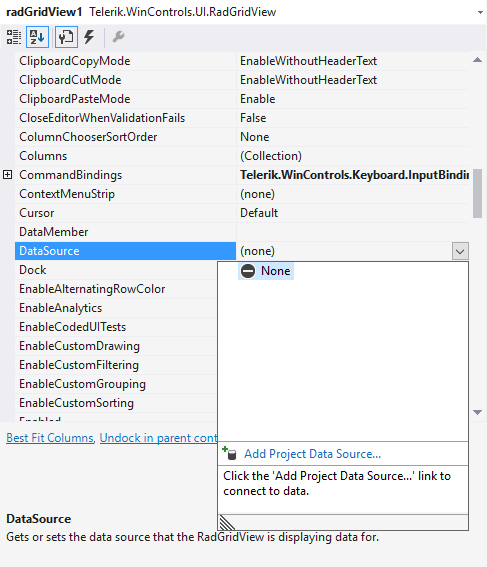
In the Properties window locate the DataSource property and click the arrow to open the list. Select the Add Project Data Source... link. This step will display the Data Source Configuration Wizard.
-
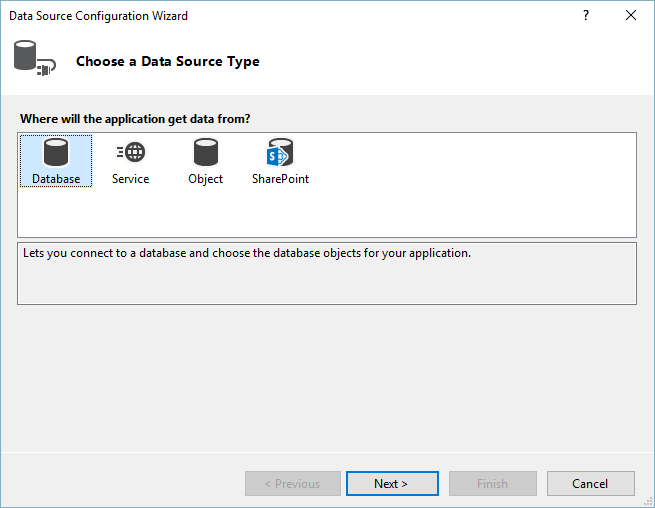
In the Data Source Configuration Wizard, Choose a Data Source Type page, select the Database icon. Click the Next button.
-
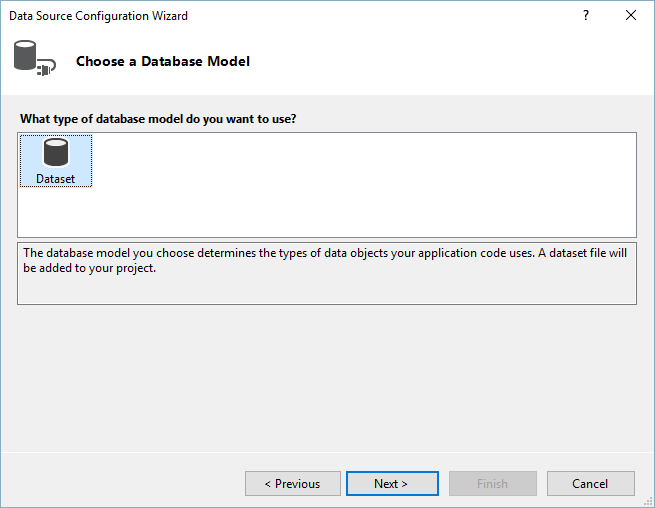
In the Database Model page of the Data Source Configuration Wizard choose Database icon. Click the Next button.
-
In the
Choose Your data Connectionpage click the New Connection... button. *This step will display the Add Connection dialog. * Add the connection and then click Next.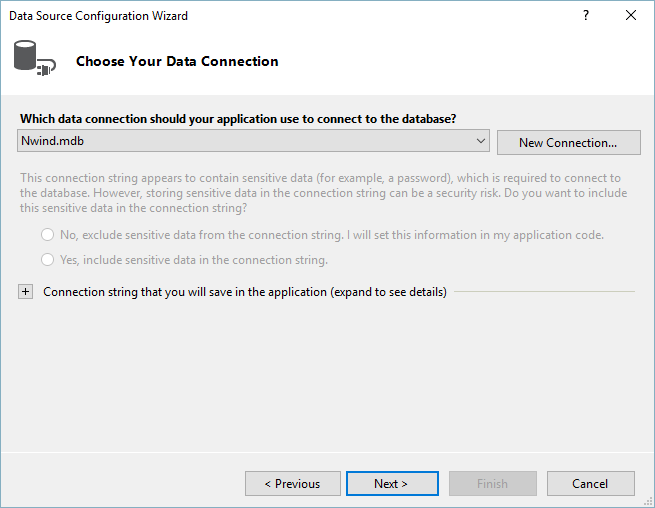
-
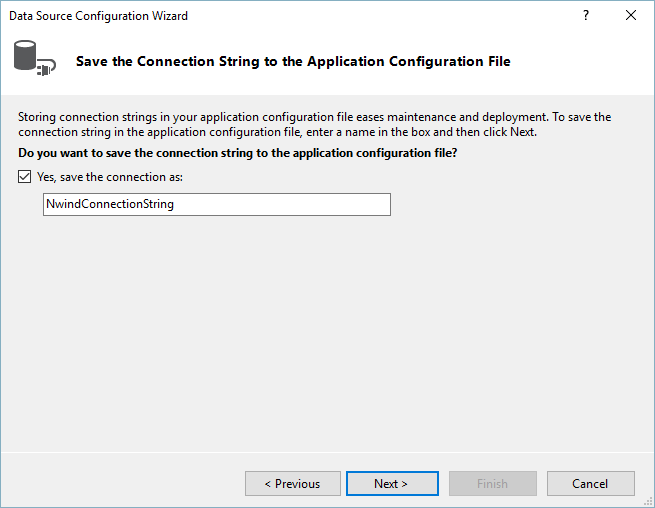
Click the Next to save the ConnectionString name:
-
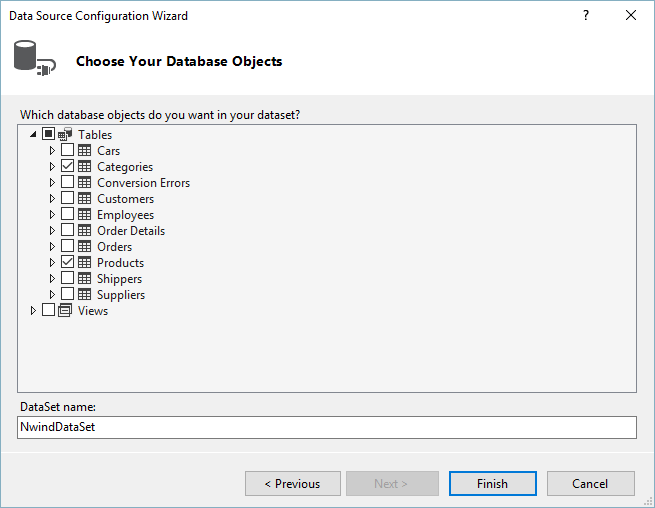
In the Choose Your Database Objects page, select the "Categories" and "Products" checkboxes. Click the Finish button to close the Data Source Configuration Wizard.
-
In the Visual Studio Properties window for the grid DataSource property select the "Products" table. * This step will create DataSet, BindingSource and TableAdapter objects for the products table.*

-
In the Visual Studio Properties window for the grid DataSource property select the "Categories" table. * This step will create DataSet, BindingSource and TableAdapter objects for the categories table.*

-
The project design should look similar to the below image. The DataSource property should be left to point at the binding source of the
Categoriestable. Note the new data components in the component tray under the design surface.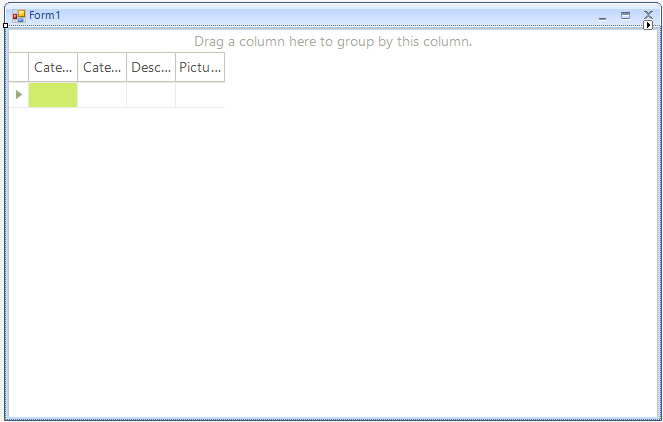
Define Child Templates
-
In the
Propertieswindow click the ellipses for the Templates property. This step will display the GridViewTemplate Collection Editor.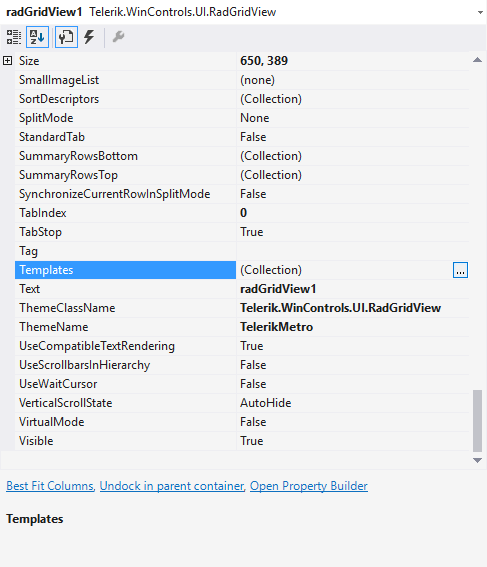
-
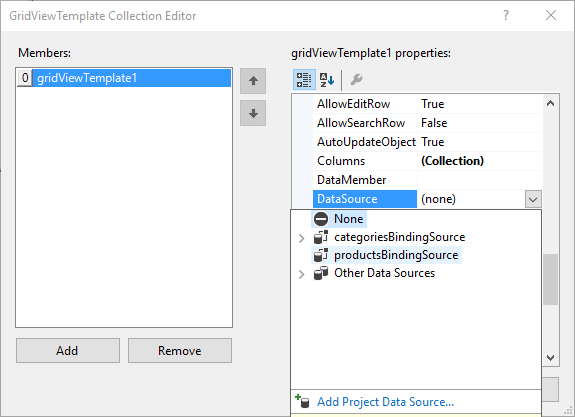
In the GridViewTemplate Collection Editor, click the Add button to add a child grid view template. In the properties for the new grid view template, use the DataSource property drop down to locate and select the binding source of the data table "Products". Click the OK button to close the dialog.
Define relations
-
In the
Propertieswindow click the ellipses for the grid Relations property. This will display the GridViewRelation Collection Editor.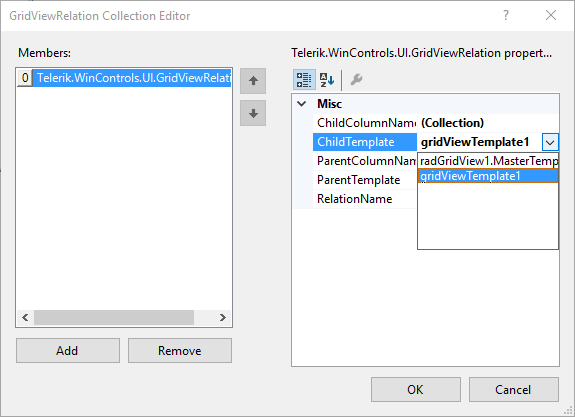
In the
GridViewRelation Collection Editor, click the Add button to add a relation. The relation will describe the parent/child relationship between the category data (parent table) and the products (child table) for each category.Set the RelationName property to "CategoryProduct".
-
Set the GridViewRelation ChildTemplate property to the child grid view template (created earlier in the GridViewTemplate Collection Editor) using the drop down list.
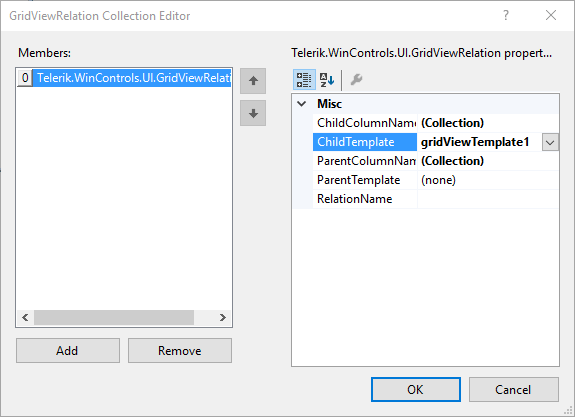
Set the ParentTemplate property to the MasterTemplate.
Click the ellipses for the ChildColumnName property. This will display the ColumnName Collection Editor.
-
In the ColumnName Collection Editor click the Add button and set the column Name property to "CategoryID". Click the OK button to close the dialog.
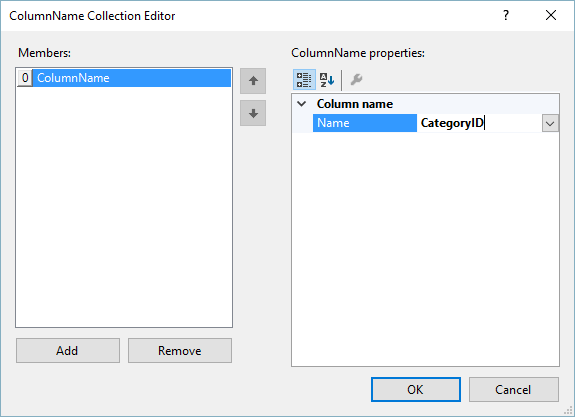
Click the ellipses for the ParentColumnName property. In the ColumnName Collection Editor click the Add button and set the column Name property to "CategoryID". Click the OK button to close the dialog.
Press F5 to run the application.