Map Shapes
The RadMap control provides you with a set of shape objects, which are specifically designed to work with the RadMap. You will be able to find equivalents to most of the Shapes introduced in Silverlight.
To learn the different ways of specifying the appearance colors of a shape read the Shape Appearance topic.
The MapShape objects allow you to attach additional data to them. This is done via their ExtendedData property. To learn more about it read this topic.
As the shapes are used identical to their counterparts, this topic will focus briefly on showing you how to use the most important of them:
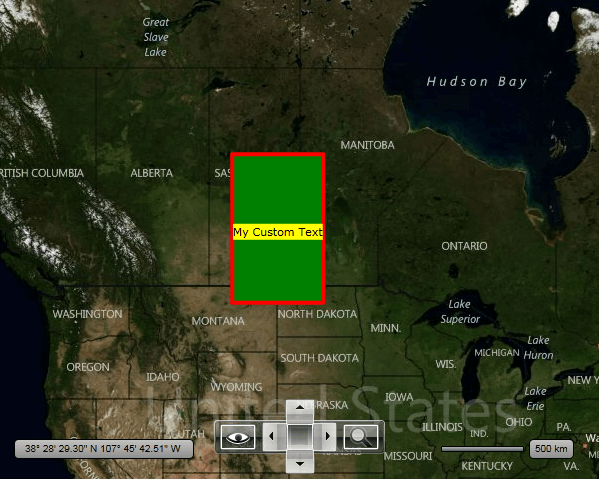
The MapShape class gives you the ability to specify caption for your Shapes using the CaptionLocation and CaptionTemplate properties. For example see MapPolygon below.
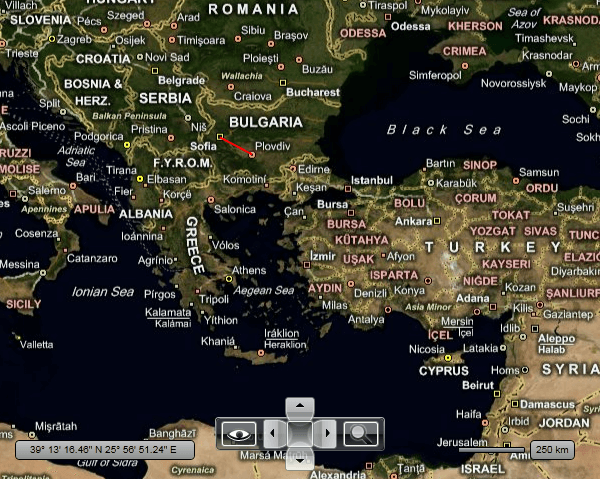
MapLine
The most important things when using the MapLine object are the Point1 and Point2 properties, which are of type Location. They define the start and the end points of the line. Here is an example.
<telerik:RadMap x:Name="radMap"
        Width="600"
        Height="480">
    <telerik:InformationLayer>
        <telerik:MapLine Point1="42.6957539183824, 23.3327663758679"
                    Point2="42.1429369264591, 24.7498095849434"
                    Stroke="Red"
                    StrokeThickness="2" />
    </telerik:InformationLayer>
</telerik:RadMap>
MapRectangle
To use the MapRectangle in your RadMap you have to set the following of its properties:
Location - represents the location on the map, to which the rectangle is bound.
Width - represents the width of the rectangle in the current distance unite (mile or kilometer), e.g. 1 is equal to 1km.
Height - represents the height of the rectangle in the current distance unite (mile or kilometer), e.g. 1 is equal to 1km.
In order to change the distance unit, you have to set the DistanceUnit property of the RadMap to the desired value - Mile or Kilometer.
Additionally you can use the following properties:
- RadiusX, RadiusY - represent the radius of the rectangle corners. Just like the Width and Height properties, these are also measured in the current distance unit.
Note that the top left coner coincides with the given location. In order to position the rectangle otherwise you might want to use the HotSpot feature.
Here is an example:
<telerik:RadMap x:Name="radMap"
        Width="600"
        Height="480">
    <telerik:InformationLayer>
        <telerik:MapRectangle Location="42.6957539183824, 23.3327663758679"
                        Width="20"
                        Height="20"
                        RadiusX="2"
                        RadiusY="2"
                        Fill="#7FFFFF00"
                        Stroke="Red"
                        StrokeThickness="2" />
    </telerik:InformationLayer>
</telerik:RadMap>

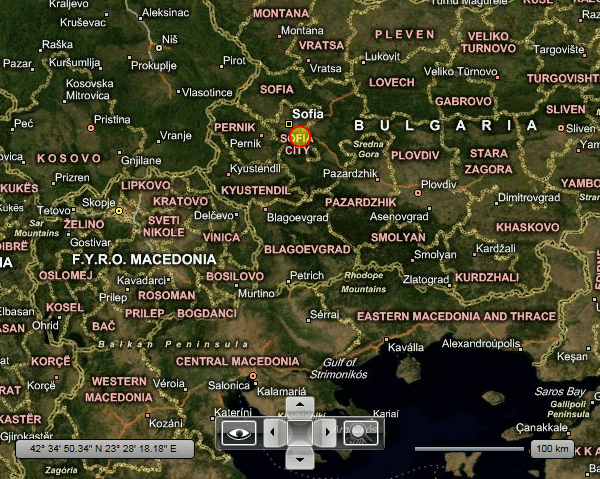
MapEllipse
To use the MapEllipse in your RadMap you have to set the following of its properties:
Location - represents the location on the map, to which the rectangle is bound.
Width - represents the width of the ellipse in the current distance unite (mile or kilometer), e.g. 1 is equal to 1km.
Height - represents the height of the ellipse in the current distance unite (mile or kilometer), e.g. 1 is equal to 1km.
In order to change the distance unit, you have to set the DistanceUnit property of the RadMap to the desired value - Mile or Kilometer.
Note that the top left coner coincides with the given location. In order to position the rectangle otherwise you might want to use the HotSpot feature.
Here is an example:
<telerik:RadMap x:Name="radMap"
        Width="600"
        Height="480">
    <telerik:InformationLayer>
        <telerik:MapEllipse Location="42.6957539183824, 23.3327663758679"
                    Width="20"
                    Height="20"
                    Fill="#7FFFFF00"
                    Stroke="Red"
                    StrokeThickness="2" />
    </telerik:InformationLayer>
</telerik:RadMap>
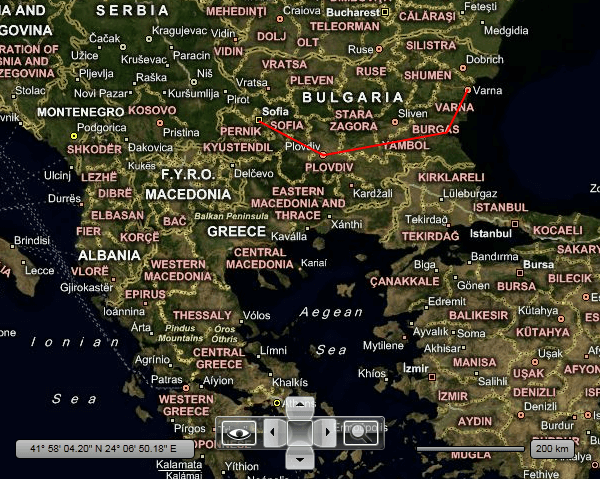
MapPolyline
The only difference between the standard Polyline and the MapPolyline is that the Points property of the MapPolyline is a set of Locations. Here is an example:
<telerik:RadMap x:Name="radMap"
        Width="600"
        Height="480">
    <telerik:InformationLayer>
        <telerik:MapPolyline Points="42.6957539183824, 23.3327663758679 42.1429369264591, 24.7498095849434 42.5131732087098, 27.4611884843576 43.2073941930888, 27.9275176988258"
                        Stroke="Red"
                        StrokeThickness="2" />
    </telerik:InformationLayer>
</telerik:RadMap>
MapPolygon
The only difference between the standard Polygon and the MapPolygon is that the Points property of the MapPolygon is a set of Locations. Here is an example:
<telerik:RadMap x:Name="radMap" Width="600" Height="480">
    <telerik:InformationLayer>
        <telerik:MapPolygon Points="56,-100 56,-108 48,-108 48,-100"
                            Fill="Green" Stroke="Red" StrokeThickness="4"
                            CaptionLocation="52,-104">
            <telerik:MapPolygon.CaptionTemplate>
                <DataTemplate>
                    <Grid Background="Yellow" telerik:MapLayer.HotSpot="0.5,0.5">
                        <TextBlock Text="My Custom Text" />
                    </Grid>
                </DataTemplate>
            </telerik:MapPolygon.CaptionTemplate>
        </telerik:MapPolygon>
    </telerik:InformationLayer>
</telerik:RadMap>
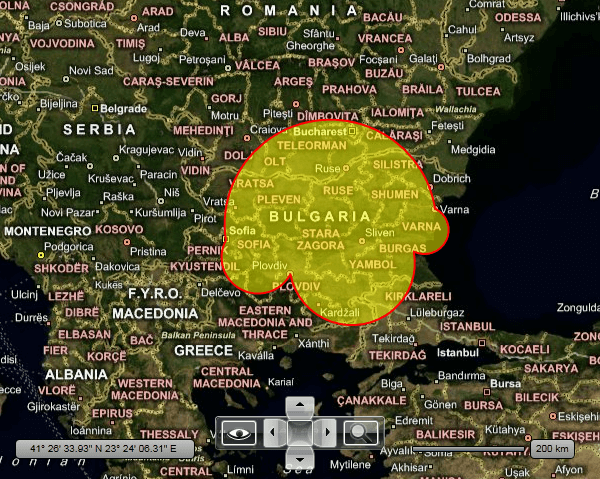
MapPath
Except the MapPath class you also have an analog for each standard Geometry or Segment class. Here is an example of an MapPath that uses MapArcSegments.
<telerik:RadMap x:Name="radMap"
        Width="600"
        Height="480">
    <telerik:InformationLayer Name="InformationLayer">
        <telerik:MapPath Fill="#7FFFFF00"
                    Stroke="Red"
                    StrokeThickness="2">
            <telerik:MapPath.Data>
                <telerik:MapPathGeometry>
                    <telerik:MapPathFigure StartPoint="42.6957539183824, 23.3327663758679">
                        <telerik:MapArcSegment Point="42.1429369264591, 24.7498095849434"
                                        IsLargeArc="True"
                                        Size="1,1"
                                        SweepDirection="Counterclockwise" />
                        <telerik:MapArcSegment Point="42.5131732087098, 27.4611884843576"
                                        IsLargeArc="True"
                                        Size="1,1"
                                        SweepDirection="Counterclockwise" />
                        <telerik:MapArcSegment Point="43.2073941930888, 27.9275176988258"
                                        IsLargeArc="False"
                                        Size="1,1"
                                        SweepDirection="Counterclockwise" />
                        <telerik:MapArcSegment Point="42.6957539183824, 23.3327663758679"
                                        IsLargeArc="True"
                                        Size="1,1"
                                        SweepDirection="Counterclockwise" />
                    </telerik:MapPathFigure>
                </telerik:MapPathGeometry>
            </telerik:MapPath.Data>
        </telerik:MapPath>
    </telerik:InformationLayer>
</telerik:RadMap>