Shape Appearance
When using MapShape objects there are several ways to control their appearance:
Another way to define the appearance of the shapes inside a layer is to use the Colorizer property of the InformationLayer.
To learn more about the usage of shapes read the Map Shapes topic. The KML Data Import and the Shapefiles Support topics might also be helpful to you.
Using the trivial properties
In this approach you use the trivial properties provided by the framework such as Fill, Stroke, StrokeThickness.
Here is an example:
<telerik:RadMap x:Name="radMap">
    <telerik:InformationLayer x:Name="informationLayer">
        <telerik:MapEllipse x:Name="Ellipse"
                            telerik:MapLayer.Location="42.6957539183824, 23.3327663758679"
                            Width="20"
                            Height="20"
                            Fill="#80808080"
                            Stroke="White"
                            StrokeThickness="3">
        </telerik:MapEllipse>
    </telerik:InformationLayer>
</telerik:RadMap>
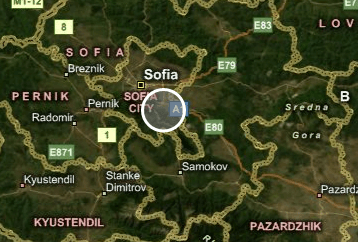
Here is a snapshot of the result:

Using the MapShapeFill object on the control level
The MapShape objects expose two specific properties - ShapeFill and HightlightFill. The first one is applied to the shapes, when they are in their normal state. The HighlightFill gets applied when the mouse is over the shape.
The two properties are of type MapShapeFill. The MapShapeFill object allows you not only to specify the Fill color, but to modify the stroke as well. Here is an example.
These properties will take precedence over the trivial ones.
<telerik:RadMap x:Name="radMap">
    <telerik:InformationLayer x:Name="informationLayer">
        <telerik:MapEllipse x:Name="Ellipse"
                            telerik:MapLayer.Location="42.6957539183824, 23.3327663758679"
                            Width="20"
                            Height="20">
            <telerik:MapEllipse.ShapeFill>
                <telerik:MapShapeFill Fill="#80808080"
                                        Stroke="White"
                                        StrokeThickness="3" />
            </telerik:MapEllipse.ShapeFill>
            <telerik:MapEllipse.HighlightFill>
                <telerik:MapShapeFill Fill="Orange"
                                        Stroke="Coral"
                                        StrokeThickness="3" />
            </telerik:MapEllipse.HighlightFill>
        </telerik:MapEllipse>
    </telerik:InformationLayer>
</telerik:RadMap>
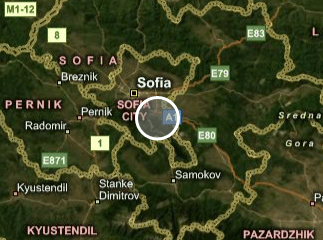
Here is a snapshot of the result:

Using the MapShapeFill object on the layer level
You are also able to define the appearance of the shapes on the Information Layer level. This way every shape, that doesn't have its respective properties explicitly set, will inherit the appearance specified for the layer. For this purpose use the ShapeFill and HighlightFill properties of the InformationLayer class. The first one is applied to the shapes, when they are in their normal state. The HighlightFill gets applied when the mouse is over the shape.
These properties will not take precedence over the properties set on the control level.
These values will get applied also on shapes that are created from KML and Shapefile data and doesn't have their appearance explicitly set.
The two properties are of MapShapeFill type. The MapShapeFill object allows you not only to specify the fill color, but to modify the stroke as well. Here is an example:
<telerik:RadMap x:Name="radMap">
    <telerik:InformationLayer x:Name="informationLayer">
        <telerik:InformationLayer.ShapeFill>
            <telerik:MapShapeFill Fill="#80808080"
                                    Stroke="White"
                                    StrokeThickness="3" />
        </telerik:InformationLayer.ShapeFill>
        <telerik:InformationLayer.HighlightFill>
            <telerik:MapShapeFill Fill="Orange"
                                    Stroke="Coral"
                                    StrokeThickness="3" />
        </telerik:InformationLayer.HighlightFill>
        <telerik:MapEllipse telerik:MapLayer.Location="42.6957539183824, 23.3327663758679"
                            Width="20"
                            Height="20">
        </telerik:MapEllipse>
        <telerik:MapEllipse telerik:MapLayer.Location="42.1429369264591, 24.7498095849434"
                            Width="20"
                            Height="20">
        </telerik:MapEllipse>
    </telerik:InformationLayer>
</telerik:RadMap>
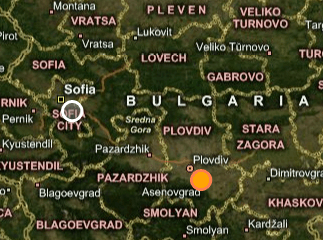
Here is a snapshot of the result:
