Hot Spots
Normally the elements placed in the Information Layer get positioned via Location coordinates. In this way their top-left corner will coincide with the point representing the location. When using FrameworkElements in your InformationLayer you can additionally arrange them around the point via their HorizontalAlignment and VerticalAlignment properties.
For more information about using FrameworkElements in the InformationLayer read here.
This example will show an ellipse, which should be positioned over the geographical location. It will also focus on the following:
Specifying a Hot Spot
To mark an element as a HotSpot you have to set its MapLayer.HotSpot attached property.
<telerik:RadMap x:Name="radMap"
                Width="600"
                Height="480">
    <telerik:InformationLayer>
        <Ellipse x:Name="Ellipse"
                    telerik:MapLayer.Location="42.6957539183824, 23.3327663758679"
                    Width="20"
                    Height="20"
                    Stroke="Red"
                    StrokeThickness="3">
            <telerik:MapLayer.HotSpot>
                <telerik:HotSpot />
            </telerik:MapLayer.HotSpot>
        </Ellipse>
    </telerik:InformationLayer>
</telerik:RadMap>
Positioning a Hot Spot
To adjust the position of the element via the HotSpot you have to set its X and Y properties. Their value can be measured in different units. To choose the desired unit you have to set the XUnits and YUnits properties. They can have one of the following values:
Fractions (default) - means fractions of the element size. This makes the values of the X and Y properties, proportional to the element size.
Pixels - pixel distance from the location to the element.
InsetPixels - offset from the upper right corner of the element given in pixels.
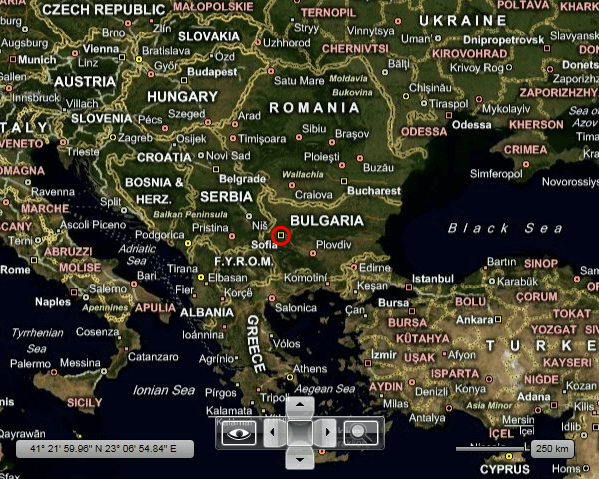
Here is the ellipse element that is centered over the location point:
<telerik:RadMap x:Name="radMap"
                Width="600"
                Height="480">
    <telerik:InformationLayer>
        <Ellipse x:Name="PART_Ellipse"
                    telerik:MapLayer.Location="42.6957539183824, 23.3327663758679"
                    Width="20"
                    Height="20"
                    Stroke="Red"
                    StrokeThickness="3">
            <telerik:MapLayer.HotSpot>
                <telerik:HotSpot X="0.5"
                                    Y="0.5"
                                    XUnits="Fraction"
                                    YUnits="Fraction" />
            </telerik:MapLayer.HotSpot>
        </Ellipse>
    </telerik:InformationLayer>
</telerik:RadMap>
Here is a snapshot of the final result:

Hot Spot inside a Complex UI
In some cases you might have a more complex structure, where the element representing the HotSpot is wrapped inside other FrameworkElements. In this case you have to set the MapLayer.HotSpot property of the root element and use the ElementName of the HotSpot object to indicate the element to which it should be attached.
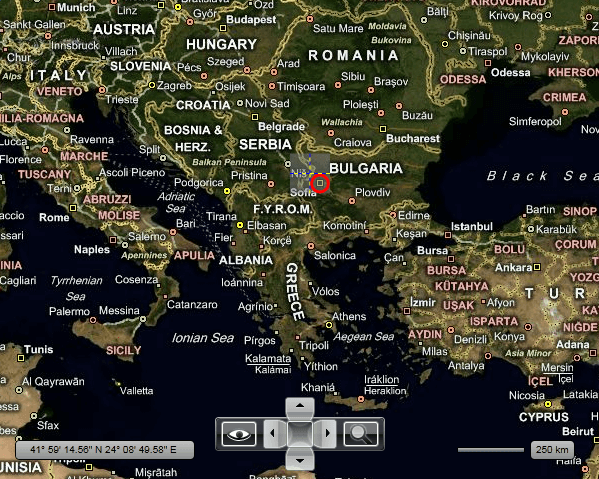
Here is an example of an Ellipse, that is placed inside a Grid control with two rows and two columns. Note that the Ellipse is still the control that is centered over the location.
<telerik:RadMap x:Name="radMap"
                Width="600"
                Height="480">
    <telerik:InformationLayer>
        <Grid telerik:MapLayer.Location="42.6957539183824, 23.3327663758679"
                ShowGridLines="True"
                Background="#80808080">
            <Grid.RowDefinitions>
                <RowDefinition Height="20" />
                <RowDefinition Height="20" />
            </Grid.RowDefinitions>
            <Grid.ColumnDefinitions>
                <ColumnDefinition Width="20" />
                <ColumnDefinition Width="20" />
            </Grid.ColumnDefinitions>
            <telerik:MapLayer.HotSpot>
                <telerik:HotSpot X="0.5"
                                    Y="0.5"
                                    XUnits="Fraction"
                                    YUnits="Fraction"
                                    ElementName="PART_Ellipse" />
            </telerik:MapLayer.HotSpot>
            <Ellipse x:Name="PART_Ellipse"
                        Grid.Row="1"
                        Grid.Column="1"
                        Width="20"
                        Height="20"
                        Stroke="Red"
                        StrokeThickness="3" />
        </Grid>
    </telerik:InformationLayer>
</telerik:RadMap>
Here is a snapshot of the final result:
