Printing
Printing in RadSpreadsheet allows you to prepare and display spreadsheet data in the most suitable way depending on your needs. Using different printing options such as defining the print page, the scale factor or whether to print gridlines, you can customize the way to present your data. Additionally, Print Area and Page Breaks allows to print only what you need to print and separate big documents on pages just the way you want your data to be separated. Together with printing on a real printer, RadSpreadsheet’s printing gives you the opportunity to export your spreadsheet data in different file formats with the help of virtual printers.
This article presents the Printing functionality of RadSpreadsheet and demonstrates how to specify what and how to print the document. It contains the following subsections:
How to print RadSpreadsheet?
RadSpreadsheet provides you with variety of options for organizing and preparing the document’s data for printing.
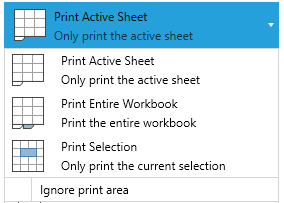
Using the PrintWhatSettings class you can specify:
ExportWhat: An enumeration specifying whether to print the Active Sheet, the Entire Workbook or the current Selection.
IncludeHiddenSheets: Bolean value indicating whether to include the hidden sheets or to skip them. Default value is
false.IgnorePrintArea: Boolean value indicating whether or not to ignore print area when printing worksheets.
Figure 1: Choose what you would like to print
Depending on whether you want to show a PrintDialog before printing, you can use some of the following RadSpreadsheet’s Print() method overloads:
Print(PrintWhatSettings printWhatSettings, string printDescription = null): Prints depending on specified PrintWhatSettings instance, showing a PrintDialog, so that the user can choose a printer and set some printer -specific options from the dialog.
Print(PrintWhatSettings printWhatSettings, PrintDialog printDialog, string printDescription = null): Prints depending on specified PrintWhatSettings instance. This overload prints silently (without showing the PrintDialog) by using an already initialized PrintDialog instance.
Example 1: Print RadSpreadsheet programmatically
Worksheet Page Setup
When you need to set different print option such as page size, print titles, page orientation, or when you want to print the spreadsheet grid lines, you can set this options using the worksheet's page setup. For more detailed information you can check the WorksheetPageSetup topic.
You can apply headers and footers to the printed document. For more details on how to achieve this, refer to the Headers and Footers topic.
Scaling
If your worksheet contains a lot of data, you can use the scaling options provided by RadSpreadsheet to reduce the size of the worksheet so it can better fit on the printed page. There are several options to help you in achieving this:
- No Scaling: This is the default value. The sheet is printed at its actual size.
- Fit Sheet on One page: Shrinks the data so that it is printed on a single page.
- Fit All Columns on One page: Shrinks the data so that it is printed on a single page wide.
- Fit All Rows on One page: Shrinks the data so that it is printed on a single page height.
- Custom Scaling options: The custom options enable you to set a scale factor according to your preferences or specify a particular number of pages the worksheet should be printed on.
All the scaling options are available in the Print Preview as well as in the Page Setup dialog. If you would like to set them programmatically, you can do so through the WorksheetPageSetup.
Figure 2: Scaling options

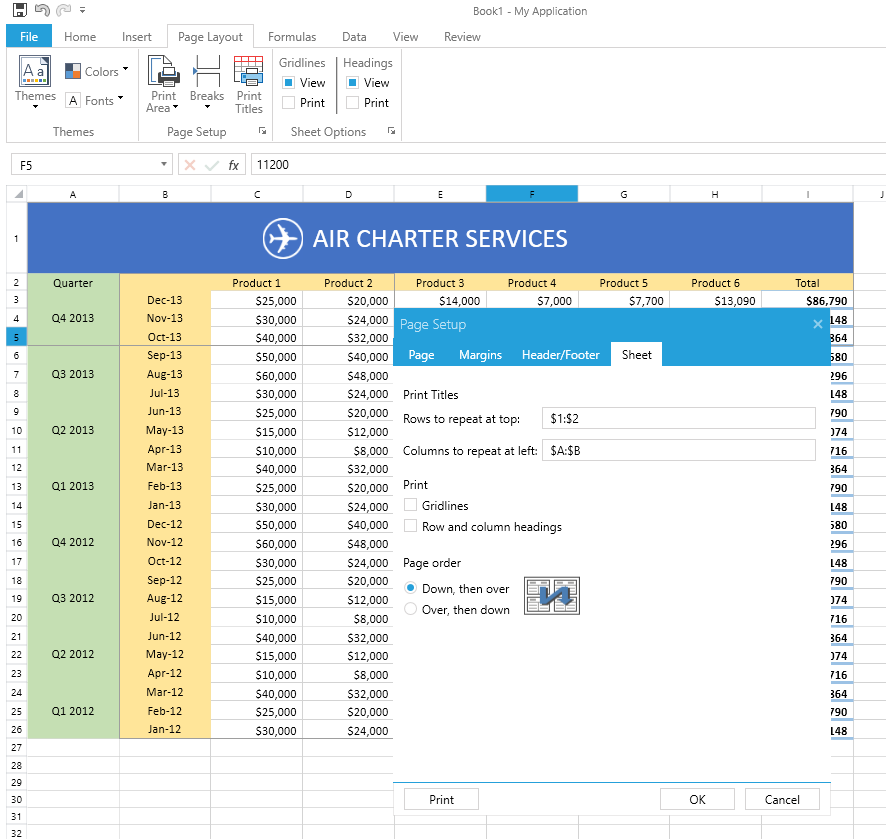
Print Titles
RadSpreadsheet comes with a built-in functionality to set rows and/or columns to be repeated on each printed page so that you can keep the titles for the data always visible. You can choose whether to set row(s) or column(s), or event both through the Page Setup dialog. This dialog is available under the Page Setup section of the Page Layout tab of RadSpreadsheet's ribbon:
Figure 3: Print titles
The WorksheetPageSetup class also enables you set the print titles in code. For more information, check the WorksheetPageSetup topic.
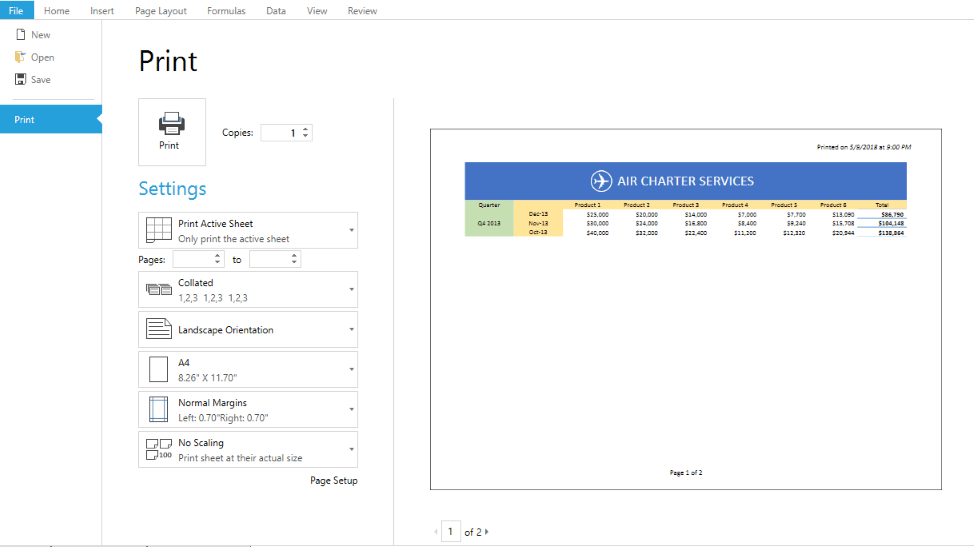
Print Preview
In order to preview the pages before printing, you can use the PrintPreviewControl class and set its RadSpreadsheet property to the RadSpreadsheet instance that you want to be previewed. This control will provide a ready-to-use functionality for previewing print pages and setting different print options.
The following code snippet shows how to integrate the print preview with RadRibbonView's backstage.
Example 2: Integrate the print preview with RadRibbonView's backstage
Figure 4: Print preview