Getting Started with WinForms GridView
| RELATED VIDEOS |
|---|
|
RadGridView for WinForms Webinar Lino Tadros from Falalel provides an in-depth overview of Telerik's RadGridView for WinForms (Runtime: 01:45:11) |
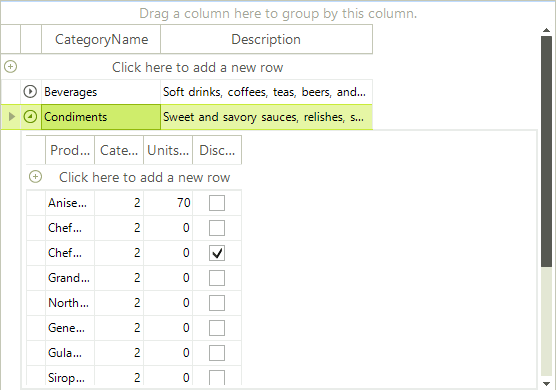
The following tutorial demonstrates how to create a hierarchical grid that presents two tables: Product Category and Product Information.
Figure 1: The final result
Setting up the Form
Create a new Windows Forms Application project.
Drop a RadGridView control on the form.
In the Properties window for RadGridView, set the
RadGridView.Dockproperty to Fill.
Connecting to Data
In the Properties window for RadGridView, locate the
DataSourceproperty drop-down.Select Add Project Data Source. This step will open the Data Source Configuration Wizard.
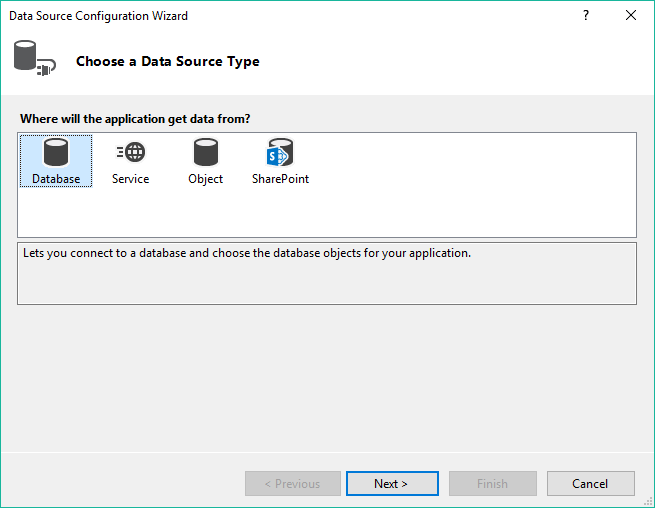
On the Choose a Data Source Type page, select Database and click Next.
On the Choose a Database Model page, select Dataset.
On the Choose Your Data Connection page, select New Connection.... This page displays the Choose Data Source dialog.
In the Choose Data Source dialog, select Microsoft Access Data Base File.
Click Continue.
In the Add Connection dialog, click the Browse... button. This step will display the Select Microsoft Access Database File dialog.
In the Select Microsoft Access Database File dialog, navigate to the Telerik UI for WinForms installation directory and locate the
Nwind.mdbfile within the\Examples\QuickStart\Datasourcesdirectory. SelectNwind.mdband click OK.Click OK again to close the Add Connection dialog.
On the Choose Your Data Connection page, click Next. Visual Studio shows a dialog that asks if you want to copy the file to your project.
Click Yes to close the Visual Studio dialog.
On the Save the Connection String to the Application Configuration File page, click Next.
On the Choose Your Database Objects page, expand the
Categoriestable.Select the following columns in the
Categoriestable:CategoryID,CategoryNameandDescription.-
Expand the
Productstable and select the following columns:ProductName,CategoryID,UnitsOnOrderandDiscontinued.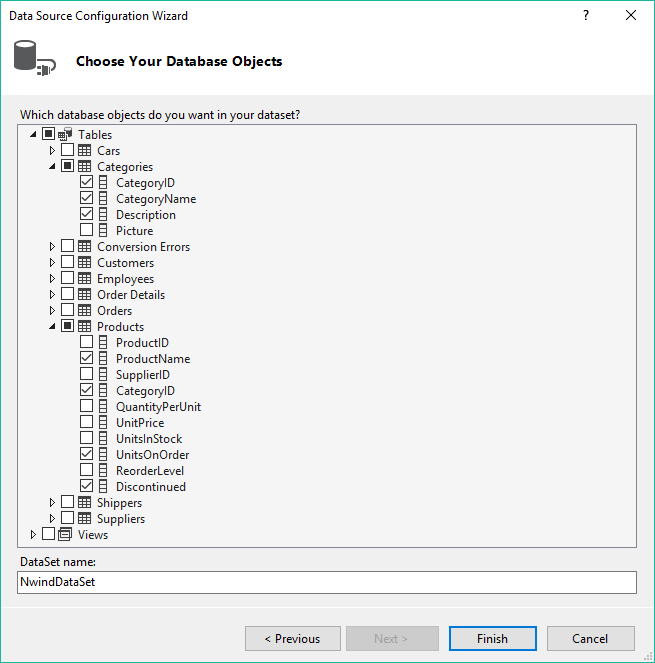
Click Finish to close the Data Source Configuration Wizard.
In the Properties window for RadGridView, select the
DataSourceproperty drop-down.Locate the
NwindDataSetdata source.-
Select
Categoriesfrom theNwindDataSetdata source. This step will create thecategoriesBindingSourceandcategoriesTableAdaptercomponents.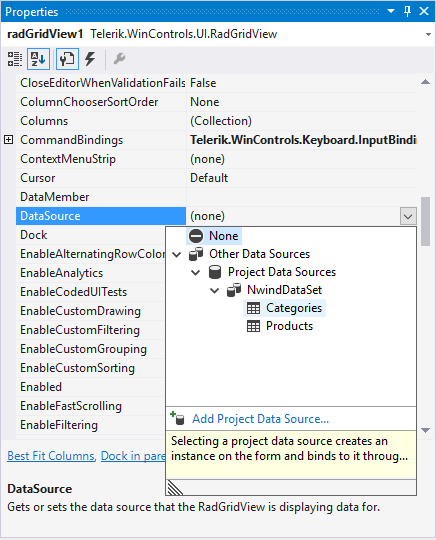
Select the
DataSourceproperty drop-down for a second time.Select
Productsfrom theNwindDataSetdata source. This step will create theproductsBindingSourceandproductsTableAdaptercomponents.Select the
DataSourceproperty drop-down for a third time.-
Select
NwindDataSet. This step will assign the entire data set to the grid.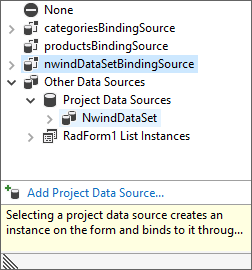
Setting Properties
In the Properties window for RadGridView, select the
DataMemberproperty.Select
Categoriesfrom the drop-down list. This step will assignCategoriesas a top level table for the grid.In the Properties window for RadGridView, select the
AutoGenerateHierarchyproperty.Select
Truefrom the drop-down list.Click the RadGridView smart tag in the form.
Select Open Property Builder from the smart tag menu.
Select the
CategoryIDcolumn in the navigation tree and clear the checkbox.Click OK to close the Property Builder.
Press F5 to run the application. Notice that the grid displays the product categories first. Each category has an icon that you can click to expand that category and show a child template with the corresponding products.
See Also
Telerik UI for WinForms Learning Resources
- Telerik UI for WinForms Gridview Component
- Getting Started with Telerik UI for WinForms Components
- Telerik UI for WinForms Setup
- Telerik UI for WinForms Application Modernization
- Telerik UI for WinForms Visual Studio Templates
- Deploy Telerik UI for WinForms Applications
- Telerik UI for WinForms Virtual Classroom(Training Courses for Registered Users)
- Telerik UI for WinForms License Agreement)