Test Studio Licensing Server
Test Studio uses a per machine licensing scheme, which requires Internet connection to be activated. To ease the process of activating and distribution of licenses across multiple users Test Studio provides a Licensing server application, which allows floating management of the purchased licenses.
The below article describes how the Licensing server works and the process of installing and configuring it.
How the Test Studio Licensing Server Works
The Licensing Server application requires to be installed on a machine, which has active connection to the Internet. This is the component, which will contact the Telerik license database to get information for the active purchased licenses, which can be used under a Telerik account.
The Licensing Server application requires a valid Telerik account to be logged in. This account should belong to the license holder user or to a user assigned as License Manager for the purchased licenses in the Manage Test Studio Activation Keys section in your Telerik account.
The machine, on which you activate Test Studio, requires connection to the configured Licensing Server machine only (may not be connected to the Internet). Start the installed Test Studio, choose the option to activate a license through the Licensing Server and enter the Licensing server address. The license gets activated, if there are free slots.
Once you exit Test Studio on your local machine, the license remains reserved for the next 5 minutes. After that it is released and can be activated on another machine, which has access to the Licensing Server. Next time when you start Test Studio on a machine, which is already connected to the Licensing server, it takes a license automatically, if available.
Install and Configure the Licensing Server Application
The Licensing server is a separate application and has its own installer file, which can be downloaded from your Telerik account.
Installation
Once you have downloaded the Test Studio Licensing Sever *.msi file, double click it to start the Installation wizard.
Important
Test Studio Licensing Server installation and setup must be configured from a Windows Administrator account.
Click the 'Read License Agreement' button to get familiar with it and confirm you read it with the 'OK' button. If you need to read it again after the installation process is finished, you can find it available online on the Progress Telerik site here.
By clicking the 'I Agree and Continue' button you confirm you agree to the terms and conditions listed in the Test Studio EULA.

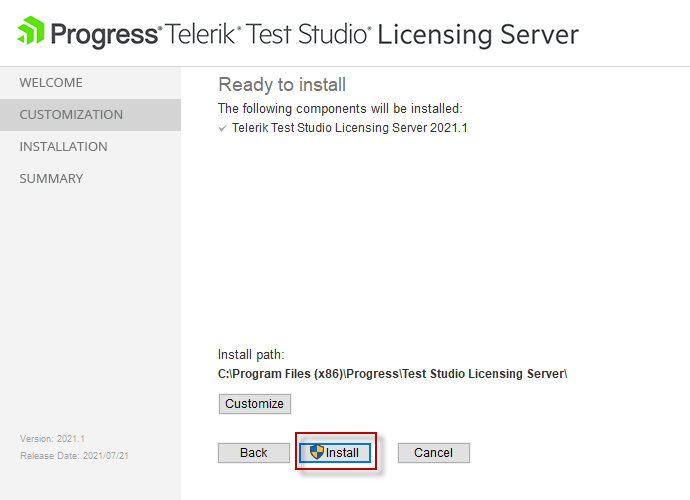
On the next screen, click the 'Install' button to trigger the installation.
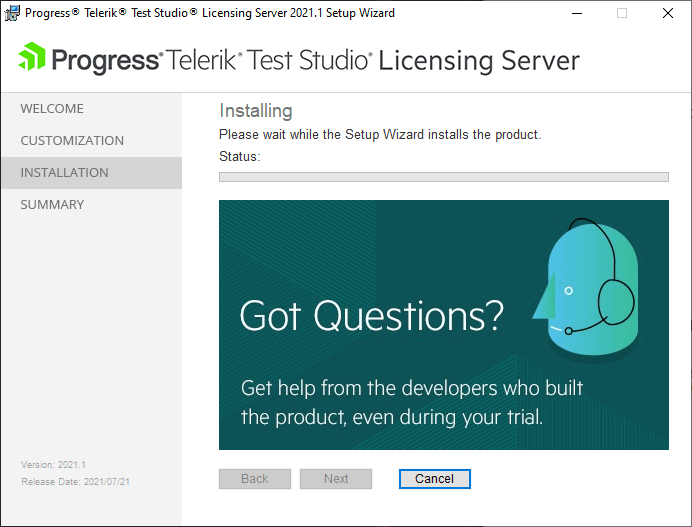
The installation wizard displays progress of the process.
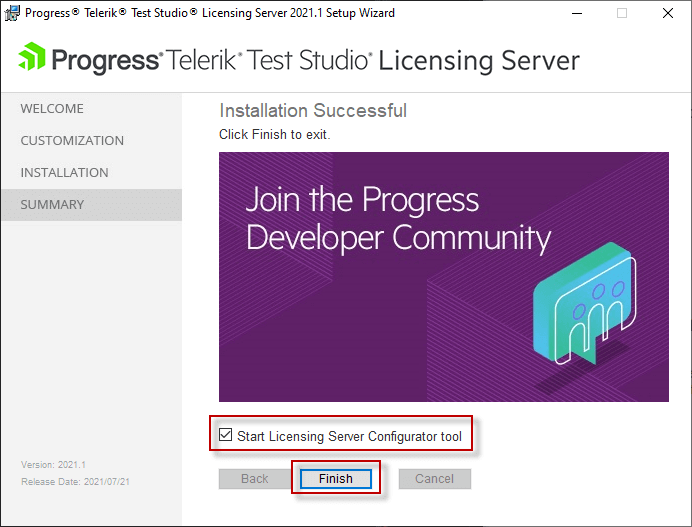
When the installation process is complete, the Telerik Test Studio Licensing Server service is automatically started. The Installation Successful screen is displayed and you can choose whether you want the wizard to launch the Test Studio Licensing Server Configuration. Click the Finish button to exit the installer wizard.
Configure Licensing Server
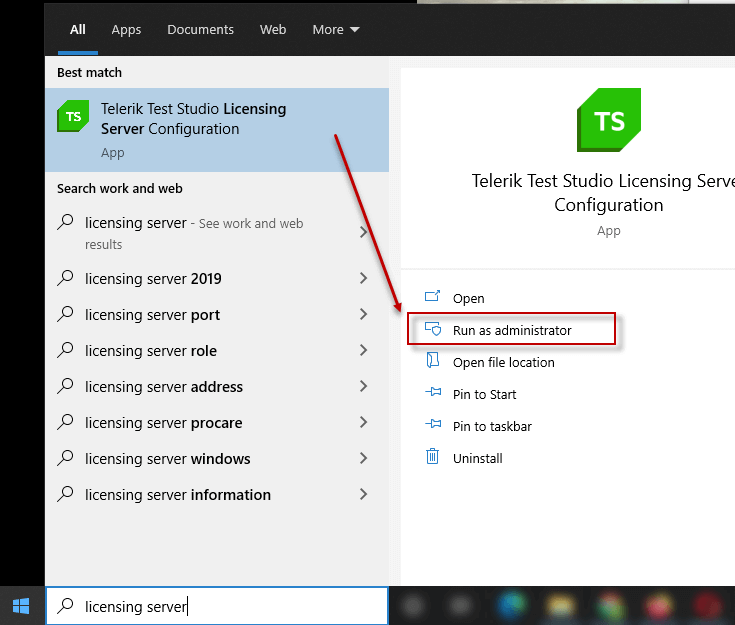
If you haven't started the Licensing Server Configuration wizard right after the installation, you can find it in the Windows Start menu by typing 'Licensing Server'. Ensure to start the tool from a Windows Administrator account.
In the Telerik Account section enter the credentials for a Telerik account, under which are assigned the purchased licenses.

In the Licensing Server section you can change the port on which the Licensing server can be accessed from the rest of the machines in the company. The default one is 9098 and it must be open for inbound and outbound communication. If you need to change it, ensure the listed one is opened in both directions and is not used from other processes.
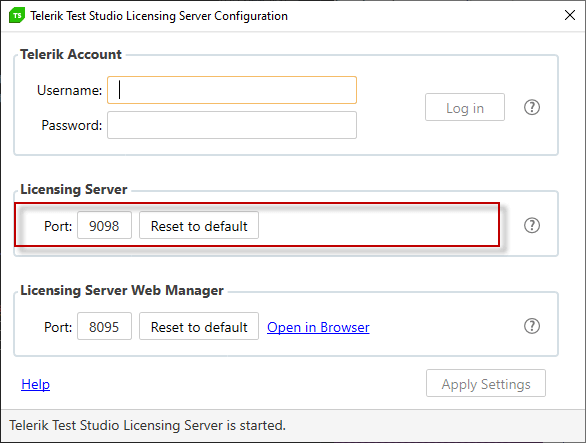
The last section Licensing Server Web Manager provides access to a locally hosted web page, which represents a list of the available licenses under the logged Telerik account. By default the Web Manager app can be accessed on port 8095 with the Licensing Server machine name. The port in use must be free (not used from other processes),

The Licensing Server Web Manager page allows you to view the number of activated and free licenses, and deactivate any of the activated licenses.
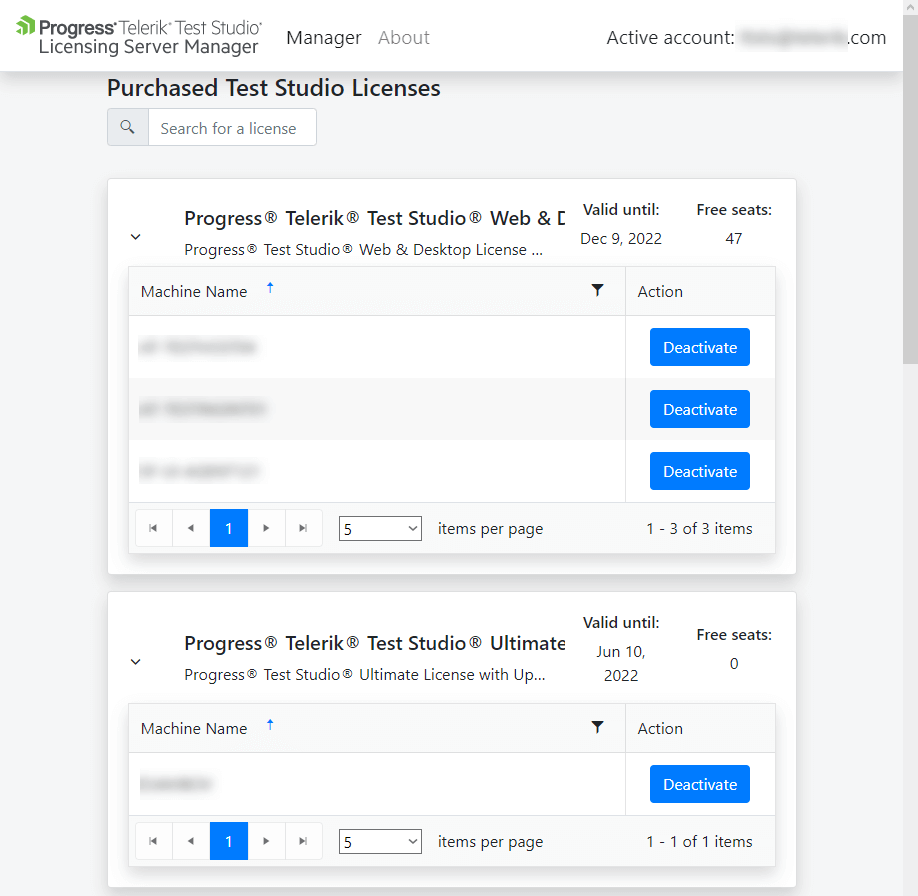
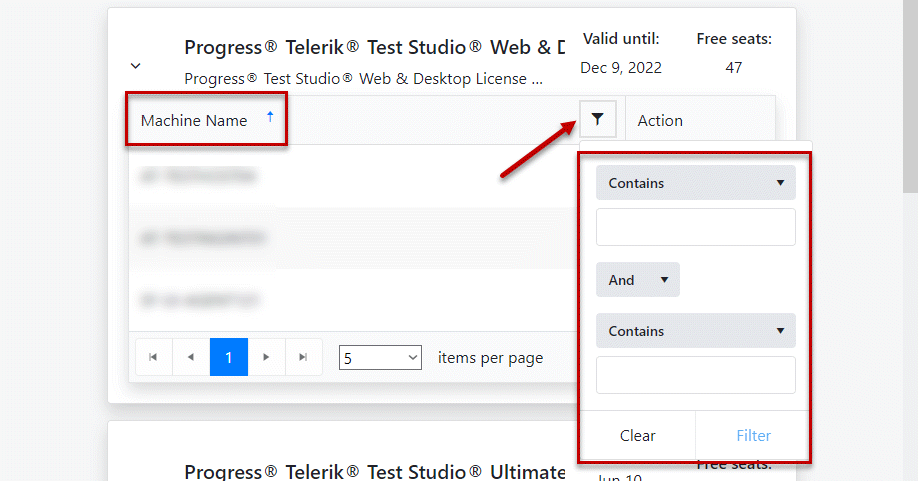
Activated licenses are sorted by Machine Name in ascending order. You can change the order by clicking on the title, or use the filtering options to find the machine.
Licensing Server Web Manager shows all activated licenses for the Telerik account that is used in the Licensing Server Configuration. This includes normal, manual and Licensing Server activations.
Use the Licensing Server to Activate Test Studio License
The option to use the Licensing Server is not visible by default. To be able to see it in the License Activation wizard, a Windows Administrator account needs to add a registry key to enable the Licensing Server activation.
Enable Licensing Server Activation Option
To enable the Licensing Server option in the Activation wizard, you need to add a registry key in the machine registry.
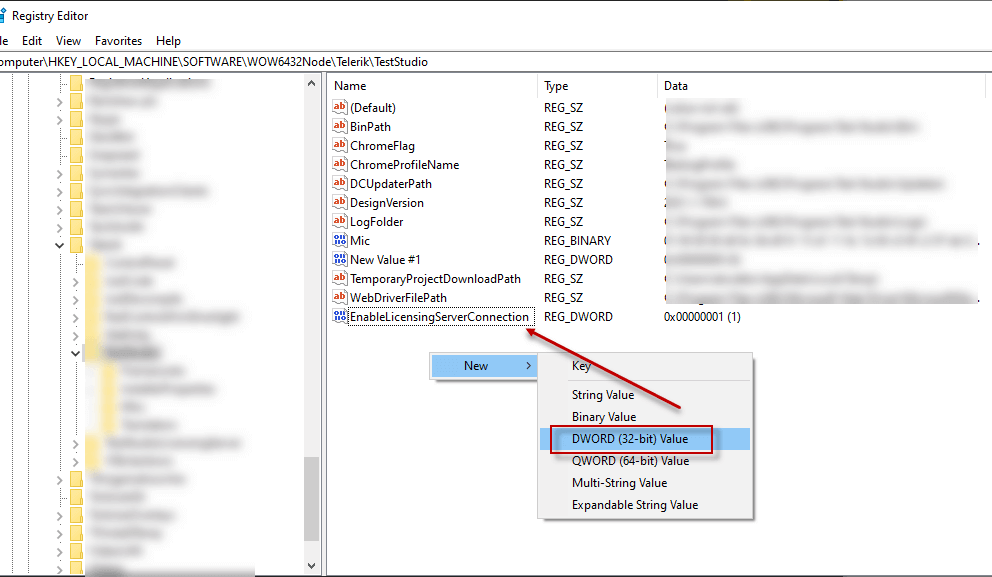
- Type 'RegEdit' in the Windows Start menu and run the Registry Editor.
- Navigate to Computer\HKEY_LOCAL_MACHINE\SOFTWARE\WOW6432Node\Telerik\TestStudio.
- Create a new key of type DWORD and name it EnableLicensingServerConnection.
- Set its value to 1.
The key can be added before installing the Test Studio product. If Test Studio is already installed, you can first deactivate the current activated license, then add the registry key. Upon starting Test Studio again you will be prompted to activate a license and the option to use the Licensing server will be available.
Activate License through the Licensing Server
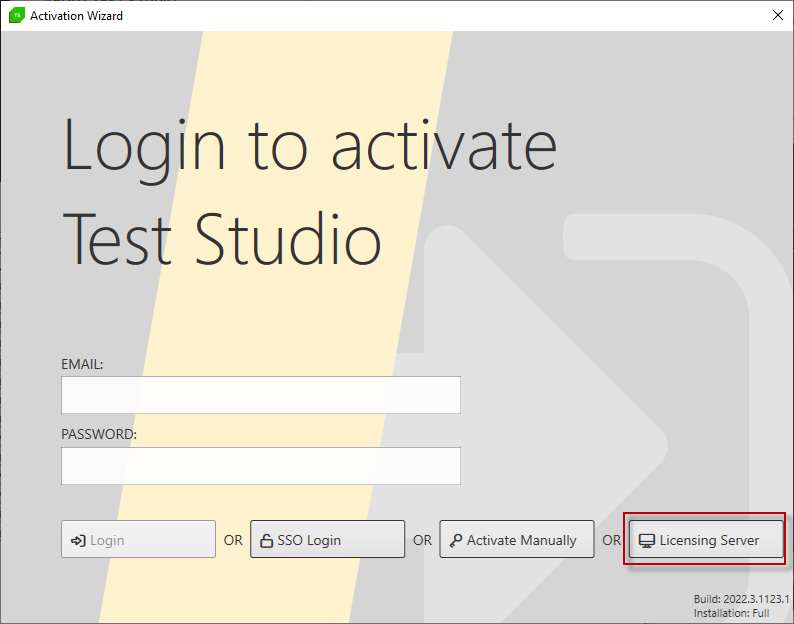
Launch Test Studio and the Activation wizard appears. Next to the Telerik Account Login and Manual activation options, you can see the option Use Licensing Server.
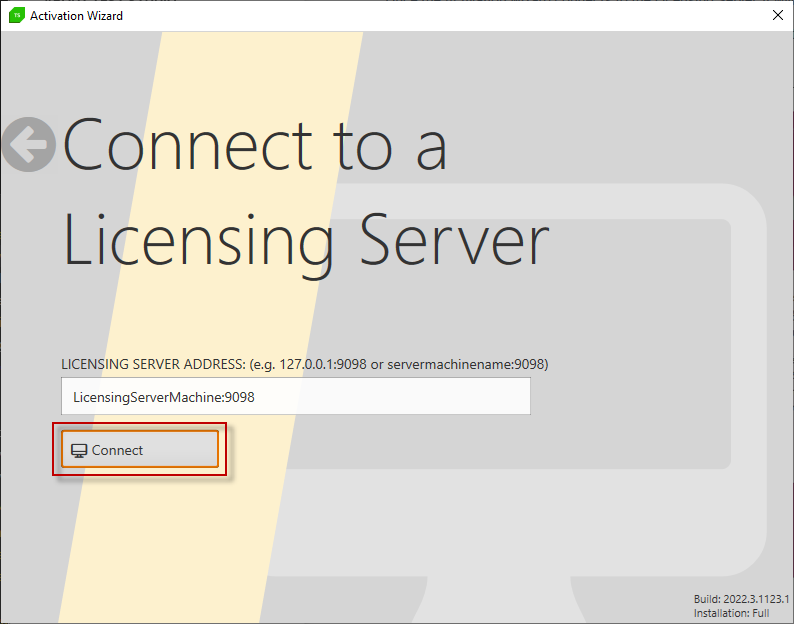
On the next screen you can enter the name of the Licensing Server machine and click the Connect button to proceed. The format of address to enter is ipaddress:port or machineName:port.
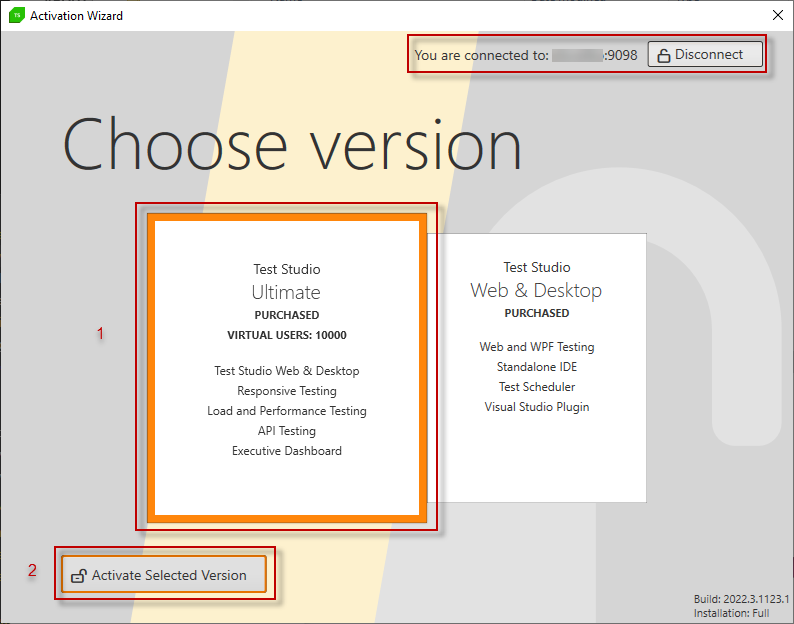
Once the Activation wizard connects to the Licensing Server, it will display the available for activation licenses and you can choose which to activate. If you have purchased only one type of license, it will be activated automatically, otherwise you can choose the license type.
Test Studio starts and your machine is registered with the Licensing server. Each next time you start Test Studio it automatically contacts the server and takes a free license of the selected type.
Disconnect from Licensing Server
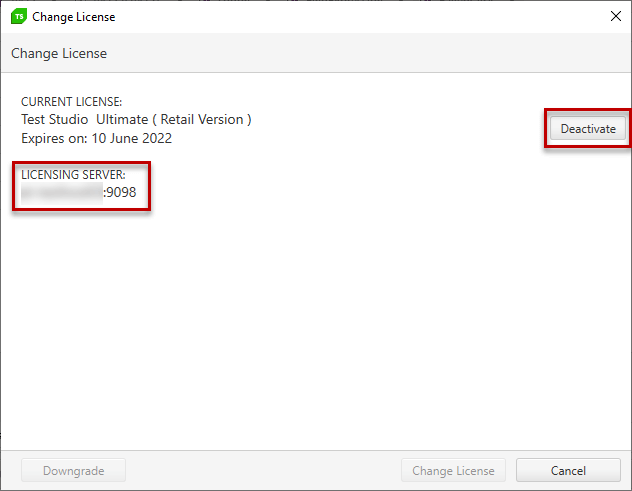
In order to disconnect Test Studio from the Licensing Server and stop the automatic license distribution on this machine, you need to deactivate the current activated license. You will see the Licensing Server that was used to activate this license.
Possible Errors
If you try to connect to a Licensing server in which there is no Telerik account logged in, you get a message to inform you that there is no active account. You will need to contact the administrator of the machine, which acts as a Licensing server.

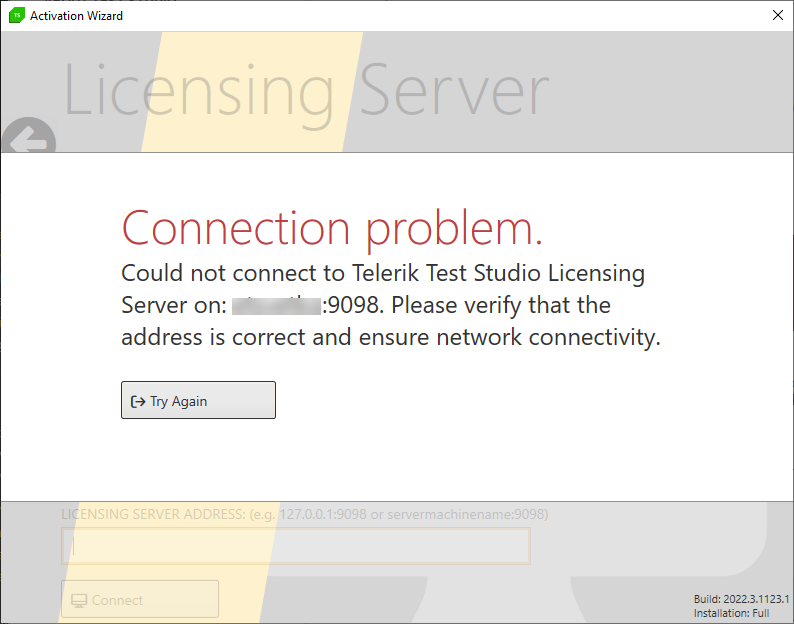
If you try to connect to a machine where no licensing server is running, or the network access to it is restricted, you get a message for connection problem. Ensure that you try to connect to the correct machine and that the access to it is not blocked.
If you do not have access to the Licensing server, when Test Studio is started and tries to get a license key, you get the message below. You will need to contact the administartor of your machine and the machine, which acts as a Licensing server.
