Test Studio Tests in Azure DevOps Classic Piepline Using Microsoft-Hosted Agent
Test Studio tests can be successfully integrated for execution with the Azure DevOps pipelines. This article guides you through an example setup of classic pipeline using Microsoft-hosted agent.
Tip!
Double check if you have covered all prerequisites for this setup.
Create a Free Form Pipeline
-
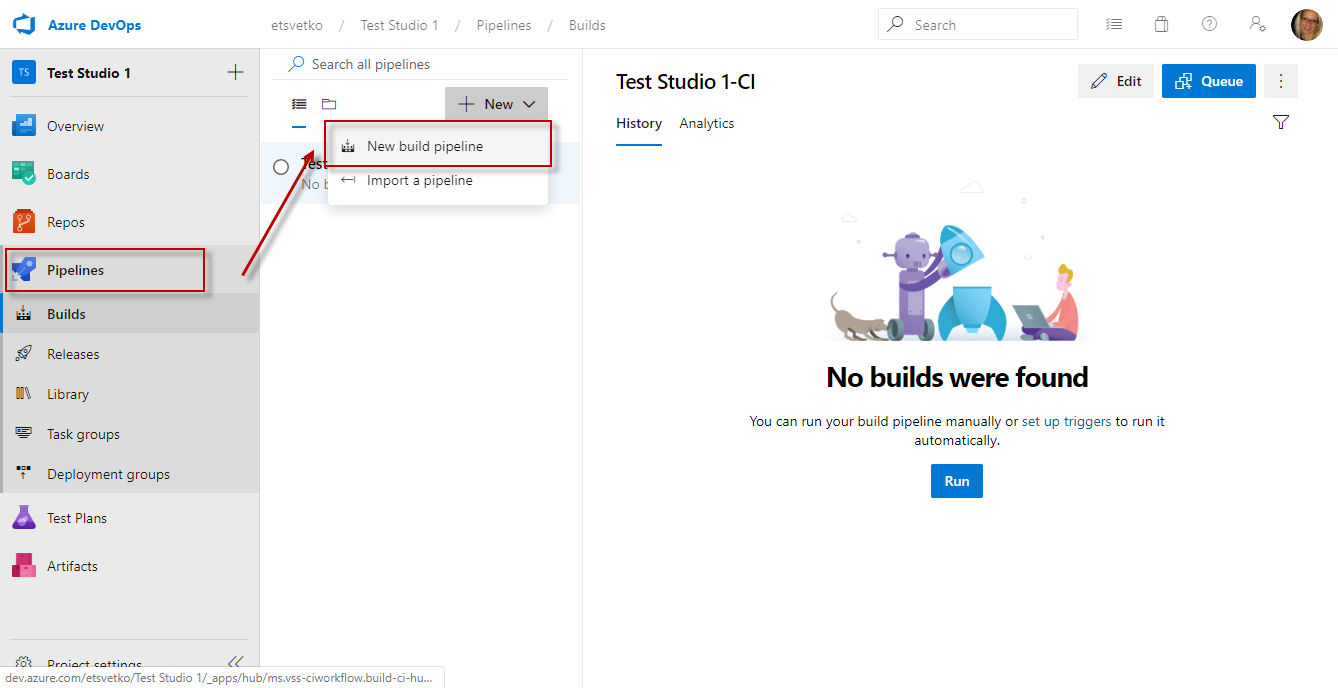
In the Azure DevOps project go to Pipelines >> New Pipeline.
-
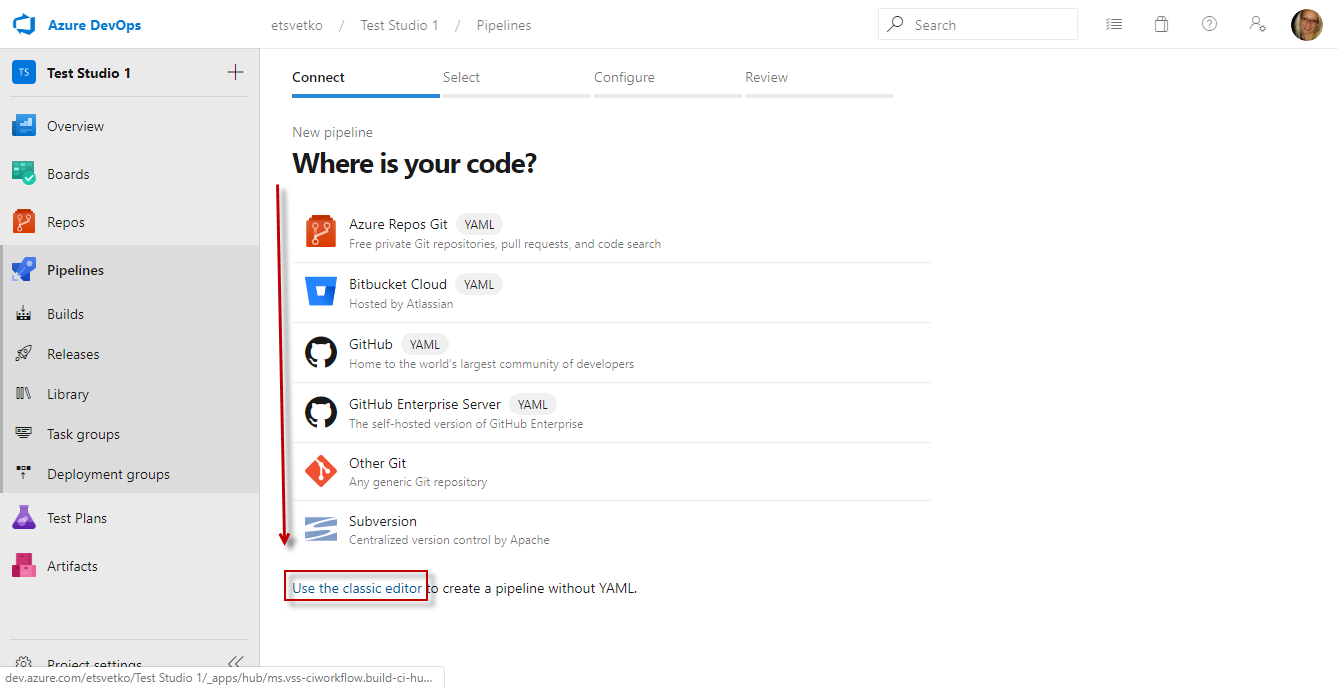
For this setup choose the option to Use the classic editor.
-
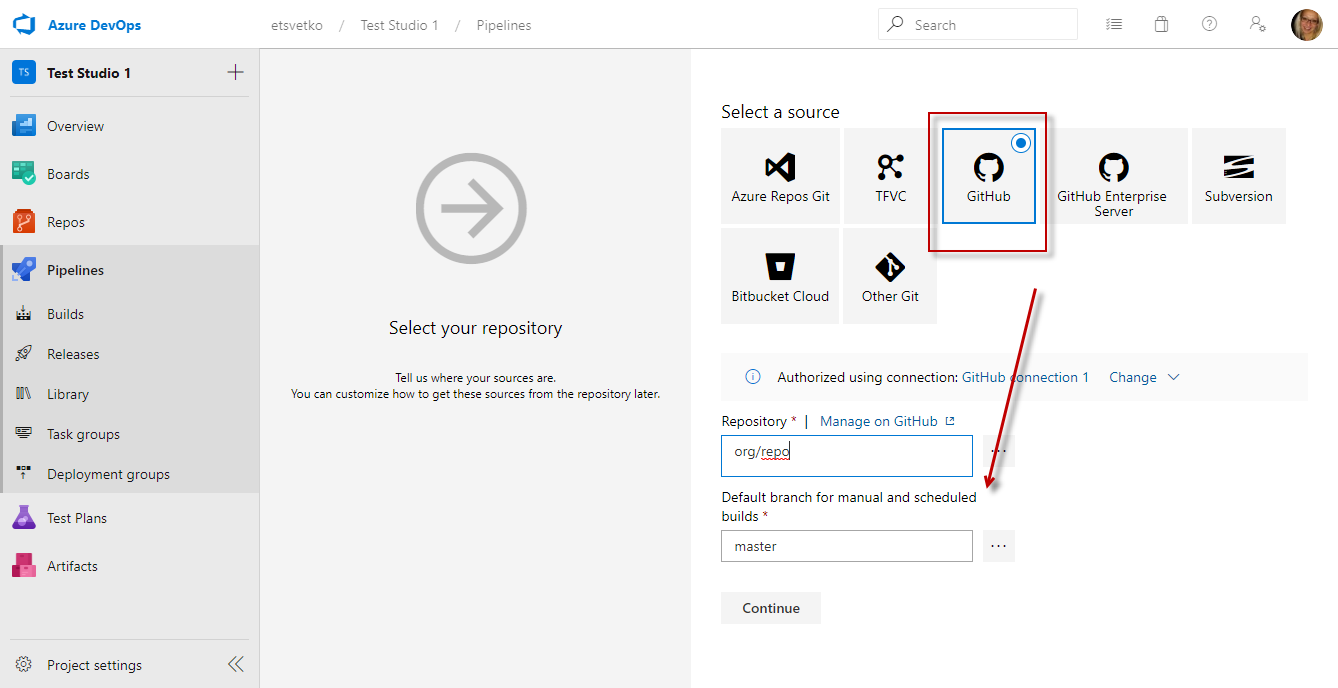
Choose the repository type where the project is and fill in the necessary details to connect to the repo. Click Continue.
-
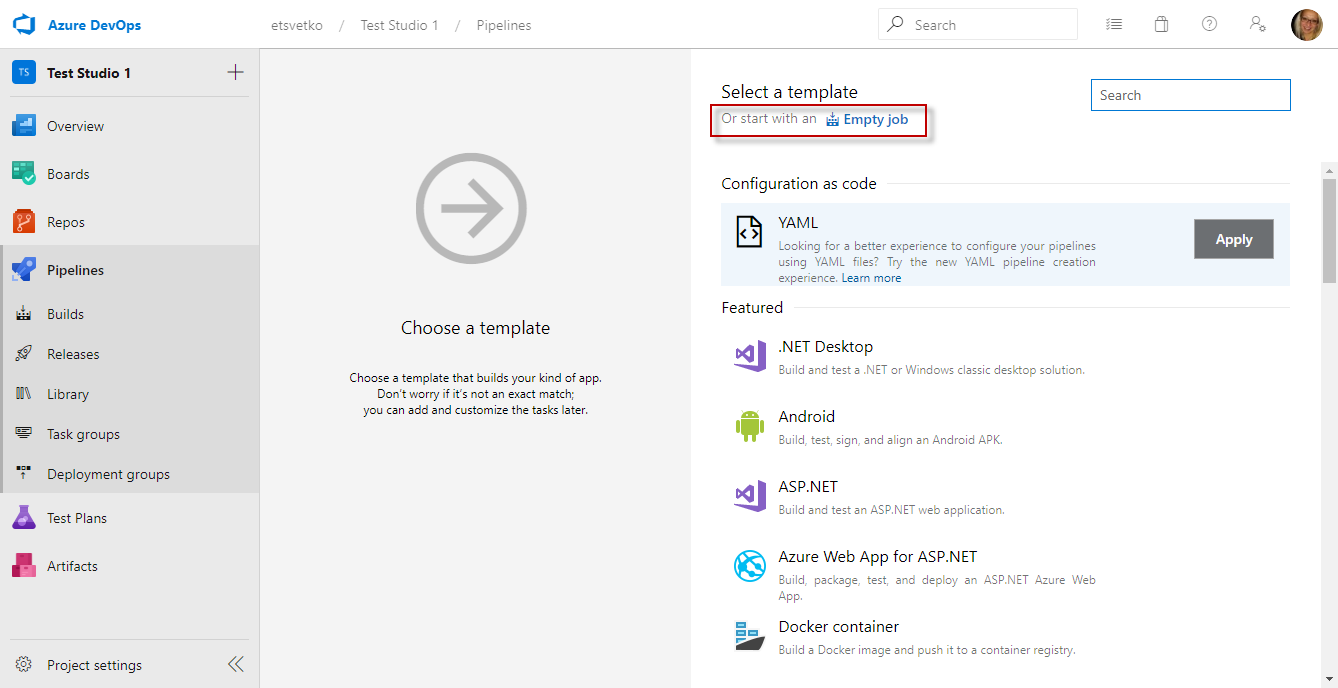
Choose Empty job as a template for the build
-
Click the Pipeline tile and set a meaningful name for the pipeline. Then select the Agent pool for Microsoft-hosted agents and choose a default image to be installed on the VM when running the pipeline - you can use windows-latest.

-
Continue with adding the Agent tasks as described below.
Tip
Set all tasks to Continue on error in the task Control Options section. This ensures that result upload tasks run even if a previous task fails.
All tasks except the first Command Line task (which executes the test run command) are optional.
Add Universal Download Package Task to Deploy Test Studio Installer on Agent Machine
-
Click the Agent tile and create a new Packages >> Universal Packages task.
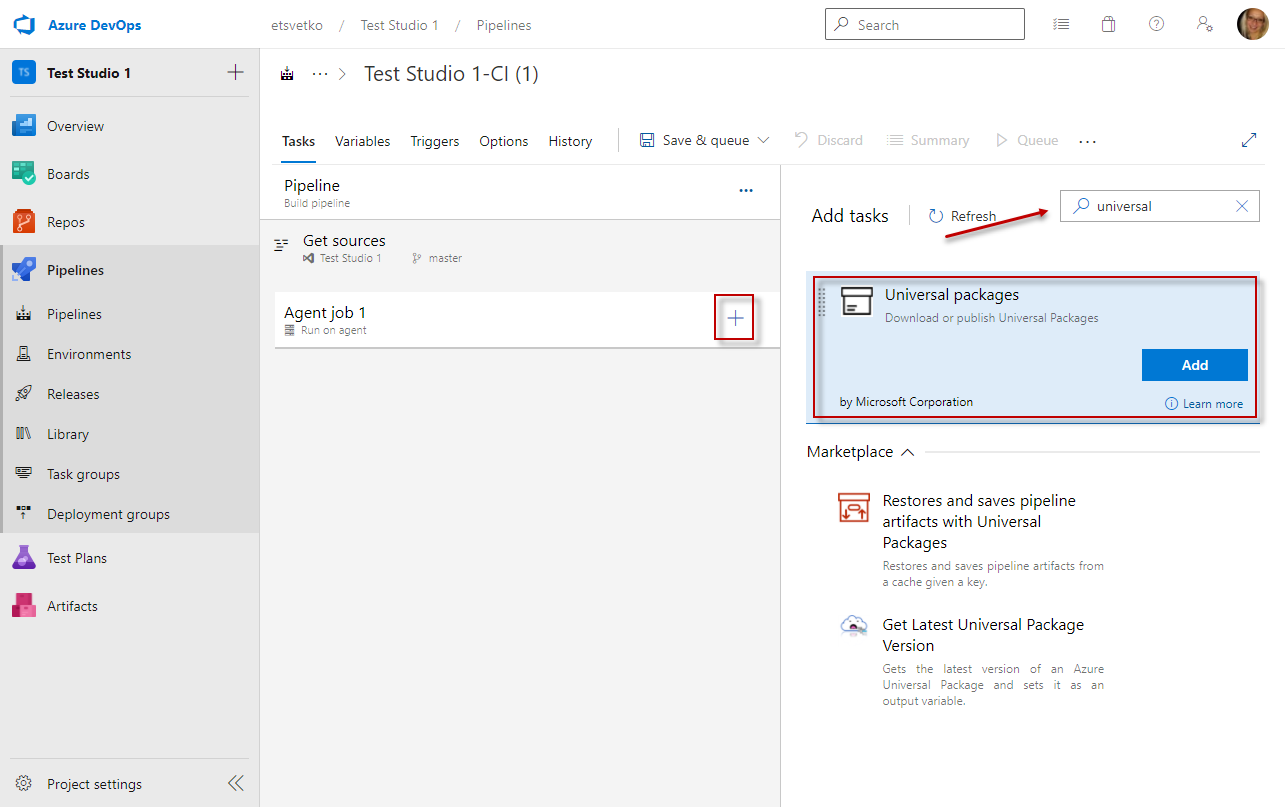
-
Set a meaningful name for the Universal Packages task. Then set the task command to download action and specify the destination folder.
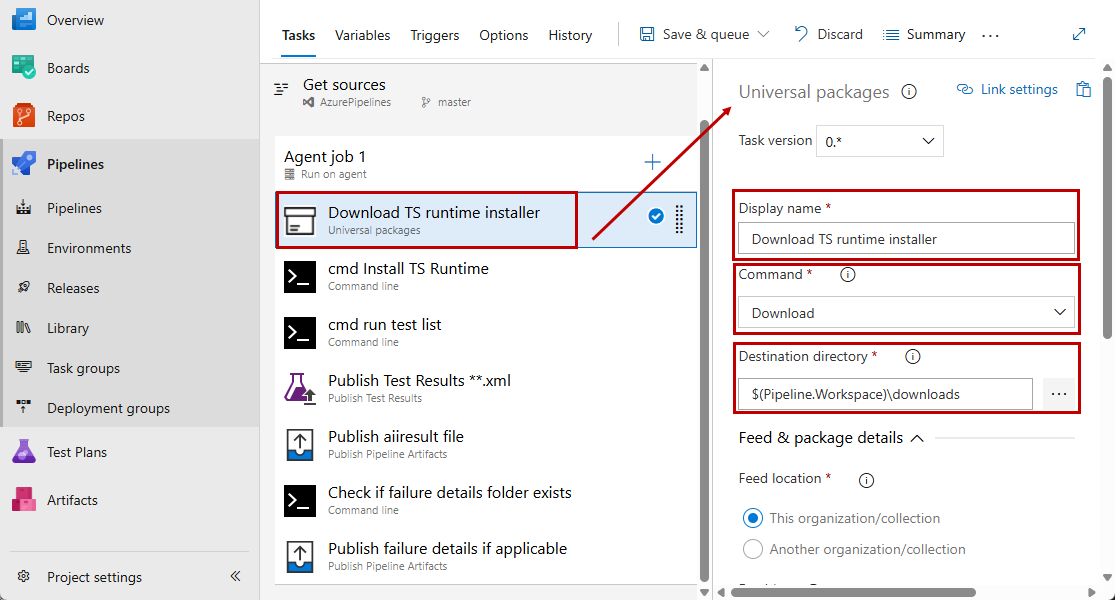
-
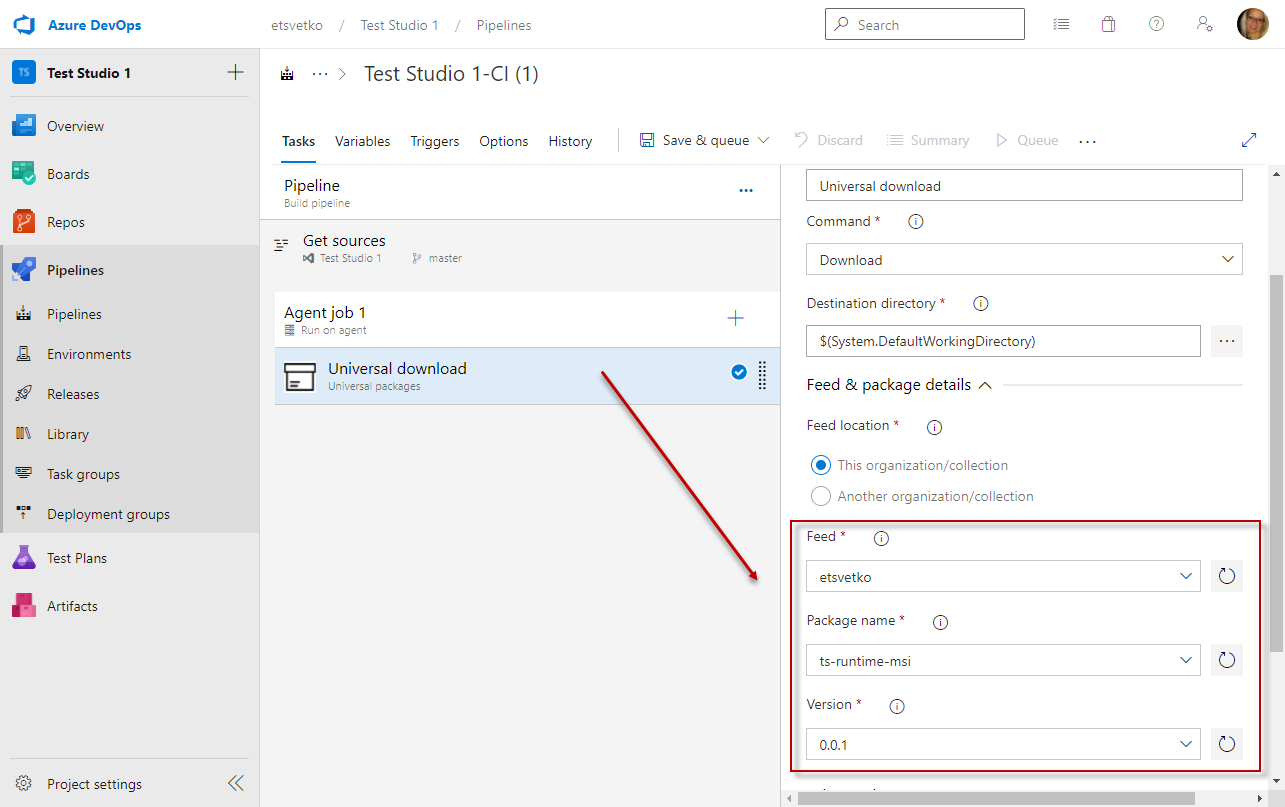
Verify the Feed & packages details section in the Universal Packages task and ensure the feed, name and version details of the artifact correspond to details specified when publishing the installer as an artifact.
Add Command Line Agent Task to Install Test Studio Runtime
-
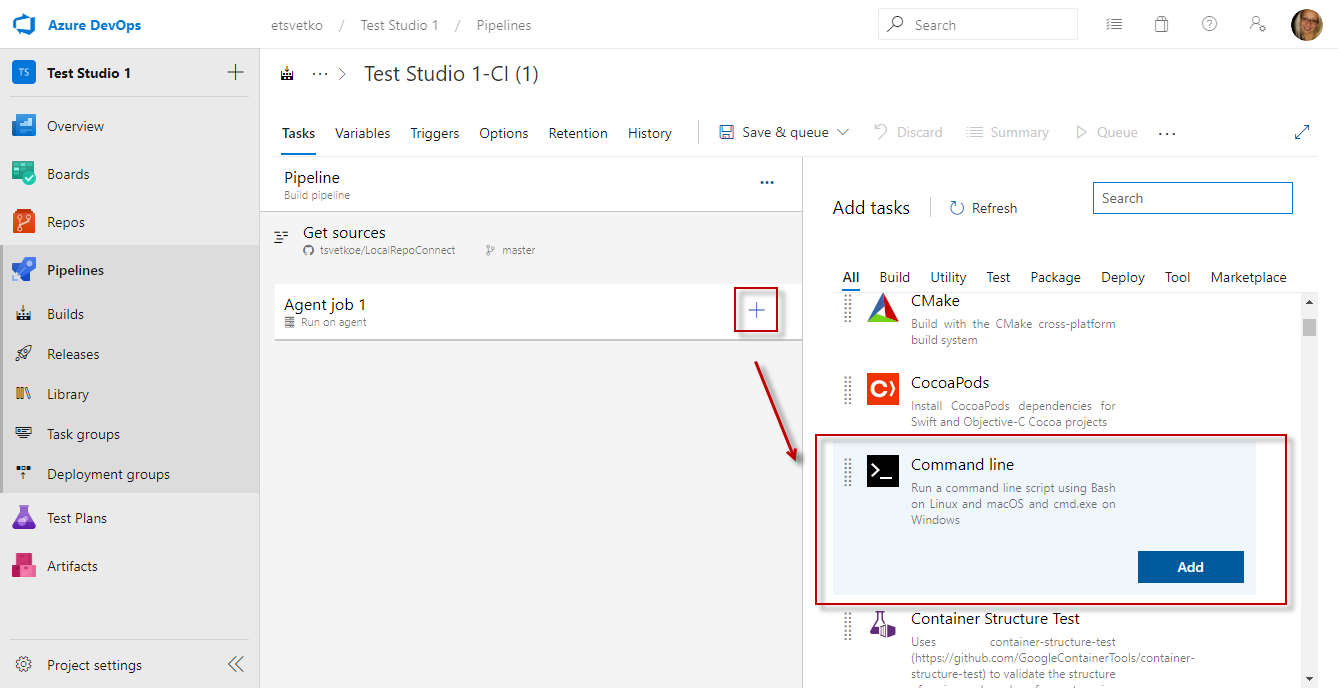
Click the Agent tile and create a new Utility >> Command line task.
-
Set a meaningful name for the Command Line task. Then place a command which calls the Windows msiexec command in passive mode. The passive mode is required due to the lack of UI session. Below is an example command to use as baseline in the task.
msiexec.exe /i c:\TestStudio_Runtime_2021_3_1103_1.msi /passive /le c:\errorlog.txt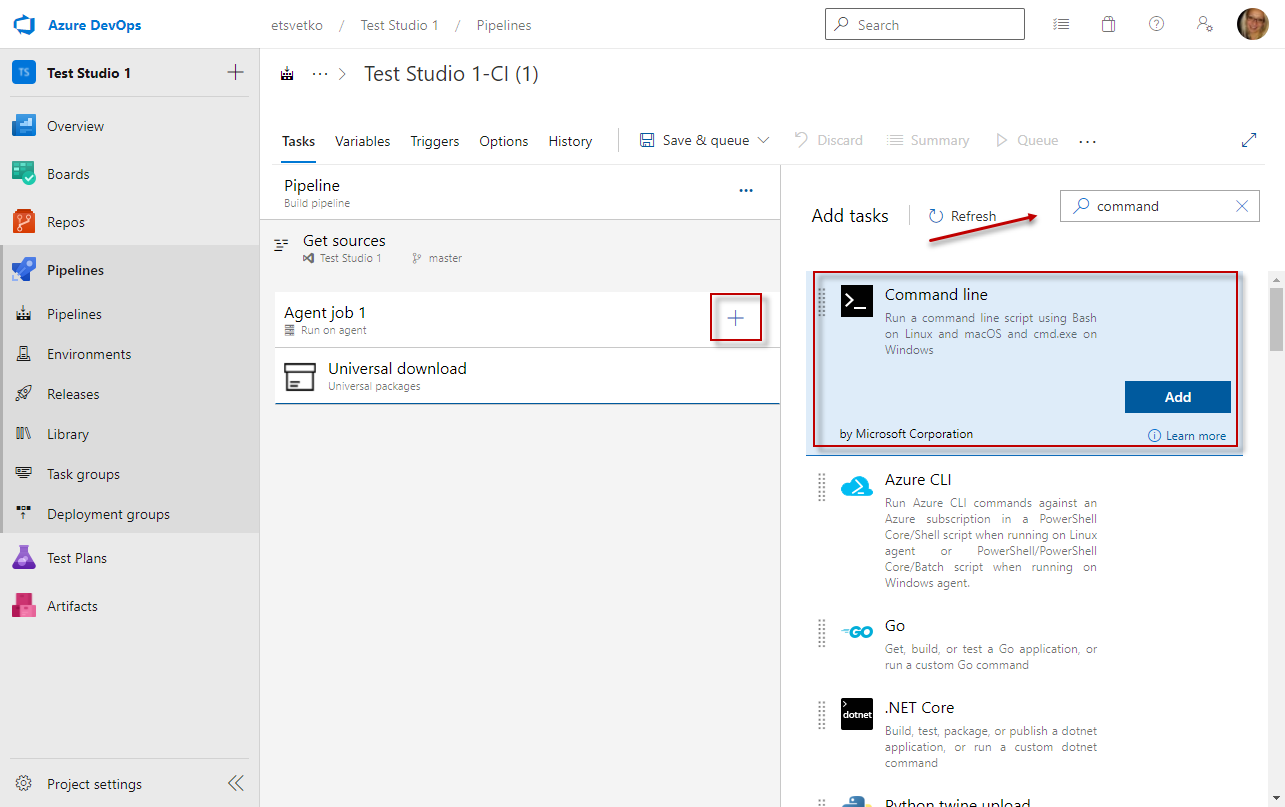
Add Command Line Agent Task to Execute Test or Test List
-
Click the Agent tile and create a new Utility >> Command line task.
-
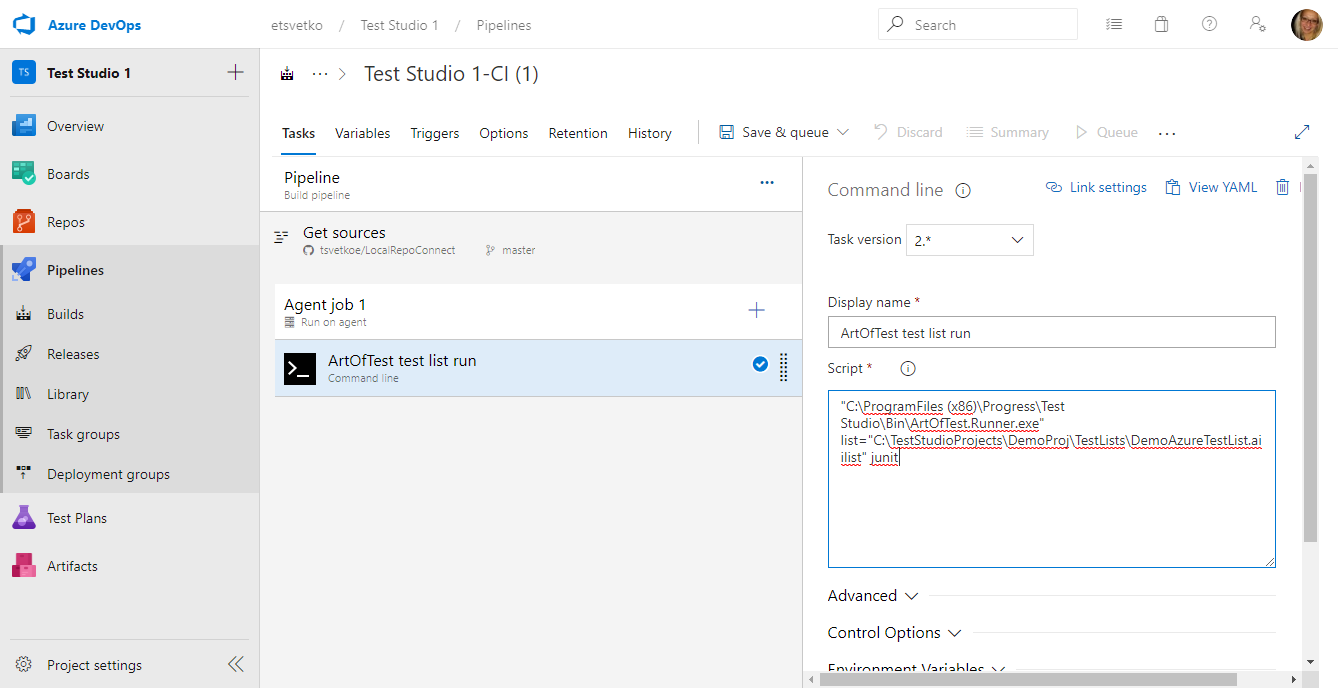
Set a meaningful name for the Command Line task. Then place a command which calls the Test Studio CLI Runner to trigger the test execution.
Tip
Test Studio CLI runner is called ArtOfTest.Runner.exe and provides various execution options. If you are not yet familiar with these check the CLI runner syntax options here to build your command. -
The sample image executes a test list, sets specific name for the output Test Studio result file and also generates a junit type of result.
Add Publish Test Results Task to Upload JUnit Results
-
Click the Agent tile and create a new Tests >> Publish Test Results task.
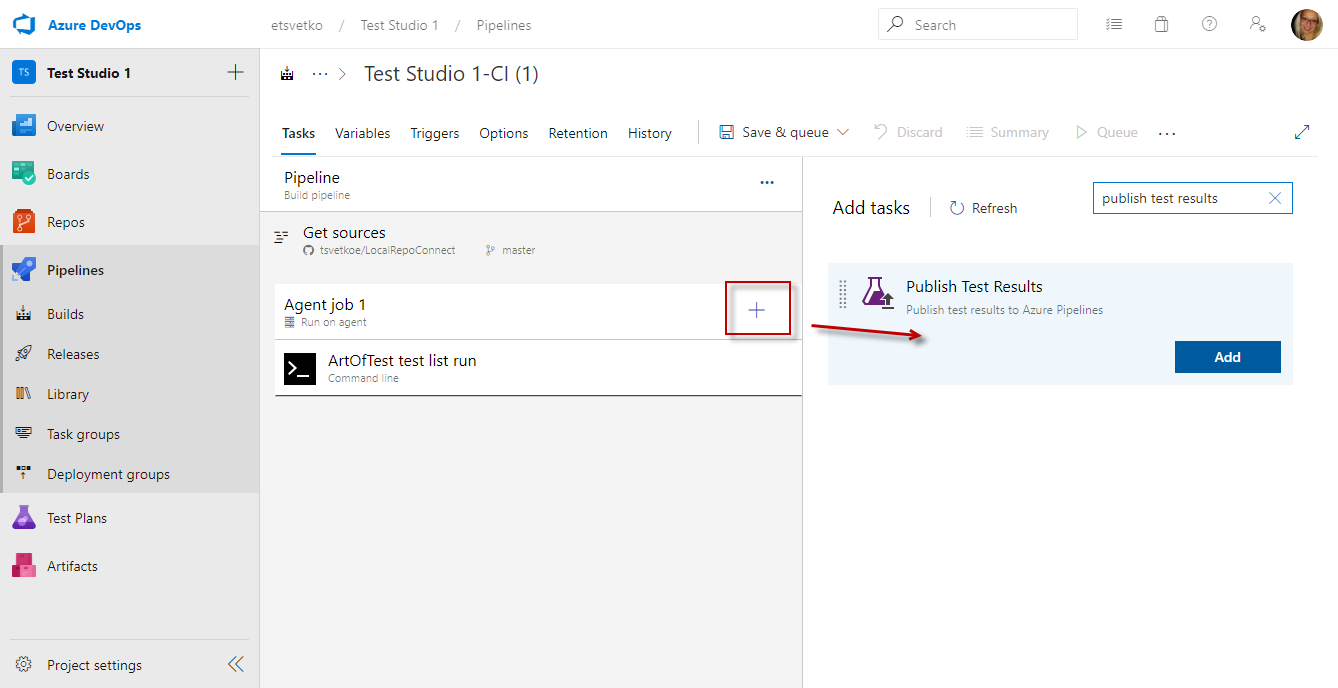
Test Studio CLI runner lets you output the execution result in junit format and this is the type of result which can be used in this pipeline task.
-
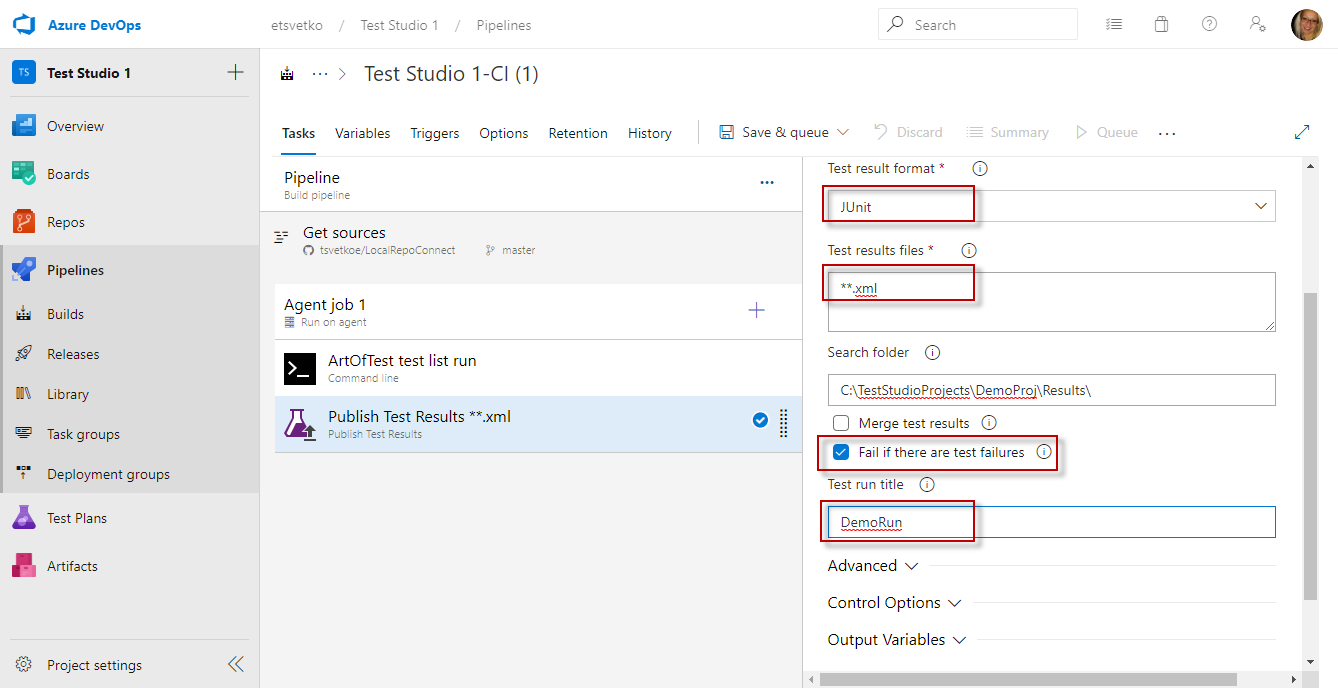
Set a meaningful name for the Publish Test Results. Then set the folder where the test results are deployed and choose to upload all .xml files.
-
Once the pipeline run is complete the details from junit result are visible in the Test tab.

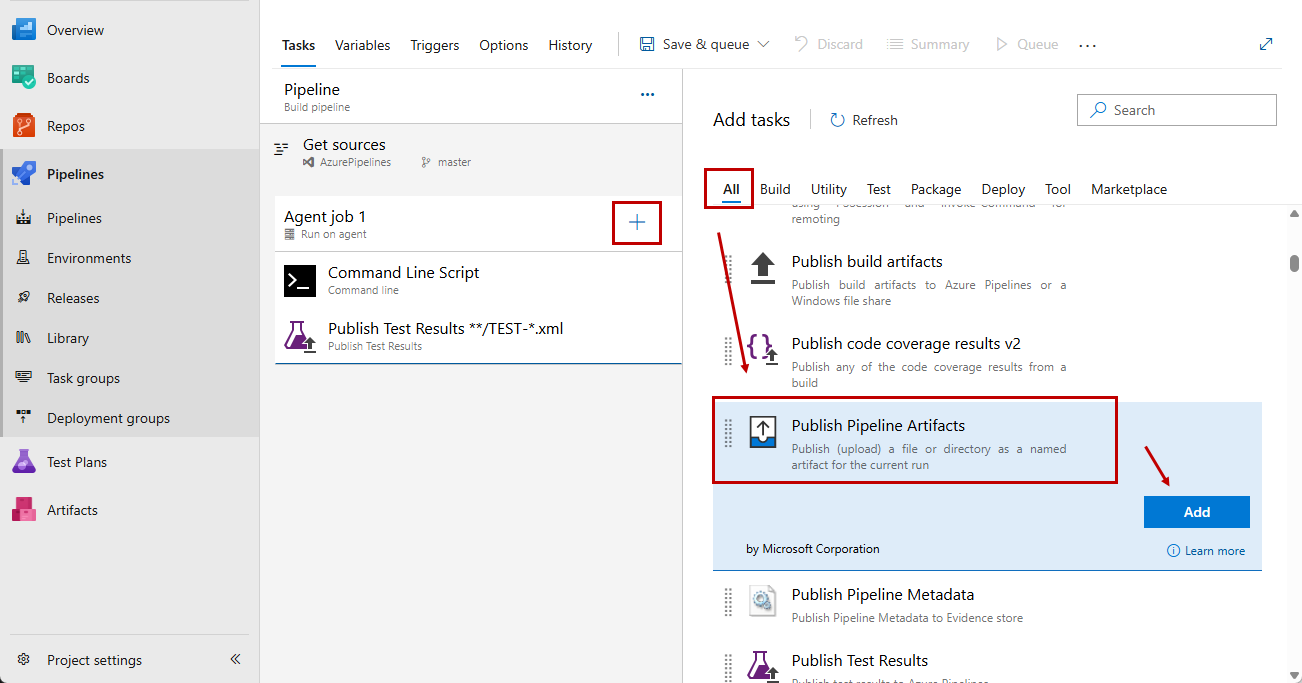
Add Publish Pipeline Artifacts Task to Upload the Test Studio Result File
Test Studio test run produces its proprietary test result file which contains additional useful information for the test run. That result file can be very helpful in the case when a test run fails. The result file always ends with file extension *.aiiresult and we recommend to specify its name as part of the command which triggers the CLI runner. That way you can control the upload of the file to the pipeline artifacts.
-
Click the Agent tile and create a new All >> Publish Pipeline Artifacts task.
-
Set a meaningful name for the Publish Pipeline Artifacts task. Then specify the file to upload using the predefined name set in the execution command and define a meaningful name for the artifact.

-
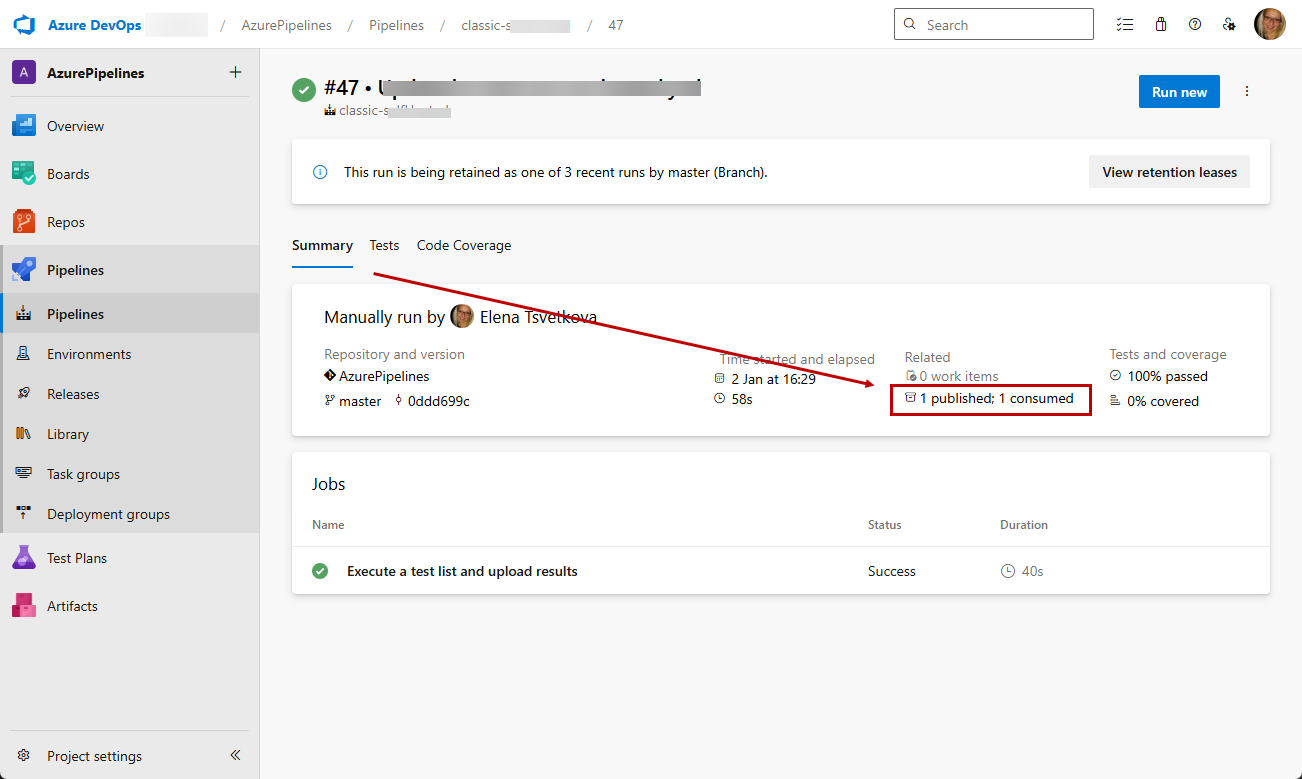
Once the pipeline run is complete the artifacts are accessible under the Summary tab in the Related listings.
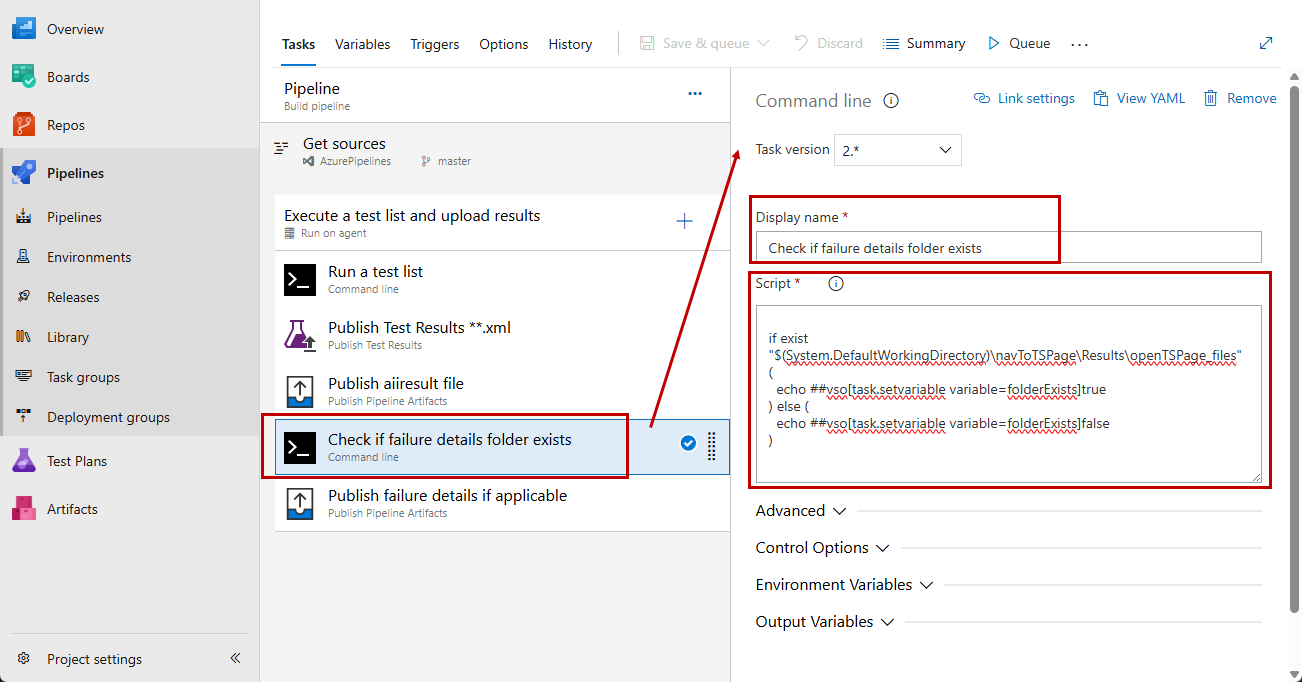
Add Publish Pipeline Artifacts Task to Upload the Test Studio Failure Details When Available
Test Studio test run produces its proprietary failure details in case a test run fails. These provide additional context for the specific failure and are very useful for debugging a failing test. The failure details are output in a folder which has the name of the test result and ends with *_files. Since these are available only if a test fails you need to setup a task to check if such folder exists and upload the artifacts only if it does.
-
Click the Agent tile and create a new Utility >> Command line task.
-
Set a meaningful name for the Command Line task. Then place a command which checks for the folder using the predefined name of the result file set in the execution command and returns true or false depending on the outcome.
-
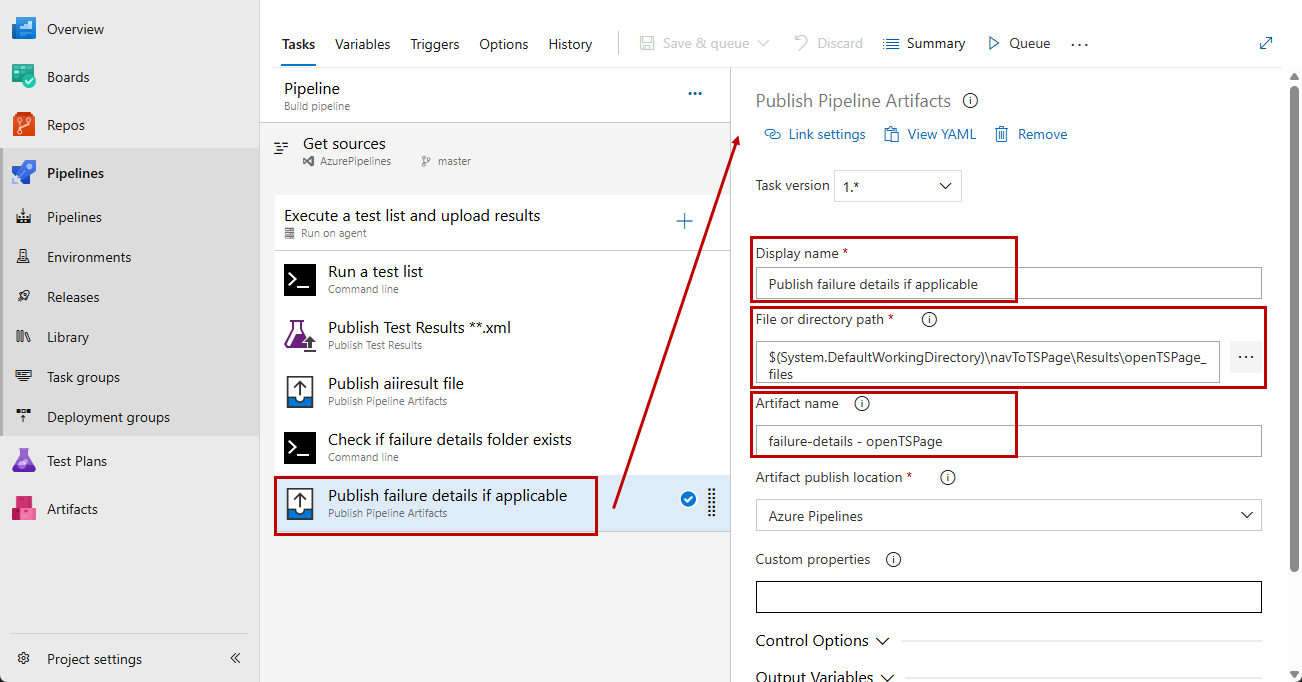
Click the Agent tile and create a new All >> Publish Pipeline Artifacts task.
-
Set a meaningful name for the Publish Pipeline Artifacts task. Then specify the folder to upload using the predefined name set in the execution command adding the ending *_files and define a meaningful name for the artifact.
-
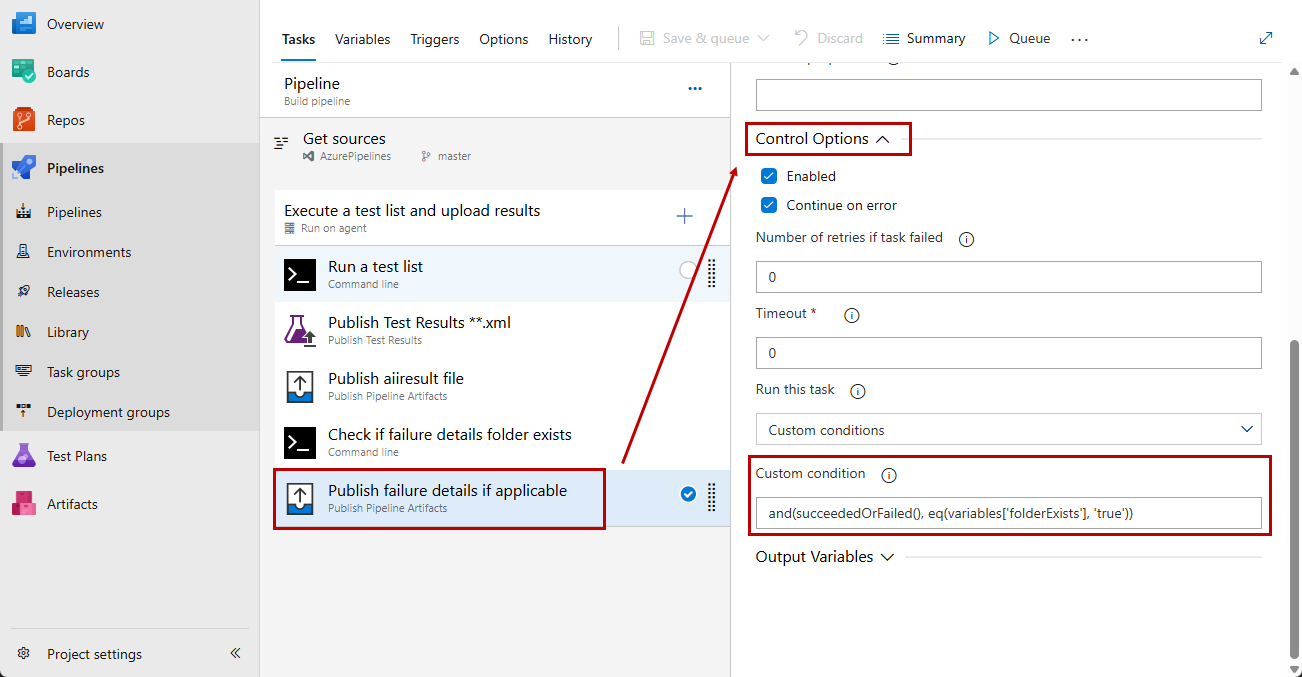
This task is supposed to be executed only if the failure folder exists. Therefore you need to specify a custom condition for executing the task. Expand the Control Options section of the task and set the Custom Condiition to check the result of the previous Command Line task.
-
Once the pipeline run is complete the artifacts are accessible under the Summary tab in the Related listings.
See Also
Tip
Check out our blog post about Tesitng in Microsoft-hosted agents.