Amazon DynamoDB
This article provides a step-by-step tutorial on how to create a table in Amazon DynamoDB and configure the Kendo UI Grid to retrieve, create, update, and destroy items in that table.
The complete implementation of the sample project is available in the Kendo UI Cloud Integration repository on GitHub.
Prerequisites
- An Amazon AWS account.
- Basic knowledge on using AWS Console.
Creating Users to Access and Manipulate the Amazon DynamoDB Table
The following instructions demonstrate how to create a user identity and use that identity directly on the client to access a DynamoDB table.
Important
Even though the following instructions demonstrates how to create a user identity and use that identity directly on the client to access a DynamoDB table, exposing user credentials directly on the client is not recommended. That is why, before sharing the client implementation with third parties or users, switch to the Amazon Cognito authentication.
- In the AWS Console, search for
"iam"(Identity and Access Management). - In the IAM console, select Users and then Add User.
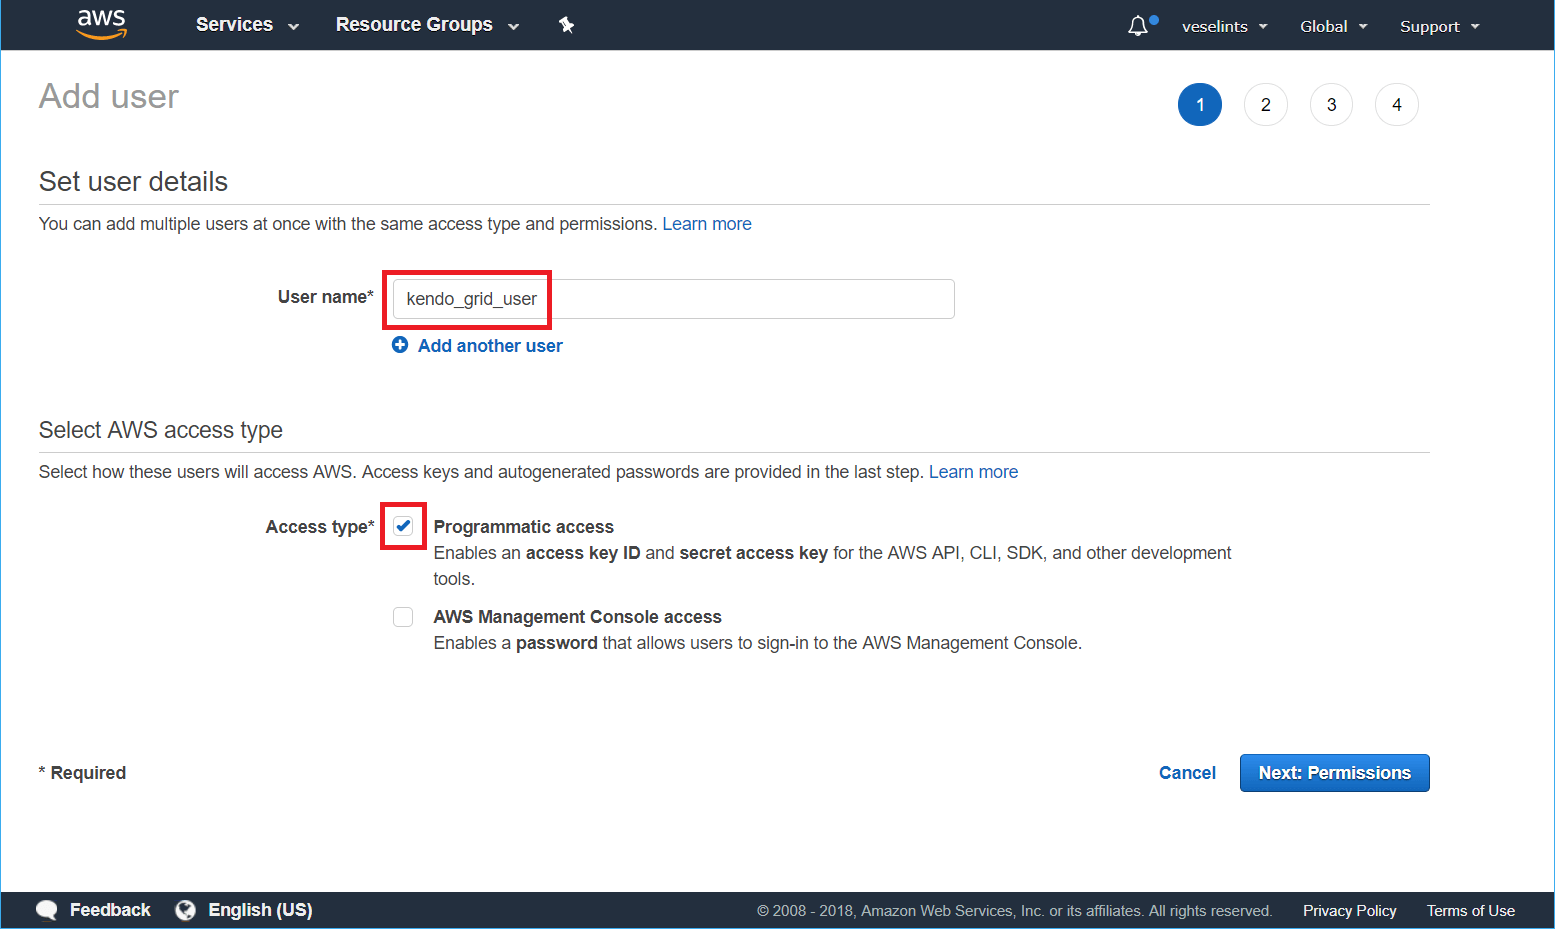
-
Type a user name and check the Programmatic access option—for example,
kendo_grid_user. Click Next: Permissions.Figure 1: Adding a new user
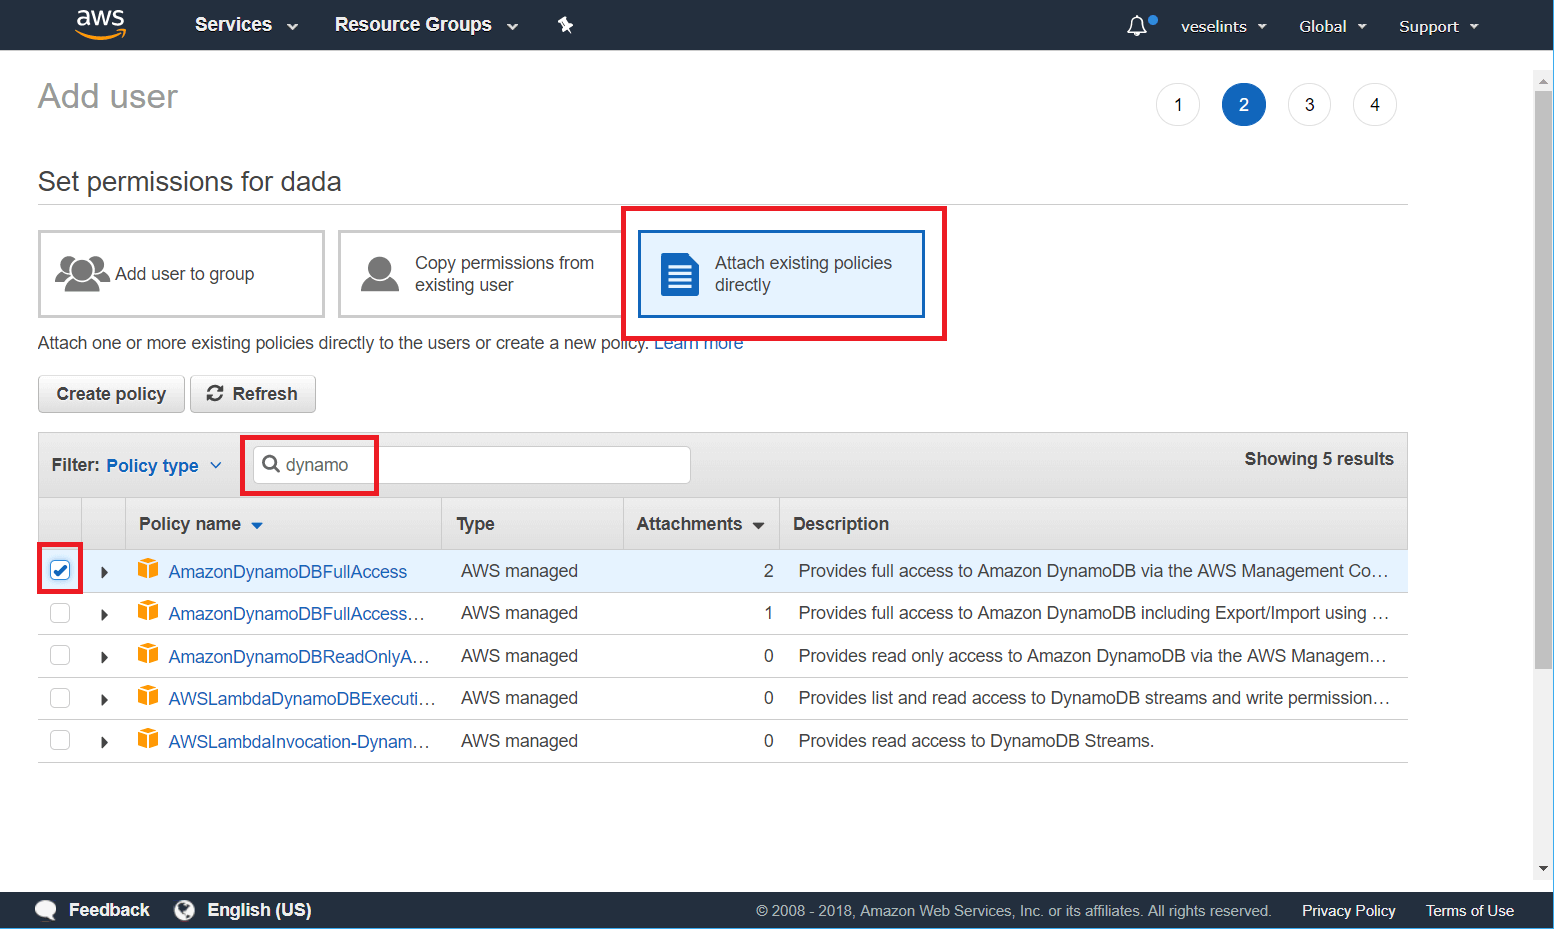
-
On the permissions step, select Attach existing policies directly. In the search field, type
dynamodband check the AmazonDynamoDBFullAccess option in the table. Click Next: Review > Create user.Figure 2: Configuring the user permissions
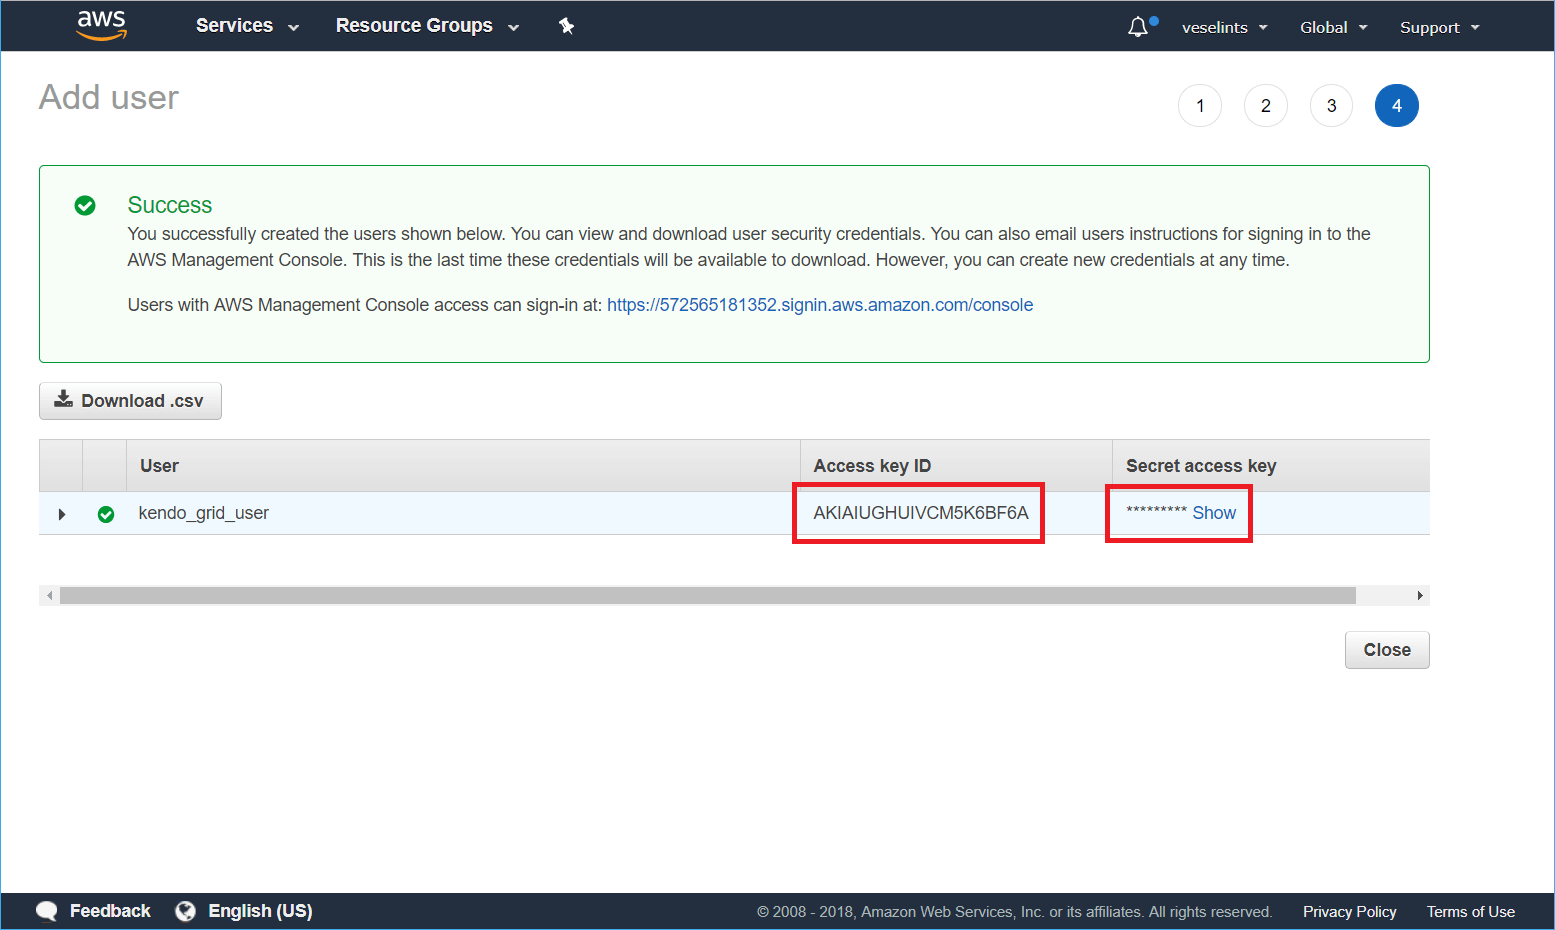
-
From the summary view of the newly created user, copy the
Access key IDand theSecret access key.Figure 3: Getting the user credentials
Configuring the Grid for Consuming and Manipulating Available DynamoDB Data
- Configure the page to load AWS SDK, jQuery, and Kendo UI, and authenticate the proper AWS user
- Configure the Kendo UI Grid and the service
Configuring the AWS SDK, jQuery, and Kendo UI Loading and User Authentication
- In the
<head>of your HTML page, load the Kendo UI styles. - Load the Amazon AWS SDK, jQuery, and Kendo UI scripts.
- Configure the AWS authentication by using the user that is already created.
<head>
  <meta charset="utf-8">
  <title>Kendo Grid DynamoDB Integration</title>

  <link rel="stylesheet" href="https://kendo.cdn.telerik.com/themes/10.0.1/default/default-main.css" />

  <script src="https://sdk.amazonaws.com/js/aws-sdk-2.221.1.min.js"></script>
  <script src="https://code.jquery.com/jquery-1.12.3.min.js"></script>
  <script src="https://kendo.cdn.telerik.com/2024.4.1112/js/kendo.all.min.js"></script>

  <script>
    AWS.config.update({
      region: "us-east-1",
      endpoint: 'dynamodb.us-east-1.amazonaws.com',
      accessKeyId: [the user access key ID],
      secretAccessKey: [the user secret access key]
    });
  </script>
</head>
Configuring the Grid and the Service
-
In the
<body>of the page, place a<div>element to initialize the Grid from. Add a<button>that will allow you to create a Table in DynamoDB on click.<div id="grid"></div> <button class="k-button" id="btn">Click to create 'Movies' table</button> -
Initialize the AWS DynamoDB client.
var dynamodb = new AWS.DynamoDB(); var docClient = new AWS.DynamoDB.DocumentClient(); -
Implement the handler for the Create movies button click.
$('#btn').on('click', function() { var params = { // Set the name of the table to be created TableName : "Movies", // Configure the KeySchema. In this case the table uses a single key named "id" KeySchema: [ { AttributeName: "id", KeyType: "HASH" } ], // The type of the key attribute is "string" ("S") AttributeDefinitions: [ { AttributeName: "id", AttributeType: "S" } ], ProvisionedThroughput: { ReadCapacityUnits: 5, WriteCapacityUnits: 5 } }; // Send the request for creating new table dynamodb.createTable(params, function(err, data) { if (err) { alert(err.message); } else { alert(data.TableDescription.TableName + " table created!"); } }); }); -
Implement the Grid that will consume the DynamoDB data.
$('#grid').kendoGrid({ editable: { mode: "popup" }, toolbar: ["create"], height: 600, columns: [ { field: "title", title: "Title", width: "15%" }, { field: "release_date", title: "Release", template: "#= kendo.toString(release_date, 'd') #", width: "8%"}, { field: "directors", title: "Directors", width: "10%"}, { field: "actors", title: "Actors", width: "17%"}, { field: "plot", title: "Plot", width: "34%"}, { command: [{ name: "edit" }, { name: "destroy" }] } ], dataSource: { schema: { model: { id: "id", fields: { release_date: { type: "date", validation: { required: true } }, title: { type: "string", validation: { required: true } }, directors: { type: "string", validation: { required: true } }, actors: { type: "string", validation: { required: true } }, plot: { type: "string", validation: { required: true } } } } }, transport: { read: onRead, create: onCreate, update: onUpdate, destroy: onDestroy } } }); -
Implement the
readfunction toscanthe DynamoDB table.function onRead(options) { var params = { TableName: "Movies" }; docClient.scan(params, function(err, data) { if (err) { options.error(err); } else { options.success(data.Items); } }); }; -
To add a new item to the table, use the
createfunction and theputaction. On the client and before the newly created item is sent to the server, assign a newidfor the item.function onCreate(options) { var model = options.data; // Assigning an id to the new item model.id = kendo.guid(); // Date should be saved as an ISO string model.release_date = model.release_date.toISOString(); var params = { TableName: "Movies", Item: model }; docClient.put(params, function(err, data) { if (err) { options.error(err); } else { options.success(model); } }); } -
The
updatefunction alters the properties of an item and uses theupdateaction with anUpdateExpressionstring.function onUpdate(options) { var model = options.data; // The date should be saved as an ISO string model.release_date = model.release_date.toISOString(); var updateArray = []; var updateArrtibutes = {}; // Get all fields and field values in the item for (var property in model) { // Skip the id field as it should be an immutable identifier if (model.hasOwnProperty(property) && property != "id") { updateArray.push(property + " = :" + property); updateArrtibutes[":" + property] = model[property]; } } // Generate the UpdateExpression string var updateExpression = "set " + updateArray.toString(); var params = { TableName: "Movies", Key:{ id: model.id }, UpdateExpression: updateExpression, ExpressionAttributeValues: updateArrtibutes, // Return the modified item ReturnValues:"ALL_NEW" }; docClient.update(params, function(err, data) { if (err) { options.error(err); } else { options.success(data.Attributes); } }); } -
The
destroyfunction removes an item from the DynamoDB table against itsidand uses thedeleteaction.function onDestroy(options) { var model = options.data; var params = { TableName: "Movies", Key:{ id: model.id }, ReturnValues:"ALL_OLD" }; docClient.delete(params, function(err, data) { if (err) { options.error(err); } else { options.success(data.Attributes); } }); }
Now, the Grid has its DataSource properly bound to the Movies DynamoDB table.