Kendo UI for jQuery Scheduler Overview

The Scheduler displays a set of events, appointments, or tasks.

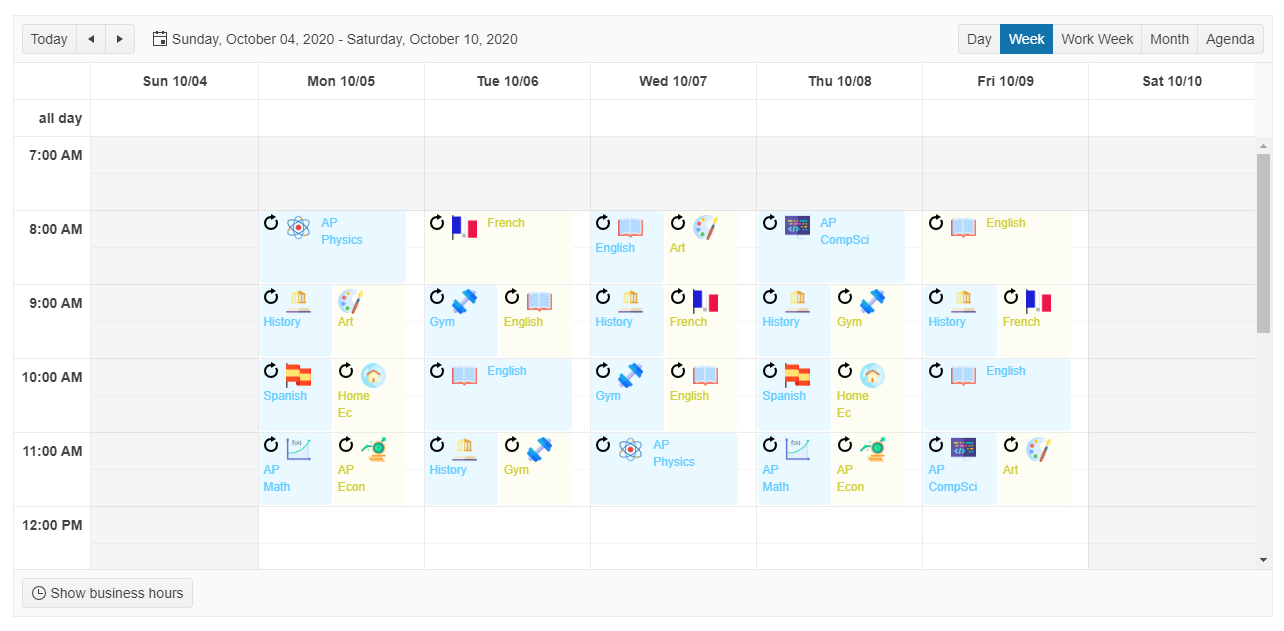
It supports the display of scheduled events in different views—single days, whole weeks, or months, or as a list of tasks which need to be accomplished.

As of the R1 2017 release, exceptions are no longer automatically removed when the user edits a series. Changes that are made to specific occurrences are persisted during series editing. If a series contains an exception, the Scheduler renders a Reset Series button within the Edit dialog of the series which allows the user to reset the series by removing existing exceptions.

As of the Kendo UI 2016 Q2 (2016.2.504) release:

Kendo UI for jQuery Kendoka image

The Scheduler is part of Kendo UI for jQuery, a professional grade UI library with 110+ components for building modern and feature-rich applications. To try it out sign up for a free 30-day trial.

  • The Scheduler substitutes the semicolon (;) as the delimiter type for recurrence exception with the comma (,).
  • The Scheduler no longer adds a trailing delimiter to a recurrence exception.

The change was driven by the RFC 5545 specification. Note that the previously demonstrated behavior had been incorrect.

Initializing the Scheduler

  1. Include the Kendo UI JavaScript and CSS files. For more information, refer to the article on getting started with Kendo UI.
  2. To be initialized, the Scheduler requires its binding to the kendo.data.SchedulerDataSource special type of Kendo UI DataSource. SchedulerDataSource contains instances of the custom kendo.data.SchedulerEvent Kendo UI model which represents the event data items of the Scheduler.

To enable the editing of and working with recurrent events, define all fields of the kendo.data.SchedulerEvent in the schema.model of the data source.

Basic Configuration

The kendo.data.SchedulerEvent object provides the following fields:

  • description String—The text description of the Scheduler event.
  • end Date—The date on which the event ends.
  • id Number—The unique identifier of the Scheduler event. Events whose id is not set are considered new.
  • isAllDay Boolean—Indicates if the event is all day or not.
  • recurrenceException String—The recurrence exceptions.
  • recurrenceId String|Number|Object—The id of the recurrence parent. If set, the current event is a recurrence exception.
  • recurrenceRule String—The recurrence rule which describes the repetition pattern of the event. Follows the rfc5545 specification.
  • start Date—The date on which the event starts.
  • title String—The title of the event which is displayed in the Scheduler views.

When you use the schema.model.fields, list all kendo.data.SchedulerEvent fields. Set the fields which represent the id of the event through the schema.model.id.

If your remote service stores and returns the Scheduler tasks in a different format use the schema.model.fields and schema.model.id options of the data source to describe them.

The following example demonstrates how to map remote service fields to client-side Scheduler event fields.

    schema: {
        model: {
            id: "taskId", // (Mandatory) The "id" of the event is the "taskId" field.
            fields: {
                // Describe the Scheduler event fields and map them to the fields returned by the remote service.
                taskId: {
                    from: "TaskID", // The 'TaskID' server-side field is mapped to the 'taskId' client-side field.
                    type: "number"
                },
                title: {
                    from: "Title", // The 'Title' server-side field is mapped to the 'title' client-side field.
                    defaultValue: "No title",
                    validation: { required: true }
                },
                start: {
                    type: "date",
                    from: "Start" // The 'Start' server-side field is mapped to the 'start' client-side field.
                },
                end: {
                    type: "date",
                    from: "End" // The 'End' server-side field is mapped to the 'end' client-side field.
                },
                description: {
                    from: "Description"
                },
                recurrenceId: { from: "RecurrenceID" },
                recurrenceRule: { from: "RecurrenceRule" },
                recurrenceException: { from: "RecurrenceException" },
                isAllDay: { type: "boolean", from: "IsAllDay" }
            }
        }
    }

Functionality and Features

Methods, Fields, and Events

The Scheduler exposes a set of methods and fields that you can use to configure the component.

<div id="scheduler"></div>
<script>
$("#scheduler").kendoScheduler({
  date: new Date("2013/6/6"),
  dataSource: [
    {
      id: 1,
      start: new Date("2013/6/6 08:00 AM"),
      end: new Date("2013/6/6 09:00 AM"),
      title: "Breakfast"
    }
  ]
});
// Get a reference to the kendo.ui.Scheduler instance.
var scheduler = $("#scheduler").data("kendoScheduler");
scheduler.view("week"); // Go to the Week view.
</script>

The Scheduler also supports a set of events to which you can subscribe. To handle the events, either specify the JavaScript function which will handle the event during the initialization of the component, or use the bind method of the component after initialization.

The event handler is the JavaScript function is invoked when the event is fired. The argument of the event handler is a JavaScript object which contains event specific data. To get a reference to the component which fired the event, use the sender field of the event argument. The function context of the event handler which is available through the this keyword is set to the instance of the component which fired the event.

The following example demonstrates how to subscribe to a Scheduler event during the initialization of the component.

<div id="scheduler"></div>
<script>
$("#scheduler").kendoScheduler({
  date: new Date("2013/6/6"),
  dataSource: [
    {
      id: 1,
      start: new Date("2013/6/6 08:00 AM"),
      end: new Date("2013/6/6 09:00 AM"),
      title: "Breakfast"
    }
  ],
  edit: function(e) {
    console.log("edit");
  }
});
</script>

The following example demonstrates how to subscribe to a Scheduler event by using the bind method.

<div id="scheduler"></div>
<script>
function scheduler_edit(e) {
    console.log("edit");
}
$("#scheduler").kendoScheduler({
  date: new Date("2013/6/6"),
  dataSource: [
    {
      id: 1,
      start: new Date("2013/6/6 08:00 AM"),
      end: new Date("2013/6/6 09:00 AM"),
      title: "Breakfast"
    }
  ]
});
var scheduler = $("#scheduler").data("kendoScheduler");
scheduler.bind("edit", scheduler_edit);
</script>

Referencing Existing Instances

To reference an existing Scheduler instance, use jQuery.data() and then pass kendoScheduler as an argument. Once a reference is established, use the Scheduler API to control its behavior.

<div id="scheduler"></div>
<script>
$("#scheduler").kendoScheduler({
  date: new Date("2013/6/6"),
  dataSource: [
    {
      id: 1,
      start: new Date("2013/6/6 08:00 AM"),
      end: new Date("2013/6/6 09:00 AM"),
      title: "Breakfast"
    }
  ]
});
// Get a reference to the kendo.ui.Scheduler instance.
var scheduler = $("#scheduler").data("kendoScheduler");
</script>

See Also

In this article