ItemTemplate
When binding your RadTreeView to a collection, you are able to configure the visualization of the data and the appearance of the RadTreeViewItems via the ItemTemplate and the ItemTemplateSelector properties.
If you want to read about the ItemTemplateSelector, see the main topic ItemTemplateSelector.
Since the most common scenario is to display hierarchical data with the RadTreeView, this tutorial will show you how to create HierarchicalDataTemplate and set it to the ItemTemplate property of the treeview using the Expression Blend.
The final result should look like the snapshot below:

-
Create a new Silverlight application and perform the following steps:
- Add a RadTreeView in your XAML.
-
Create two empty hierarchical data templates and one empty data template in your application resources as it is shown in the XAML below:
        <UserControl.Resources>

            <DataTemplate x:Key="Team">
                <Grid>
                </Grid>
            </DataTemplate>

            <HierarchicalDataTemplate x:Key="Division">
                <Grid>
                </Grid>
            </HierarchicalDataTemplate>

            <HierarchicalDataTemplate x:Key="League">
                <Grid>
                </Grid>
            </HierarchicalDataTemplate>

        </UserControl.Resources>

        <Grid x:Name="LayoutRoot" Background="White">
            <telerik:RadTreeView x:Name="radTreeView" Margin="8"/>
        </Grid>
-
Open your page in Expression Blend.
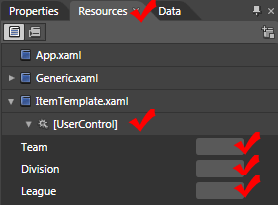
In the Resources window (Window->Resources), in the context of your control you will see the three templates which were declared directly in the XAML on the previous step.
-
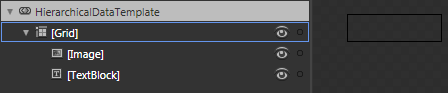
Press the "Edit resource" button (located next to each template) for the League template. This will open the current template for edit. Drag and drop the controls you need for the template and configure their properties. In the example are used an Image and a TextBlock controls:
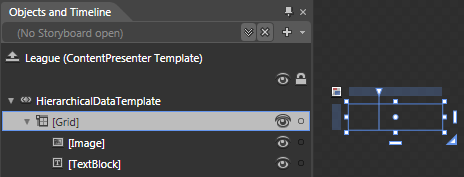
    <HierarchicalDataTemplate x:Key="League" ItemsSource="{Binding Divisions, Mode=OneWay}"
            ItemTemplate="{StaticResource Division}">
        <Grid d:DesignWidth="93" d:DesignHeight="26">
         <Grid.ColumnDefinitions>
          <ColumnDefinition Width="0.323"/>
          <ColumnDefinition Width="0.677"/>
         </Grid.ColumnDefinitions>
         <Image Source="{Binding ImageUrl, Mode=OneWay}"/>
         <TextBlock Margin="0" Grid.Column="1" TextWrapping="Wrap" Text="{Binding Name, Mode=OneWay}"/>
        </Grid>
    </HierarchicalDataTemplate>
To configure the binding for the Source property of the Image control, select it in the "Object and Timeline" pane.
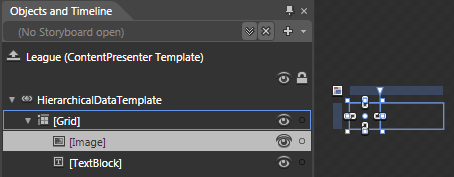
Go to the "Properties" pane and find the Source property in the Common properties section.
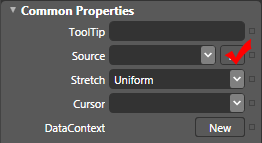
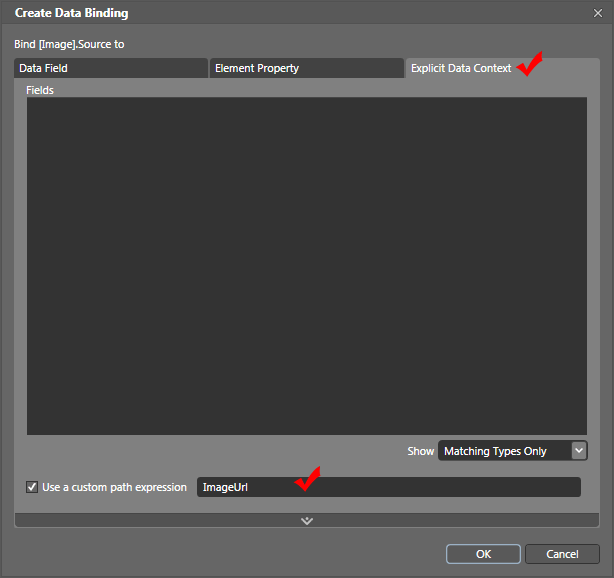
Click the empty square that's on the right of it to open the context menu for the property and choose DataBinding to open the "Create Data Binding" dialog

In the "Create Data Binding" dialog choose the Explicit DataContext tab and check the "Use custom path expression" box. In the field write the name of the property you would like to bind to. Click "Finish".
Do the same for the Text property of the TextBlock.
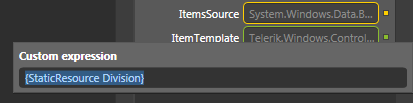
Finally, in the "Object and Timeline" pane, select the HierarchicalDataTemplate:
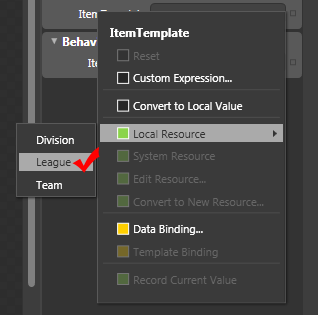
Find and set the following properties in the "Properties" pane:
-
ItemsSource

-
ItemTemplate
Here is the result XAML for the League data template:
<HierarchicalDataTemplate x:Key="League" ItemsSource="{Binding Divisions, Mode=OneWay}" ItemTemplate="{StaticResource Division}"> <Grid d:DesignWidth="93" d:DesignHeight="26"> <Grid.ColumnDefinitions> <ColumnDefinition Width="0.323"/> <ColumnDefinition Width="0.677"/> </Grid.ColumnDefinitions> <Image Source="{Binding ImageUrl, Mode=OneWay}"/> <TextBlock Margin="0" Grid.Column="1" TextWrapping="Wrap" Text="{Binding Name, Mode=OneWay}"/> </Grid> </HierarchicalDataTemplate> -
Perform the same steps for the other two templates - Division and Team.
The final step is to select your treeview and to set the ItemTemplate property:
Here is the final XAML:
<UserControl.Resources>
    <sampleData:RadTreeViewSampleData x:Key="DataSource"/>

    <DataTemplate x:Key="Team">
       <Grid>
            <Grid.ColumnDefinitions>
                <ColumnDefinition Width="0.323"/>
                <ColumnDefinition Width="0.677"/>
            </Grid.ColumnDefinitions>
            <Image Source="{Binding ImageUrl, Mode=OneWay}" Width="16" Height="16"/>
            <TextBlock Margin="0" Grid.Column="1" TextWrapping="Wrap" Text="{Binding Name, Mode=OneWay}"/>
        </Grid>
    </DataTemplate>

    <HierarchicalDataTemplate x:Key="Division"
        ItemsSource="{Binding Teams, Mode=OneWay}"
        ItemTemplate="{StaticResource Team}">
        <Grid>
            <Grid.ColumnDefinitions>
                <ColumnDefinition Width="0.323"/>
                <ColumnDefinition Width="0.677"/>
            </Grid.ColumnDefinitions>
            <Image Source="{Binding ImageUrl, Mode=OneWay}" Width="16" Height="16"/>
            <TextBlock Margin="0" Grid.Column="1" TextWrapping="Wrap" Text="{Binding Name, Mode=OneWay}"/>
        </Grid>
    </HierarchicalDataTemplate>
    <HierarchicalDataTemplate x:Key="League"
        ItemsSource="{Binding Divisions, Mode=OneWay}"
        ItemTemplate="{StaticResource Division}">
        <Grid>
            <Grid.ColumnDefinitions>
                <ColumnDefinition Width="0.323"/>
                <ColumnDefinition Width="0.677"/>
            </Grid.ColumnDefinitions>
            <Image Source="{Binding ImageUrl, Mode=OneWay}" Width="16" Height="16"/>
            <TextBlock Margin="0" Grid.Column="1" TextWrapping="Wrap" Text="{Binding Name, Mode=OneWay}"/>
        </Grid>
    </HierarchicalDataTemplate>
</UserControl.Resources>
<Grid x:Name="LayoutRoot" Background="White">
    <telerik:RadTreeView x:Name="radTreeView" Margin="8"
       ItemsSource="{Binding Source={StaticResource DataSource}, Path=LeaguesDataSource}"
       ItemTemplate="{StaticResource League}" />
</Grid>
The data source class RadTreeViewSampleData assigned to the RadTreeView is covered in greater details in the chapter Binding to Object.