Use IsRecentColorsActive property
This article will show you how to use the IsRecentColorsActive property of the RadColorPicker control.
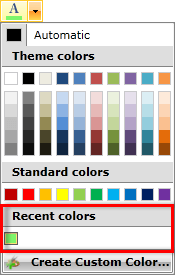
The final result should look like this
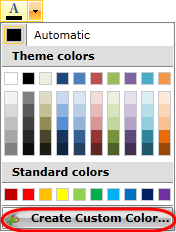
For the purpose of this article we will use the AdditionalContent property of the RadColorPicker control to add a customized button at the bottom of the drop down content. This can be implemented by the following code:
<telerik:RadColorPicker x:Name="xColorPicker" IsRecentColorsActive="True">
    <telerik:RadColorPicker.AdditionalContent>
        <telerik:RadButton Click="RadButton_Click">
            <StackPanel Orientation="Horizontal">
                <Image Width="16"
                       Height="16"
                       Margin="0 0 10 0"
                       Source="palette-add.png" />
                <TextBlock Text="Create Custom Color..." />
            </StackPanel>
        </telerik:RadButton>
    </telerik:RadColorPicker.AdditionalContent>
</telerik:RadColorPicker>
The RecentColors palette is visible when the IsRecentColorsActive property of the RadColorPicker control is set to True and the selected color does not exist in MainPalette, HeaderPalette or StandartPalette.
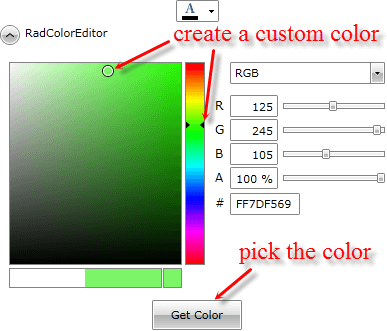
In the button's Click event handler we display a RadExpander control which hosts a RadColorEditor. This layout will be used to customize colors:
<StackPanel>
        <telerik:RadColorPicker x:Name="xColorPicker" IsRecentColorsActive="True">
            <telerik:RadColorPicker.AdditionalContent>
                <telerik:RadButton Click="RadButton_Click">
                    <StackPanel Orientation="Horizontal">
                        <Image Width="16"
                               Height="16"
                               Margin="0 0 10 0"
                               Source="palette-add.png" />
                        <TextBlock Text="Create Custom Color..." />
                    </StackPanel>
                </telerik:RadButton>
            </telerik:RadColorPicker.AdditionalContent>
        </telerik:RadColorPicker>

        <telerik:RadExpander x:Name="xExpander"
                             Width="400"
                             Header="RadColorEditor"
                             Opacity="0">
            <StackPanel>
                <telerik:RadColorEditor x:Name="xColorEditor"
                                        Width="400"
                                        Height="250"
                                        HorizontalAlignment="Center" />
                <telerik:RadButton Width="90"
                                   Height="30"
                                   Click="OK_RadButton_Click"
                                   Content="Get Color" />
            </StackPanel>
        </telerik:RadExpander>
    </StackPanel>
private void RadButton_Click(object sender, RoutedEventArgs e)
{
    this.xColorPicker.IsDropDownOpen = false;
    this.xExpander.Opacity = 1;
    this.xExpander.IsExpanded = true;
}
Private Sub RadButton_Click(sender As Object, e As RoutedEventArgs)
    Me.xColorPicker.IsDropDownOpen = False
    Me.xExpander.Opacity = 1
    Me.xExpander.IsExpanded = True
End Sub
Finally in the confirmation's button Click event handler we implement the selection logic of the customized color.
private void OK_RadButton_Click(object sender, RoutedEventArgs e)
{
    this.xColorPicker.SelectedColor = this.xColorEditor.SelectedColor;
    this.xExpander.IsExpanded = false;
    this.xExpander.Opacity = 0;
    this.xColorPicker.IsDropDownOpen = true;
}
Private Sub OK_RadButton_Click(sender As Object, e As RoutedEventArgs)
    Me.xColorPicker.SelectedColor = Me.xColorEditor.SelectedColor
    Me.xExpander.IsExpanded = False
    Me.xExpander.Opacity = 0
    Me.xColorPicker.IsDropDownOpen = True
End Sub
Now we are able to run the project and select a custom color following these steps:
Click the "Create Custom Color" button.
Create a customized color using the thumbs and pick it.
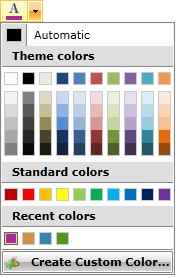
Your custom color will be added to the RecentColors palette.