Delayed Display
When using the RadBusyIndicator in your applications you can notify the users about an ongoing process with a specific delay. By changing the DisplayAfter property to a certain TimeSpan, the RadBusyIndicator is shown after the corresponding amount of time elapses.
The default value of this delay is 100 milliseconds but you can easily change it in XAML or code-behind.
The following example will create a RadBusyIndicator and its only content will be a Button. When this Button is pressed the RadBusyIndicator will be activated after the predefined delay time.
First you have to declare the controls in XAML or code-behind:
Defining RadBusyIndicator and a Button as content
<telerik:RadBusyIndicator x:Name="radBusyIndicator"
                          DisplayAfter="00:00:05">
    <Grid>
        <Button Content="Show RadBusyIndicator"
                VerticalAlignment="Bottom"
                Click="showIndicatorButton_Click"/>
    </Grid>
</telerik:RadBusyIndicator>
Notice that the DisplayAfter property is of type TimeSpan. Considering this fact, in this example you have to set the RadBusyIndicator to be delayed with 5 seconds (00:00:05).
Finally, in the code-behind you have to handle the click event for the button and activate the RadBusyIndicator control:
To read more about enabling the RadBusyIndicator look here.
Enable RadBusyIndicator
private void showIndicatorButton_Click( object sender, RoutedEventArgs e )
{
    this.radBusyIndicator.IsBusy = true;
}
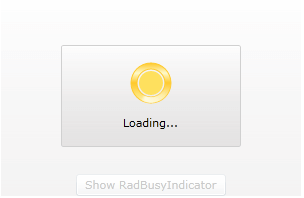
As a result when the user clicks on a button after a delay of five seconds, the RadBusyIndicator will be displayed:

RadBusyIndicator also gives you a read-only boolean property - IsBusyIndicationVisible. Its value will be equal to True whenever the RadBusyIndicator is enabled and visualized.To check whether the RadBusyIndicator is enabled, you can observe its IsBusy boolean property.