Installing UI for Silverlight from a NuGet package
The following topic describes what steps you should perform in order to install Telerik UI for Silverlight from a NuGet package.
We’re providing a common NuGet package containing all the assemblies from the UI for Silverlight suite as well as separate packages for the different assemblies. It is up to you to decide which one is more suitable for your project.
The provided NuGet packages contain either NoXaml binaries or XAML binaries. Check the Setting a Theme (Using Implicit Styles) help topic for more details on the NoXaml binaries and Implicit Styles.
We will go through the following sections:
Downloading the NuGet packages
In order to download the latest NuGet packages, follow the instructions below:
Go to to the UI for Silverlight download page following the instructions in Download Product Files topic.
Download the needed NuGet .zip file depending on whether you're using Xaml or NoXaml binaries and extract it into the folder where your Telerik NuGet packages are located.
Installing Silverlight Controls Package
The next steps show how to install the complete NuGet package which includes all the assemblies.The approach is the same for the separate packages.
Once you open the “Manage NuGet Packages” dialog in Visual Studio (right-click Project References -> Manage NuGet Packages), you can select the Telerik NuGet folder and the available packages there will be shown:
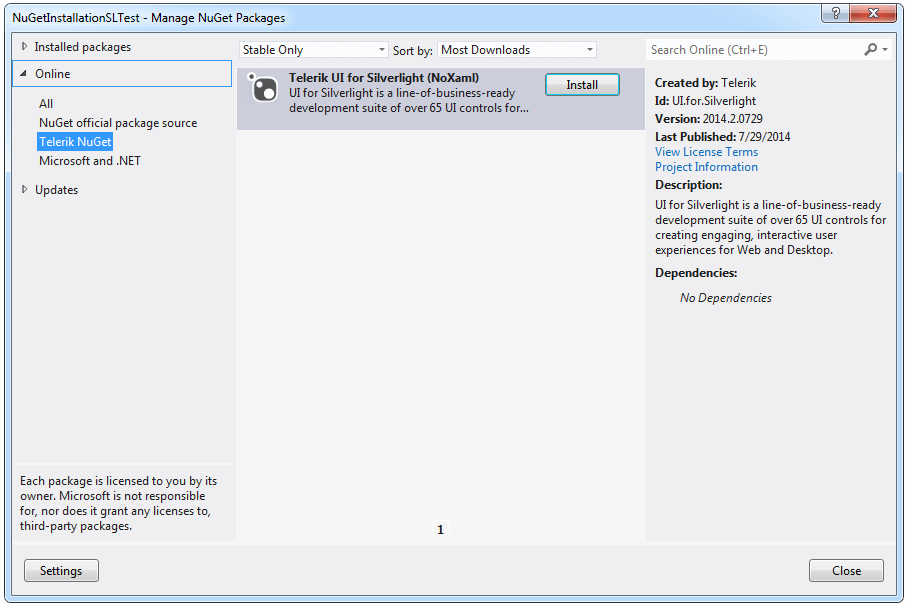
If you haven’t set the Telerik NuGet folder until now, you can do it by clicking Settings button on the “Manage NuGet Packages” dialog, then add the folder where you’ve extracted the .nupkg file (for example C://Telerik NuGet) as a new package source inside the Options dialog:
Click the “Install” button and the references will be automatically added to your project as shown below: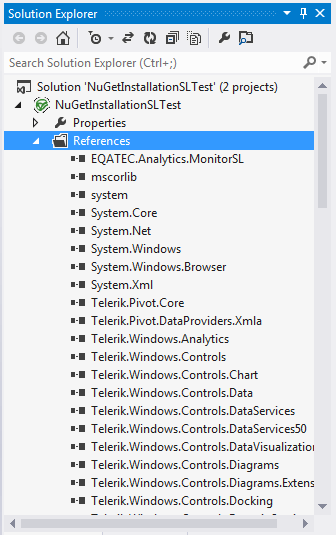
You can now use the Telerik Silverlight controls in your project.
Additionally, you can create a private NuGet Feed and deploy the Telerik NuGet packages there - for more details refer to this blog post.
Add the Telerik NuGet Server
Through the Telerik NuGet Server users can easily include the Telerik UI for Silverlight suite and update to latest official version without having to log into their Telerik account. The following steps will demonstrate how this can be done in Visual Studio.
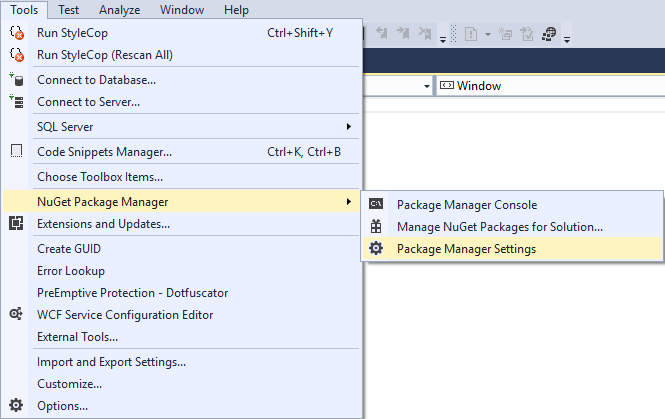
1.Navigate to the Package Manager Settings menu.
2.Add new source in the Package Sources section.
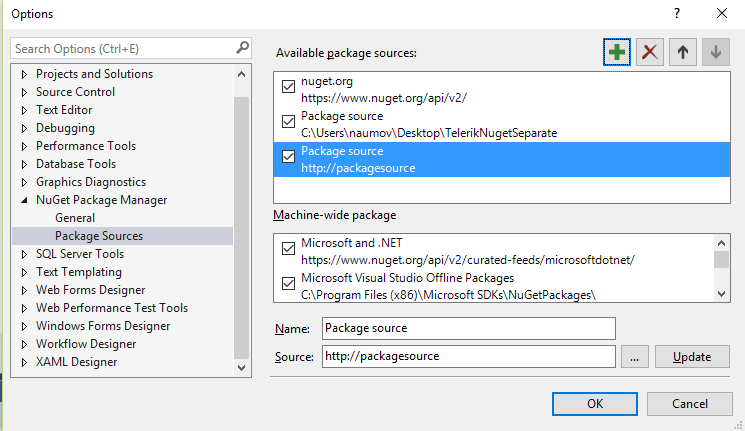
3.In the Source field fill the address of the Telerik NuGet Server and click Update
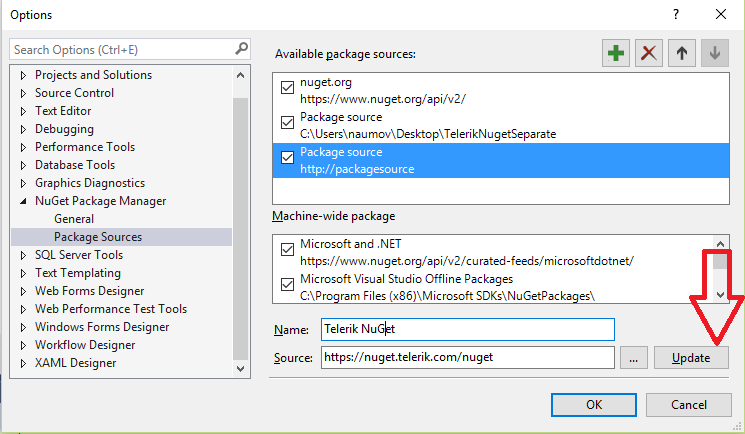
4.The Telerik Server is added and ready to use. Click on the Manage NuGet Packages menu.
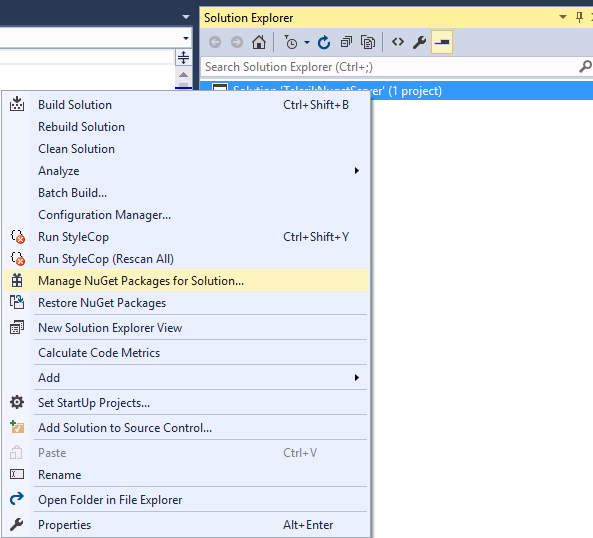
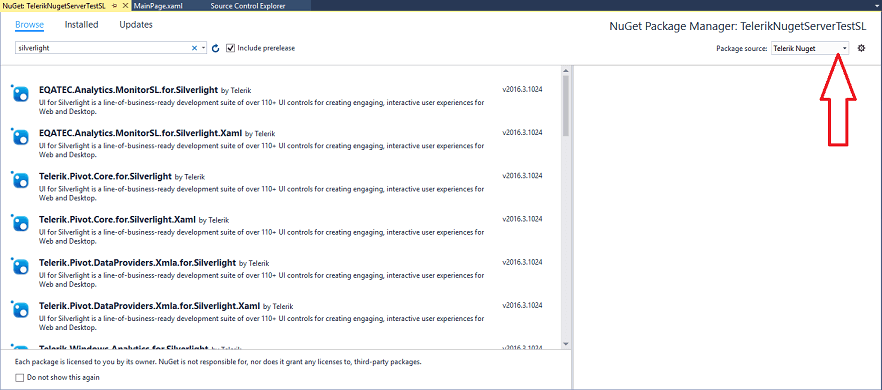
5.Set the Telerik Server as a package source. Enter user credentials when prompted and search for the needed package.
