Getting Started with Silverlight Wizard
This tutorial will walk you through the creation of a sample application that contains a RadWizard control.
Assembly References
In order to use the RadWizard control in your projects you have to add references to the following assemblies:
- Telerik.Windows.Controls
-
Telerik.Windows.Controls.Navigation
You can find the required assemblies for each control from the suite in the Controls Dependencies help article.
Adding RadWizard to the Project
You can add RadWizard in XAML or in code. You can also add the control by dragging it from the Toolbox.
Example 1: Adding a RadWizard in XAML
<telerik:RadWizard x:Name="wizard" />
In order to use RadWizard you should define the following namespace: xmlns:telerik="http://schemas.telerik.com/2008/xaml/presentation"
Example 2: Adding a RadWizard in code
RadWizard wizard = new RadWizard();
Private wizard As RadWizard = New RadWizard()
Adding pages to RadWizard
To add pages to RadWizard you can use its WizardPages collection, which consists of WizardPage elements. Here is an example of defining a page in code and in xaml:
Example 3: Adding a WizardPage in XAML
<telerik:RadWizard x:Name="radWizard" >
    <telerik:RadWizard.WizardPages>
        <telerik:WizardPage Content="My Wizard Page Content" />
    </telerik:RadWizard.WizardPages>
</telerik:RadWizard>
Example 4: Adding WizardPages in code
wizard.WizardPages.Add(new WizardPage() { Content = "My Wizard Page Content" });
wizard.WizardPages.Add(New WizardPage() With {.Content ="My Wizard Page Content"})
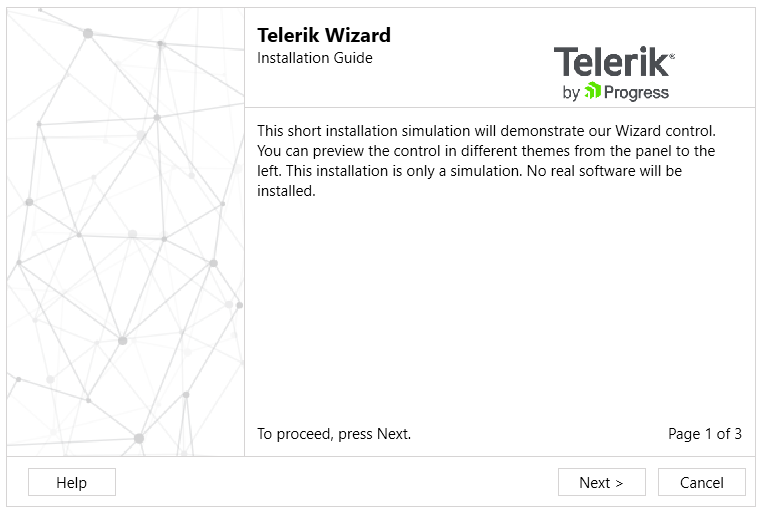
Figure 1: RadWizard with WizardPage

For more information on how to control the visualization of the buttons, check out the Wizard Buttons article.
Setting a Theme
The controls from our suite support different themes. You can see how to apply a theme different than the default one in the Setting a Theme help article.
Changing the theme using implicit styles will affect all controls that have styles defined in the merged resource dictionaries. This is applicable only for the controls in the scope in which the resources are merged.
To change the theme, you can follow the steps below:
Choose between the themes and add reference to the corresponding theme assembly (ex: Telerik.Windows.Themes.Windows8.dll). You can see the different themes applied in the Theming examples from our Silverlight Controls Examples application.
-
Merge the ResourceDictionaries with the namespace required for the controls that you are using from the theme assembly. For RadWizard, you will need to merge the following resources:
- Telerik.Windows.Controls
- Telerik.Windows.Controls.Navigation
Example 5 demonstrates how to merge the ResourceDictionaries so that they are applied globally for the entire application.
Example 5: Merge the ResourceDictionaries
    <Application.Resources>
        <ResourceDictionary>
            <ResourceDictionary.MergedDictionaries>
                <ResourceDictionary Source="/Telerik.Windows.Themes.Windows8;component/Themes/System.Windows.xaml"/>
                <ResourceDictionary Source="/Telerik.Windows.Themes.Windows8;component/Themes/Telerik.Windows.Controls.xaml"/>
                <ResourceDictionary Source="/Telerik.Windows.Themes.Windows8;component/Themes/Telerik.Windows.Controls.Navigation.xaml"/>
            </ResourceDictionary.MergedDictionaries>
        </ResourceDictionary>
    </Application.Resources>
Figure 2 shows RadWizard with the Windows8 theme applied.
Figure 2: RadWizard with the Windows8 theme