Getting Started Overview
This tutorial will walk you through creating a Web page that uses RadDock controls. It shows how to:
Use RadDockLayout to ensure that docking layouts persist after a postback.
Use RadDockZone to provide a docking area for RadDock controls.
Add content to the RadDock controls.
Use RadDock properties to control where the RadDock control can appear.
Here is a detailed list of steps:
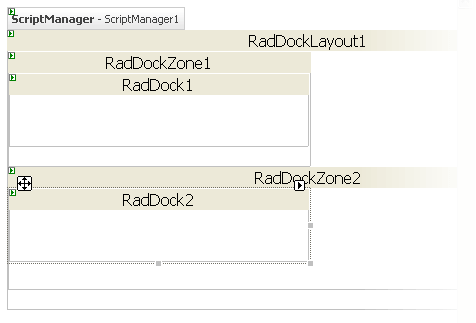
Drag a RadDockLayout component from the toolbox onto your Web page. The RadDockLayout component is responsible for ensuring that the layout of the RadDock controls on your page is maintained after any postbacks. This happens automatically, as long as the RadDock and RadDockZone controls are created inside the RadDockLayout control.
-
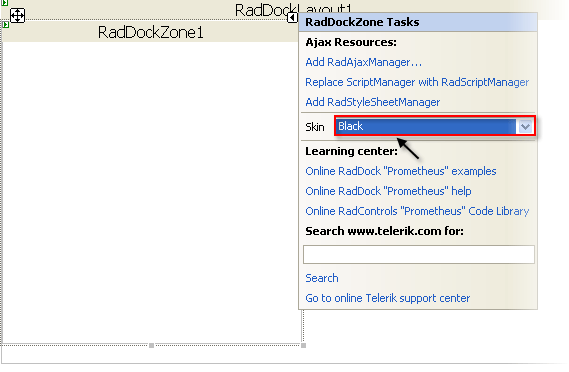
Drag a RadDockZone control from the toolbox onto the surface of the RadDockLayout component. The RadDockZone Smart Tag should appear automatically. In the Smart Tag, set the Skin property to "Black":
-
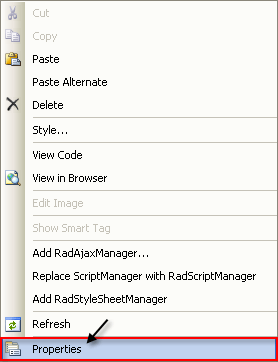
Right-click the RadDockZone, and choose Properties from its context menu:
-
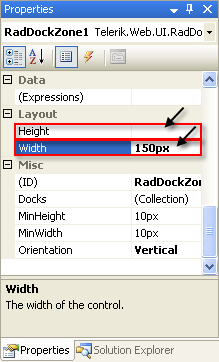
In the properties pane for the RadDockZone control, set the Height property to an empty string and the width property to "150px":
-
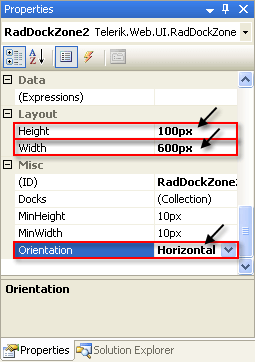
Drag a second RadDockZone control into the RadDockLayout. Using the properties pane,
- Set its Height property to "100px".
- Set its Width property to "600px".
- Set its Orientation property to "Horizontal".
-
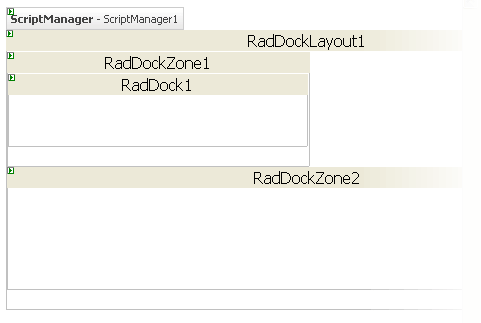
Drag a RadDock control from the toolbox into the first RadDockZone:
-
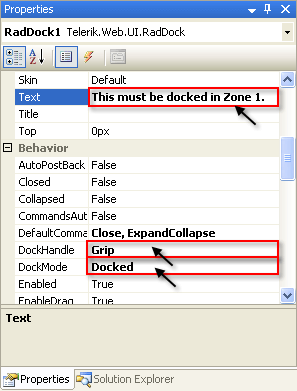
Use the properties pane to set:
- the Text property to "This must be docked in Zone 1."
- the DockHandle property to "Grip". This replaces the default title bar and command buttons with a simple grip control.
- the DockMode property to "Docked". This restricts the RadDock control so that it must be docked in a dock zone.
-
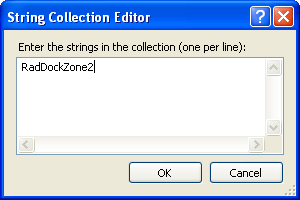
Click the ellipsis button on the ForbiddenZones property to bring up the String Collection Editor. In the String Collection Editor, add a single string, "RadDockZone2". The ForbiddenZones collection holds the UniqueName properties of all dock zones where the RadDock control can't be docked. By adding "RadDockZone2" to this collection, you ensure that the RadDock control can't be docked in the second dock zone. Because its DockMode property is "Docked", this means that the only place the RadDock control can reside is docked in the remaining dock zone, RadDockZone1.
-
Drag a second RadDock control from the toolbox into the second RadDockZone control (RadDockZone2).
-
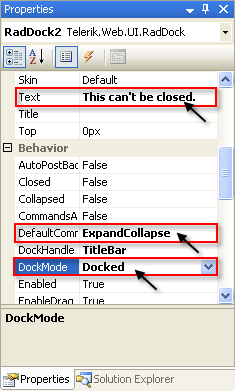
On the second RadDock control
- Set the Text property to "This can't be closed."
- Set the DefaultCommands property to "ExpandCollapse". This specifies that the title bar for the RadDock control contains a single icon, for expanding or collapsing the RadDock window.
- Set the DockMode property to "Docked". This restricts the RadDock control so that it can only be placed in one of the two dock zones.
-
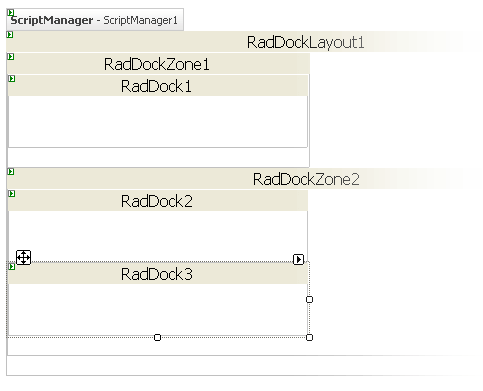
Drag a third RadDock control from the toolbox onto the second RadDock zone:
-
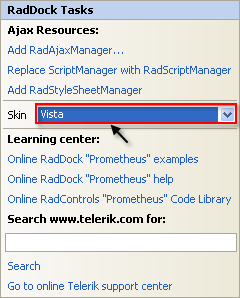
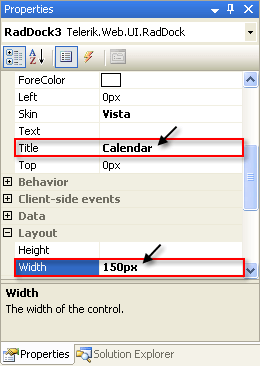
Using the Smart Tag that appears automatically when you place the RadDock control, set its Skin to "Vista".
-
In the properties pane for this RadDock control, set the Title property to "Calendar" and the Height property to "150px":
-
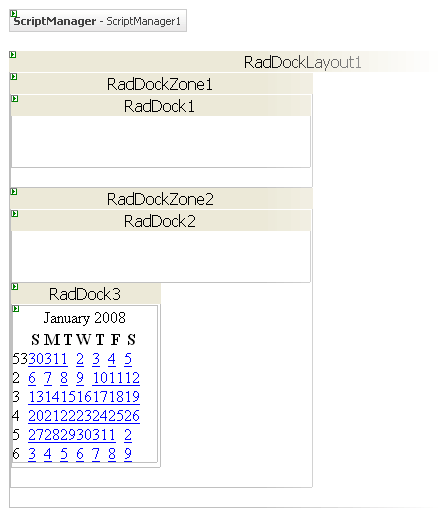
Drag a RadCalendar control from the toolbox onto the surface of the RadDock control:
-
On the Source view for the Web page, surround the declaration for the RadCalendar control between a
<ContentTemplate>tag and a</ContentTemplate>tag:ASP.NET
<telerik:RadDock
   ID="RadDock3"
   runat="server"
   Skin="Vista"
   Title="Calendar"
   Width="150px">
<ContentTemplate>
  <telerik:RadCalendar RenderMode="Lightweight" ID="RadCalendar1" runat="Server" />
</ContentTemplate>
</telerik:RadDock>
Known issue - There is a problem with the ContentTemplate tag when a control is added inside the RadDock at design time. The ContentTemplate tag disappears and should be added manually.
-
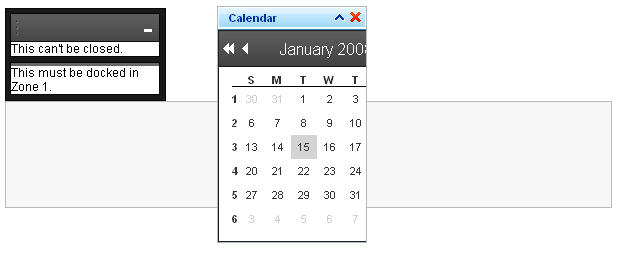
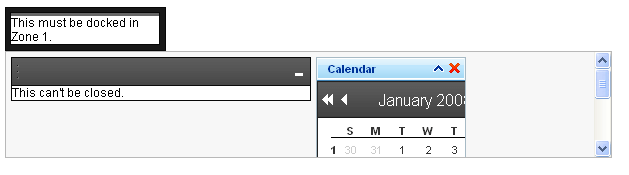
Run the application. Note that the appearance of the two dock zones differs, reflecting the different skins you assigned. The RadDock controls inherit the skin of their parent RadDockZone, except for the third RadDock control, where you explicitly set the Skin property. The second RadDockZone control has scrollbars because the Height property is not sufficient to display all of its docked windows:
-
Experiment with the drag-and-drop behavior of the RadDock controls:
- Click the mouse on the title bar of the second RadDock control. Try to drag it onto the space between the two dock zones. Note that it snaps back to its starting point.
- Drag the second RadDock control into the first dock zone. It can move to the new position because it is in a dock zone. The dock zone expands to hold the new control, because its Height property is not set.
- Try to drag the first RadDock control into the second dock zone. It snaps back because the second dock zone is in its ForbiddenZones list.
- Drag the first RadDock control around the first dock zone. you can change its position in the first dock zone.
- Drag the third RadDock control. Note that you can drop it anywhere on the page, not just in the dock zones. When you drop it in the dock zones, it is moved to a position in the horizontal or vertical layout.