Configuring the Embedded Time View
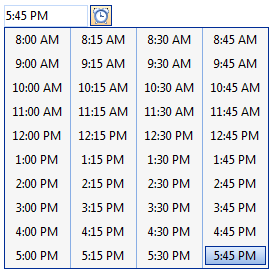
By default, the embedded RadTimeView control that the RadDateTimePicker control displays as a popup has a header area that says "Time Picker", and three columns of times that the user can select. The times range from 12:00 AM through 11:00 PM, with an entry for every hour:

To change the text of the header, set the HeaderText property. If you set HeaderText to an empty string, the header does not appear. You can also hide the header by setting the ShowHeader property.
To change the range of times displayed, use the StartTime and EndTime properties.
To change the interval between adjacent times in the time view, set the Interval property. The valid values are between StartTime and EndTime and less than EndTime - StartTime.
To change the number of columns, set the Columns property.
You can set these properties at design time by expanding the TimeView property:
<telerik:RadDateTimePicker RenderMode="Lightweight" ID="RadDateTimePicker1" runat="server" Skin="Default">
    <TimeView Skin="Default"
        ShowHeader="False"
        StartTime="08:00:00"
        Interval="00:15:00"
        EndTime="18:00:00"
        Columns="4">
    </TimeView>
</telerik:RadDateTimePicker>
RadDateTimePicker custom values
RadDateTimePicker allows displaying custom pre-defined time values. This feature is controlled by the CustomTimeValues property that the TimeView of the time picker exposes. The CustomTimeValues is of type object and accepts:
-
A string array where each string represents a given time value. The separator for the various time parts can be a column, a dash or a semi-column. Each string time value can contains:
- day, hour, minutes, seconds, milliseconds
- hour, minutes, seconds, milliseconds
- hour, minutes, seconds
- hour, minutes
A TimeSpan array with the custom-defined time values.
A DateTime array containing the user-specified time values.
Here is an example how to set the value of the property
Using a string array:
protected void SetCustomValuesByStringArray()
{
    RadDateTimePicker1.TimeView.CustomTimeValues = new string[] { "12,10,10,57,4", "5,6,3,38,9", "3,8,11,5,7" };
}
Protected Sub SetCustomValuesByStringArray()
    RadDateTimePicker1.TimeView.CustomTimeValues = New String() {"12,10,10,57,4", "5,6,3,38,9", "3,8,11,5,7"}
End Sub
Using TimeSpan array:
protected void SetCustomValuesByTimeSpansArray()
{
    RadDateTimePicker1.TimeView.CustomTimeValues = new TimeSpan[] { new TimeSpan(12, 10, 10), new TimeSpan(5, 6, 3), new TimeSpan(3, 8, 11) };
}
Protected Sub SetCustomValuesByTimeSpansArray()
    RadDateTimePicker1.TimeView.CustomTimeValues = New TimeSpan() {New TimeSpan(12, 10, 10), New TimeSpan(5, 6, 3), New TimeSpan(3, 8, 11)}
End Sub
Using DateTime array:
protected void SetCustomValuesByDateTimeArray()
{
    RadDateTimePicker1.TimeView.CustomTimeValues = new DateTime[] { new DateTime(2012, 12, 15, 12, 10, 10), new DateTime(2012, 12, 15, 5, 6, 3), new DateTime(2012, 12, 15, 3, 8, 11) };
}
Protected Sub SetCustomValuesByDateTimeArray()
    RadDateTimePicker1.TimeView.CustomTimeValues = New DateTime() {New DateTime(2012, 12, 15, 12, 10, 10), New DateTime(2012, 12, 15, 5, 6, 3), New DateTime(2012, 12, 15, 3, 8, 11)}
End Sub
To enable scrolling for the TimeView you can set its Width and Height properties:
<telerik:RadDateTimePicker RenderMode="Lightweight" runat="server" ID="RadDateTimePicker2">
    <TimeView Width="100px" Height="200px" Interval="00:15:00"
    Columns="5"></TimeView>
</telerik:RadDateTimePicker>
You can also configure the embedded time view control at runtime:
protected void Page_Load(object sender, EventArgs e)
{
    if (!IsPostBack)
    {
        RadDateTimePicker1.TimeView.StartTime = new TimeSpan(8, 0, 0);
        RadDateTimePicker1.TimeView.EndTime = new TimeSpan(18, 0, 0);
        RadDateTimePicker1.TimeView.Interval = new TimeSpan(0, 15, 0);
        RadDateTimePicker1.TimeView.HeaderText = "";
        RadDateTimePicker1.TimeView.Columns = 4;
    }
}
Protected Sub Page_Load(ByVal sender As Object, ByVal e As EventArgs) Handles Me.Load
    If Not IsPostBack Then
        RadDateTimePicker1.TimeView.StartTime = New TimeSpan(8, 0, 0)
        RadDateTimePicker1.TimeView.EndTime = New TimeSpan(18, 0, 0)
        RadDateTimePicker1.TimeView.Interval = New TimeSpan(0, 15, 0)
        RadDateTimePicker1.TimeView.HeaderText = ""
        RadDateTimePicker1.TimeView.Columns = 4
    End If
End Sub