How to: Model Flat Inheritance with the Visual Designer
This article is relevant to entity models that utilize the deprecated Visual Studio integration of Telerik Data Access. The current documentation of the Data Access framework is available here.
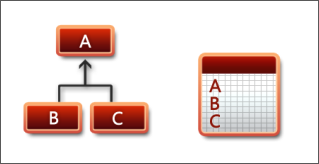
With flat mapping, fields from the subclasses are mapped to a superclass table. Flat mapping is the simplest and is usually the fastest option. In Flat mapping, the entire class hierarchy is persisted to a single table. That includes everything from an interface/abstract class at the top, all the way down to implementation classes at the bottom. Also you need to provide a "discriminator" column to tell Telerik Data Access which rows for which classes are.
This topic demonstrates how to implement flat inheritance mapping with the Telerik Data Access Visual Designer.
- Create a new empty console application in Visual Studio.
- For this walkthrough, you will need to create a new empty database named AnimalKingdom on your server.
-
Add a new Telerik Data Access Domain Model to your project. Name the domain model AnimalKingdomDomainModel. In the Select Domain Model Type Dialog, select the Empty Domain Model option.
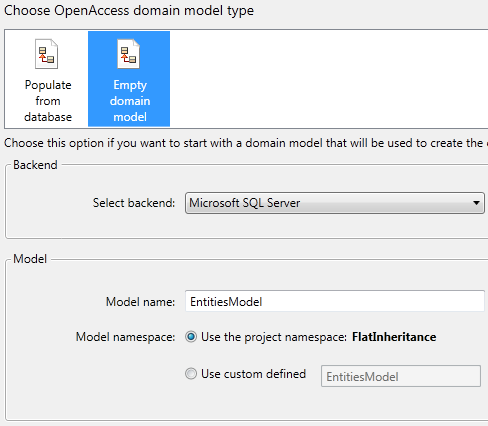
Click Finish to generate empty model. The next several steps demonstrate how to create a sample inheritance hierarchy in the Visual Designer.
- If the generated domain model is not opened in the Visual Designer, double click it in the Solution Explorer to open it.
-
Next, you have to declare several entities in the Visual Designer. To add a new entity in the design surface, open the Toolbox and drag the Domain Class item onto the design surface. To add a new property to a domain class, right-click the target domain class, point to Add, and then click Property. Another way to add a new property is to right-click the Properties section in the domain class, and then select Add new Property. Add four entities with the following characteristics:
-
Animal - this will be the base class in the hierarchy. It exposes the following properties:
-
AnimalId - this is the primary key for the entity. The type of this property is Int32. The Identity property of AnimalId is set to True.
- Name - the type of this property is String.
-
AnimalId - this is the primary key for the entity. The type of this property is Int32. The Identity property of AnimalId is set to True.
-
Dog - derives from Animal. You don't have to specify a primary key for the Dog class, because it is a subclass in a flat inheritance hierarchy. The class exposes the following properties:
- Age - the type of this property is Int32.
-
Cat - derives from Animal. You don't have to specify a primary key for the Cat class, because it is a subclass in a flat inheritance hierarchy. The class exposes the following properties:
- LivesLeft - the type of this property is Int32.
-
WienerDog - derives from Dog. You don't have to specify a primary key for the WienerDog class, because it is a subclass in a flat inheritance hierarchy. The class exposes the following properties:
- Length - the type of this property is Decimal.
-
Animal - this will be the base class in the hierarchy. It exposes the following properties:
-
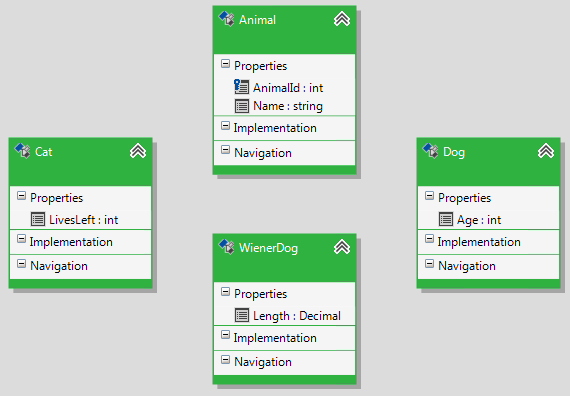
Finally, your model should look like the snapshot below.
The next step is to define inheritance associations. For that purpose, open the Toolbox pane (from the main menu, point View and select Toolbox). Select the Inheritance item.
- Select the objects to be included in the inheritance by clicking the derived entity first (Dog or Cat) on the design surface and then clicking the base entity on the design surface (Animal). Do the same for the WienerDog entity. However, it must derive from the Dog entity.
-
When you specify all inheritance relationships, your model should look like the snapshot below:
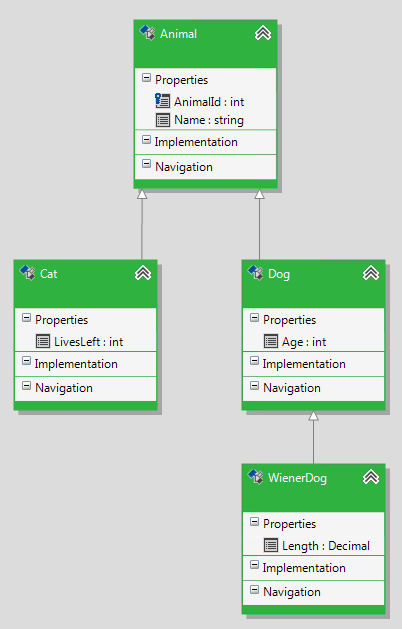
When modelling a flat inheritance, a primary key is specified only for the root class of the hierarchy. In this demo, this is the Animal class.
- Next, you have to change the inheritance strategy for all subclasses. When you create flat mapping, a discriminator column in the table of the topmost class is required. This column is auto-generated by Telerik Data Access. Its name is voa_class. Now, you have to specify an unique discriminator value for each of the classes or you could use the Class Full Name as a discriminator value.
-
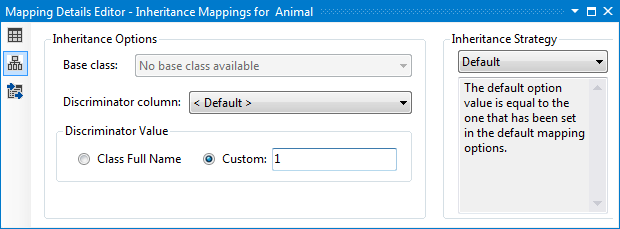
Select the Animal entity in the Visual Designer and open the Mapping Details Editor. Navigate to the Inheritance Mappings section. Set the Discriminator Value option to Custom and specify its value to 1. The inheritance strategy for the base class should be set to Default.
-
Select the Cat entity in the Visual Designer and open the Mapping Details Editor. Navigate to the Inheritance Mappings section. Set the Discriminator Value option to Custom and specify its value to 2. Change the Inheritance Strategy to Flat

-
Select the Dog entity in the Visual Designer and open the Mapping Details Editor. Navigate to the Inheritance Mappings section. Set the Discriminator Value option to Custom and specify its value to 3. Change the Inheritance Strategy to Flat.

-
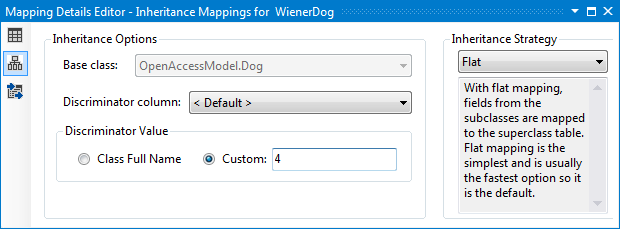
Select the WienerDog entity in the Visual Designer and open the Mapping Details Editor. Navigate to the Inheritance Mappings section. Set the Discriminator Value option to Custom and specify its value to 4. Change the Inheritance Strategy to Flat.
-
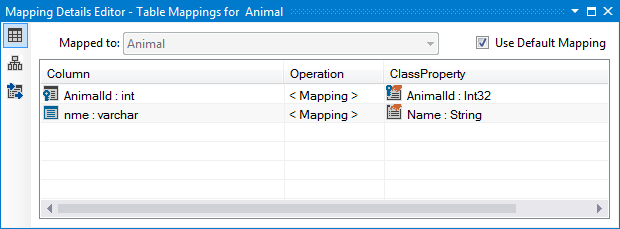
The next step is to map all entities to tables. Select the Animal entity in the Visual Designer and open the Mapping Details Editor (View->Other Windows->Entity Diagrams Details Editor). In the Table Mappings section, check the Use Default Mapping option. With flat mapping, fields from the subclasses are mapped to a superclass table. Or in other words, the Cat, Dog and WienerDog entities are automatically mapped to the Animal table.
The only step left is to update the database with the changes made so far to the model. To do so, rebuild the project and start the Update Database from Model Wizard wizard (right-click on an empty area in the Visual Designer and choose Update Database from Model). In the Setup Database Connection dialog specify a connection string to the AnimalKingdom database which was created on step 2. On the second page of the wizard, you need to select the Create Database strategy. On the Summary Page (the third page), you could review the generated script and execute it. Execute the script. For more information about the Update Database from Model wizard, take a look at How to: Update an Existing Database Schema.
-
Spend some time to analyze the generated script. The generated script should be similar to the SQL script listed below:
-- FlatInheritanceDemo.Animal CREATE TABLE [animal] ( [animal_id] INT NOT NULL, -- animalId [nme] varchar(255) NULL, -- name [voa_class] varchar(255) NOT NULL, -- <internal-class-id> [lives_left] INT NULL, -- Cat.livesLeft [age] INT NULL, -- Dog.age [lngth] NUMERIC(20,10) NULL, -- WienerDog.length CONSTRAINT [pk_animal] PRIMARY KEY ([animal_id]) ) GO -
Execute the generated script. Now you are ready to start working with your domain model.
using (EntitiesModel dbContext = new EntitiesModel())
{
   Dog d = new Dog();
   d.Age = 100;
   d.AnimalId = 1;
   d.Name = "Peter";
   WienerDog wd = new WienerDog();
   wd.Age = 1;
   wd.AnimalId = 2;
   wd.Length = 30;
   wd.Name = "Jeff";
   dbContext.Add(d);
   dbContext.Add(wd);
   dbContext.SaveChanges();
   foreach (Animal animal in dbContext.Animals)
   {
       Console.WriteLine(animal.Name);
   }
}
Using dbContext As New EntitiesModel() Dim d As New Dog() d.Age = 100 d.AnimalId = 1 d.Name = "Peter" Dim wd As New WienerDog() wd.Age = 1 wd.AnimalId = 2 wd.Length = 30 wd.Name = "Jeff" dbContext.Add(d) dbContext.Add(wd) dbContext.SaveChanges() For Each _animal As Animal In dbContext.Animals Console.WriteLine(_animal.Name) Next _animal End Using