Handling Database Schema Changes
This article is relevant to entity models that utilize the deprecated Visual Studio integration of Telerik Data Access. The current documentation of the Data Access framework is available here.
The Telerik Data Access Visual Designer uses the Update from Database Wizard to update a domain model for changes made to the database. This topic explains the most common scenarios you could come across.
- Adding New Tables
- Adding New Columns
- Adding New Associations (Foreign Key Constraints)
- Deleting Tables
- Deleting Columns
- Deleting Associations (Foreign Key Constraints)
- Renaming Tables
- Renaming Columns
- Changing the Column Type
- Changing the Column Nullability
- Changing the PrimaryKey
- Adding Tables to a Schema
- Changing the Table Schema
Adding New Tables
The first example demonstrates the case when you add a new table in the database and want to include that table in the domain model. What you need to do in this scenario is just to select the new table (e.g. Orders) in the Choose Database Items dialog.

In the Select Changes page the new table will be marked with the Add operation.

When you click Finish, the new table will be added to the relational part of the domain model and a corresponding domain class will be created in Visual Designer.

Adding New Columns
The second example is pretty similar. In this case, you add a new column. For example, you add a new column named Email, to the Customers table. What you need to do here is to select the modified table (e.g. Customers) in the Choose Database Items dialog.

In the Select Changes page the table will be marked with the Modify operation.

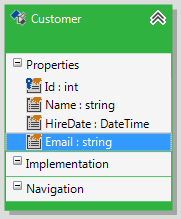
When you click Finish, a new property will be added in your domain class.

Adding New Associations (Foreign Key Constraints)
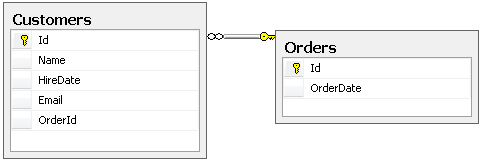
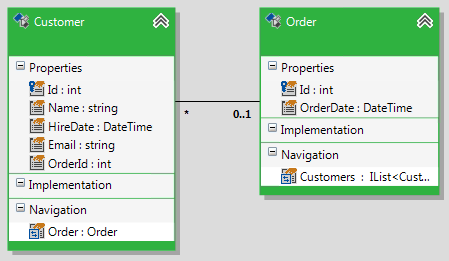
In the next case, you are going to define a new foreign key association between tables in the database.

The specific moment here is that you need to select both of the tables (e.g. Orders and Customers) in the Choose Database Items dialog.

When you click finish your model will be updated.

Deleting Tables
In this scenario, the Update from Database Wizard cannot recognize that the table has been deleted. The table won't appear in the Choose Database Items dialog. You have to manually remove the corresponding entity from the designer. In order to do that, two steps should be performed:
- Delete the domain class from the Visual Designer.
-
Delete the table from the relational part of the domain model. In the Model Schema Explorer, expand the Tables node. Right-click the corresponding table and click Remove table.

Deleting Columns
What you need to do here is to select the modified table (e.g. Customers) in the Choose Database Items dialog.

In the Select Changes page the table will be marked with the Modify operation. The deleted column will be marked with the Remove operation.

When you click Finish, the wizard will remove the deleted column from the relational part of the domain model. However, the corresponding domain class property won't be deleted. You have to do that manually.
For example, the HireDate column is deleted from the Customers table in the database. When you run the Update from Database Wizard, the HireDate column will be removed from the relational part (see the Model Schema Explorer on the image below). However, the HireDate property won't be removed from your domain class. You need to perform this operation manually.

Deleting Associations (Foreign Key Constraints)
When you delete an association from the database, you need to select the participating tables (e.g. Orders and Customers) in the Choose Database Items dialog.

In the Select Changes page the child table (the table that holds the foreign key) will be marked with the Modify operation. The deleted constraint will be marked with the Remove operation.

When you click Finish, the association will be deleted from the Visual Designer and the corresponding foreign key constraint will be removed from the relational part of the model.
Renaming Tables
In this scenario, the Update from Database Wizard cannot recognize that the table has been renamed. The table will appear in the Choose Database Items dialog with the new name.

In the Select Changes page the new table will be marked with the Add operation.

That means that when you click finish, the renamed table will be imported as a new table in your domain model. Also, a new entity will be added in the Visual Designer.
Suppose, you want to rename the Customers table to NewCustomers. When you run the Update from Database Wizard, a new table/entity pair will be added in your domain model.

However, the old Customer entity and Customers table won't be deleted. You have to remove them manually:
- Delete the domain class from Visual Designer.
- Delete the table from the relational part of the domain model. In Model Schema Explorer, expand the Tables node. Right-click the corresponding table and click Remove table.
Renaming Columns
When you rename a column in the database, you need to select the parent table (e.g. Customers) in the Choose Database Items dialog.

In the Select Changes page the new table will be marked with the Modify operation. The original column will be marked with Remove, i.e. it will be removed from the relational part of the domain model. The new (renamed) column will be marked with Add, i.e. it will be included in the relational part of the domain model and a corresponding property will be added in the Visual Designer. In this example, the Email column of the Customers table is renamed to Email_Changed.

When you click Finish:
- The new (renamed) column will be included in the domain model and a corresponding property will added to the modified domain class.
- The original column will be removed from the domain model. You could verify it by looking at the modified table in Model Schema Explorer.
-
The original property won't be deleted from Visual Designer. You have to remove it manually.

Changing the Column Type
When you change a column type in the database, you need to select the parent table (e.g. Customers) in the Choose Database Items dialog.

In the Select Changes page the table will be marked with the Modify operation. The AdoType, Length and SqlType properties of the column will be modified.

When you click Finish, the target column/property will be modified in Visual Designer. You won't be required to perform any additional actions.
Changing the Column Nullability
When you change column nullability in the database, you need to select the parent table (e.g. Customers) in the Choose Database Items dialog.

In the Select Changes page the table will be marked with the Modify operation. The IsNullable property of the column will be modified.

When you click Finish, the target column/property will be modified in Visual Designer. You won't be required to perform any additional actions.
Changing the PrimaryKey
When you change the primary key column in the database, you need to select the parent table (e.g. Customers) in the Choose Database Items dialog.

In the Select Changes page the table will be marked with the Modify operation. The IsPrimaryKey property of the old column will be set to False. Respectively, the IsPrimaryKey property for the new primary key column will be set to True.

When you click Finish, the wizard will do all necessary changes. You won't be required to perform any additional actions.
Adding Tables to a Schema
This example demonstrates the case when you add a new table to a new schema in the database and want to include that table in the domain model. What you need to do in this scenario is just to select the new table (e.g. Locations) in the Choose Database Items dialog.

In the Select Changes page the new table will be marked with the Add operation. When you click Finish, the new table will be added to the relational part of the domain model and a corresponding domain class will be created in Visual Designer. If the schema does not exist in the domain model it will be also added to the MetadataContainer.Schemas collection.
Changing the Table Schema
In this scenario, Update from Database Wizard cannot recognize that the table schema is changed. The table will appear in the Choose Database Items dialog under the new schema.

In the Select Changes page the table will be marked with the Add operation.

That means that when you click finish, the table will be imported as a new table in your domain model. Also, a new entity will be added in the Visual Designer.

You have to manually delete the old class and table from the domain model:
- Delete the domain class from Visual Designer.
- Delete the table from the relational part of the domain model. In Model Schema Explorer, expand the Tables node. Right-click the corresponding table and click Remove table. Note that the tables will be duplicated. Find the correct one by checking the schema.
