WebAPI Binding
Web API is an application programming interface for a web application or server which utilizes the HTTP protocol for communication. It enables you to make the server-side of the application more monolithic when it comes to establishing communication between clients and websites to have data access.
For runnable examples, refer to the demos on WebAPI binding of the Grid component.
Defining a Schema.Model.Id is mandatory for the proper execution of the Update, Create and Destroy of the Grid.
Setting up the application for WebAPI Binding
To ensure that the application is configured for both Web API binding capabilities:
-
Configure Web API by calling
GlobalConfiguration.Configurein theApplication_Startmethod.public class MvcApplication : System.Web.HttpApplication { protected void Application_Start() { GlobalConfiguration.Configure(WebApiConfig.Register); RouteConfig.RegisterRoutes(RouteTable.Routes); } } -
Create a file named
WebApiConfig.csinside theApp_Startfolder and configure the default WebAPI routing convention.public static class WebApiConfig { public static void Register(HttpConfiguration config) { // Web API configuration and services. // Web API routes. config.MapHttpAttributeRoutes(); config.Routes.MapHttpRoute( name: "DefaultApi", routeTemplate: "api/{controller}/{id}", defaults: new { id = RouteParameter.Optional } ); } }
Adding a Web API Controller
To support writing and reading data using WebAPI endpoints, the ApiController base class needs to be inherited for a given controller instance.
    public class TaskController : System.Web.Http.ApiController
    {
    }
Configuring the CRUD Operations
- Create a new ASP.NET MVC 5 application. If you have installed the Telerik UI for ASP.NET MVC Visual Studio Extensions, create a Telerik UI for ASP.NET MVC Web application. Name the application
KendoGridWebApiCRUD. If you decided not to use the Telerik UI for ASP.NET MVC Visual Studio Extensions, follow the steps from the introductory article to add Telerik UI for ASP.NET MVC to the application. -
Add a new
Entity Framework Data Model. Right-click the~/Modelsfolder in the solution explorer and pick Add > New Item. Choose Data > ADO.NET Entity Data Model in the Add New Item dialog. Name the modelNorthwind.edmxand click Next. This starts the Entity Data Model Wizard.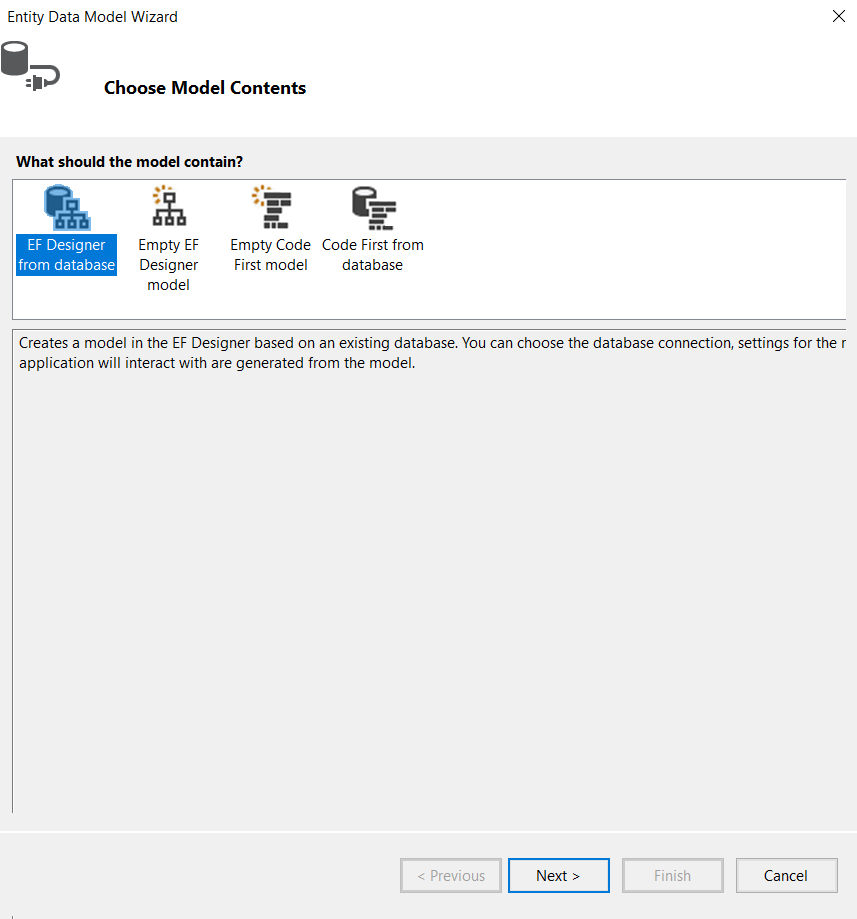
Select Generate from database and click Next. Configure a connection to the Northwind database. Click Next.
-
Select the Products table. Leave all other options as they are set by default. Click Finish to create the Entity Framework model.

Right click the
Controllersfolder in Visual Studio solution explorer. Select Add > Controller.-
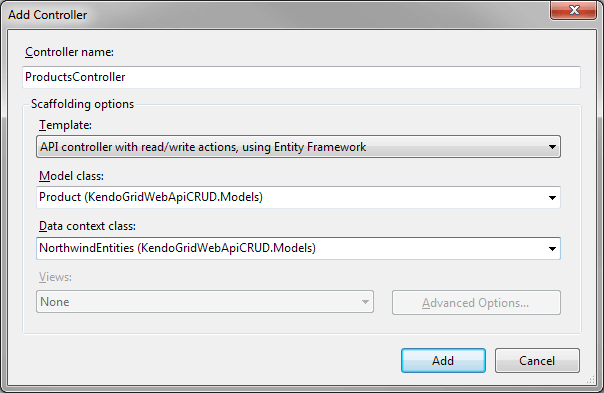
Set ProductsController as Controller name. Select API controller with read/write actions, using Entity Framework as Template. Select Product (KendoGridWebApiCRUD.Models) as Model class and NorthwindEntities (KendoGridWebApiCRUD.Models) as Data context class. Click Add to create the WebAPI controller.
-
Update the
Getmethod as demonstrated by The following example.public DataSourceResult Get([System.Web.Http.ModelBinding.ModelBinder(typeof (WebApiDataSourceRequestModelBinder))DataSourceRequest request) { return db.Products.ToDataSourceResult(request); } -
Update the
Postmethod as demonstrated in The following example.public HttpResponseMessage Post(Product product) { if (ModelState.IsValid) { db.Products.Add(product); db.SaveChanges(); DataSourceResult result = new DataSourceResult { Data = new[] { product }, Total = 1 }; HttpResponseMessage response = Request.CreateResponse(HttpStatusCode.Created, result); response.Headers.Location = new Uri(Url.Link("DefaultApi", new { id = product.ProductID })); return response; } else { return Request.CreateErrorResponse(HttpStatusCode.BadRequest, ModelState); } } -
Update the
Putmethod as demonstrated in The following example.public HttpResponseMessage Put(int id, TaskViewModel task) { if (ModelState.IsValid && id == task.TaskID) { try { service.Update(task, null); } catch (DbUpdateConcurrencyException) { return Request.CreateResponse(HttpStatusCode.NotFound); } return Request.CreateResponse(HttpStatusCode.OK); } else { var errors = ModelState.Values.SelectMany(v => v.Errors).Select(error => error.ErrorMessage); return Request.CreateResponse(HttpStatusCode.BadRequest, errors); } } -
Update the
Deletemethod as demonstrated in the following example.public HttpResponseMessage Delete(int id) { ProductViewModel product = service.Read().FirstOrDefault(p => p.ProductID == id); if (product == null) { return Request.CreateResponse(HttpStatusCode.NotFound); } try { service.Destroy(product); } catch (DbUpdateConcurrencyException) { return Request.CreateResponse(HttpStatusCode.NotFound); } return Request.CreateResponse(HttpStatusCode.OK, product); } In the view, configure the Grid to use the Products WebAPI controller.
    @(Html.Kendo().Grid<KendoGridWebApiCRUD.Models.Product>()
        .Name("grid")
        .Columns(columns =>
        {
            columns.Bound(product => product.ProductID).Width(100);
            columns.Bound(product => product.ProductName);
            columns.Bound(product => product.UnitsInStock).Width(250);
            columns.Command(commands =>
            {
                commands.Edit(); // The "edit" command will edit and update data items.
                commands.Destroy(); // The "destroy" command removes data items.
            }).Title("Commands").Width(200);
        })
        .ToolBar(toolbar => toolbar.Create()) // The "create" command adds new data items.
        .Editable(editable => editable.Mode(GridEditMode.InLine)) // Use inline edit mode.
        .DataSource(dataSource => dataSource
            .WebApi()
            .Model(model =>
            {
                model.Id(product => product.ProductID); // Specify the property which is the    unique identifier of the model.
                model.Field(product => product.ProductID).Editable(false); // Make the  ProductID property not editable.
            })

            .Read(read => read.Url(Url.HttpRouteUrl("DefaultApi", new { controller = "Product" }    )))
            .Create(create => create.Url(Url.HttpRouteUrl("DefaultApi", new { controller =  "Product" })))
            .Update(update => update.Url(Url.HttpRouteUrl("DefaultApi", new { controller =  "Product", id = "{0}" })))
            .Destroy(destroy => destroy.Url(Url.HttpRouteUrl("DefaultApi", new { controller =   "Product", id = "{0}" })))

        )
    )
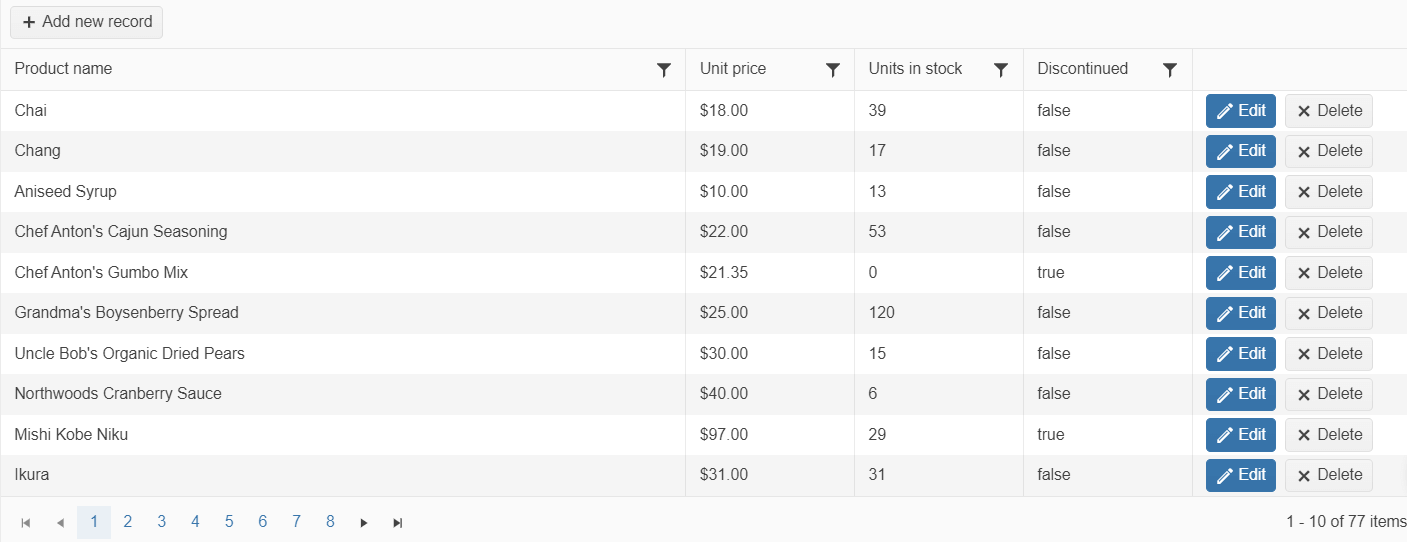
Building the application
The final result is a Grid with configured editing