Getting Started with the AIPrompt
This tutorial explains how to set up the Telerik UI for ASP.NET MVC AIPrompt and goes through the steps in the configuration of the component.
You will initialize an AIPrompt component with Prompt, Output, and Commands views and configure prompt suggestions options. Next, you will create a custom command that translates the output in Spanish. Then, you will use the template options to enhance the prompt suggestion cards and learn how to handle the JavaScript events of the component.
After completing this guide, you will achieve the following results:
Prerequisites
To successfully complete the tutorial, you need a project that is already configured to use the Telerik UI for ASP.NET MVC components:
To create a new pre-configured project for the Telerik UI for ASP.NET MVC components, you can use a project template.
To manually configure an existing project by using NuGet, see the Adding Telerik UI through NuGet.
1. Prepare the CSHTML File
The first step is to add the required directives at the top of the .cshtml document:
-
To use the Telerik UI for ASP.NET MVC HtmlHelpers:
@using Kendo.Mvc.UI
Optionally, you can structure the document by adding the desired HTML elements like headings, divs, paragraphs, and others.
    @using Kendo.Mvc.UI

    <h4>Generated templates with AI</h4>
    <div>

    </div>
2. Initialize the AIPrompt
Use the AIPrompt HtmlHelper to configure the component.
- The
Name()configuration method is mandatory as its value is used for theidand thenameattributes of the AIPrompt element. - The
Views()configuration specifies the component views. For example,Prompt,Output, andCommandsviews. - The
PromptCommands()option sets the desired custom commands of theCommandsview.
    @(Html.Kendo().AIPrompt()
        .Name("aiprompt")
        .Views(views =>
        {
            views.Add().Type(ViewType.Prompt);
            views.Add().Type(ViewType.Output);
            views.Add().Type(ViewType.Commands)
            .PromptCommands(commands =>
            {
                commands.Add().Id("1").Text("Translate in Spanish").Icon("edit-tools");
            });
        })
    )
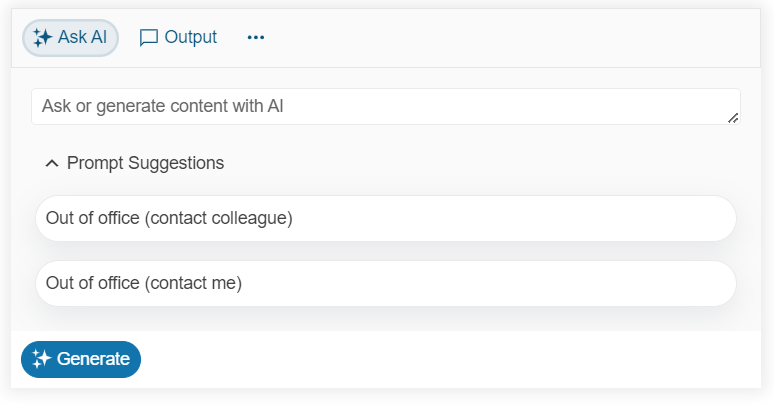
3. Configure the Prompt Suggestions
The next step is to create a JavaScript array that contains the prompt suggestion, its output in English, and the translated output in Spanish.
    <!DOCTYPE html>
    <html
        <head>
            <meta charset="UTF-8">
        </head>
        <script>
            var defaultResponse = 'For real prompt processing, please connect the component to a preferred AI service.';
            var promptData = [
            {
                suggestion: "Out of office (contact colleague)",
                output: `Subject: Out of Office: [Your Name]

                    Dear [Recipient's Name],

                    I am currently out of the office until [Return Date] and won't have access to email. For urgent matters, please contact [Colleague's Name] at [Colleague's Email]. I'll respond to your email upon my return.

                    Thank you,
                    [Your Name]`,
                spanish: `Asunto: Fuera de la Oficina: [Tu Nombre]

                    Estimado/a [Nombre del Destinatario],

                    Actualmente estoy fuera de la oficina hasta el [Fecha de Regreso] y no tendré acceso al correo electrónico. Para asuntos urgentes, por favor contacta a [Nombre del Colega] en [Correo Electrónico del Colega]. Responderé a tu correo a mi regreso.

                    Gracias,
                    [Tu Nombre]`
            },
            {
                suggestion: "Out of office (contact me)",
                output: `Subject: Out of Office: [Your Name]

                Dear [Recipient's Name],

                I am currently out of the office until [Return Date] and have limited email access. For urgent matters, please call me at [Your Phone Number]. Otherwise, I will respond to your email upon my return.

                Thank you for your understanding.

                Best,
                [Your Name]`,
                spanish: `Asunto: Fuera de la Oficina: [Tu Nombre]

                    Estimado/a [Nombre del Destinatario],

                    Actualmente estoy fuera de la oficina hasta el [Fecha de Regreso] y tengo acceso limitado al correo electrónico. Para asuntos urgentes, por favor llámame al [Tu Número de Teléfono]. De lo contrario, responderé a tu correo electrónico a mi regreso.

                    Gracias por tu comprensión.

                    Saludos,
                    [Tu Nombre]`
            }];
        </script>
    </html>
Now, configure the prompt suggestions that the user can select, and handle the PromptRequest event that triggers when the Generate button is clicked.
To define the prompt suggestions, use the PromptSuggestions() option of the Prompt view.
    @(Html.Kendo().AIPrompt()
        .Name("aiprompt")
        .Events(ev => ev.PromptRequest("onPromptRequest"))
        .Views(views =>
        {
            views.Add().Type(ViewType.Prompt).PromptSuggestions(new string[] { "Out of office (contact colleague)", "Out of office (contact me)" });
            views.Add().Type(ViewType.Output);
            views.Add().Type(ViewType.Commands)
            .PromptCommands(commands =>
            {
                commands.Add().Id("1").Text("Translate in Spanish").Icon("edit-tools");
            });
        })
    )
    <script>
        function onPromptRequest(ev) {
            var aipromptWidget = ev.sender; // Get a reference to the AIPrompt.
            const response = promptData.find((s) => s.suggestion === ev.prompt); // Find the prompt item in the data collection "promptData".
            const output = { // Construct the output object.
                id: kendo.guid(),
                output: response?.output || defaultResponse,
                prompt: ev.prompt,
                isRetry: ev.isRetry
            };
            aipromptWidget.addPromptOutput(output); // Set the output based on the selected prompt suggestion.
            aipromptWidget.activeView(1); // Activate the Output view.
        }
    </script>
4. Configure the Prompt Command
In this step, handle the CommandExecute event of the AIPromprt that triggers when a command item from the Commands view is clicked, and get the translated version of the latest output in the Output view from the promptData array. Then, call the addPromptOutput() client-side method to modify the current output in the AIPrompt.
    @(Html.Kendo().AIPrompt()
        .Name("aiprompt")
        .Events(ev => ev.CommandExecute("onCommandExecute").PromptRequest("onPromptRequest"))
        .Views(views =>
        {
            views.Add().Type(ViewType.Prompt).PromptSuggestions(new string[] { "Out of office (contact colleague)", "Out of office (contact me)" });
            views.Add().Type(ViewType.Output);
            views.Add().Type(ViewType.Commands)
            .PromptCommands(commands =>
            {
                commands.Add().Id("1").Text("Translate in Spanish").Icon("edit-tools");
            });
        })
    )
    <script>
        function onCommandExecute(ev) {
            var aipromptWidget = ev.sender; // Get a reference to the AIPrompt.
            if (this.promptOutputs.length > 0) { // Check if the Output view is not empty.
                let output = this.promptOutputs[0].prompt; // Get the first prompt in the Output view.
                const response = promptData.find((s) => s.suggestion === output); // Find the prompt item in the data collection defined in the previous step.

                if (response) {
                    let result = { // Construct the modified output.
                        id: kendo.guid(),
                        output: response["spanish"], // Select the transalted verison of the output.
                        prompt: output,
                        isRetry: ev.isRetry
                    };
                    aipromptWidget.addPormptOutput(result); // Update the output content when the command is clicked.
                }
            }
        }
    </script>
5. Customize the Appearance of the Prompt Suggestions
To alter the appearance of the prompt suggestion cards, use the PromptSuggestionItemTemplateHandler template option. By using this method, you can return the desired template through a JavaScript function. Another option is to pass the template as a string to the PromptSuggestionItemTemplate() method.
    @(Html.Kendo().AIPrompt()
        .Name("aiprompt")
        .PromptSuggestionItemTemplateHandler("promptSuggestionTemplate")
        ...... //Additional configuration
    )
    <script>
        function promptSuggestionTemplate(data) {
            let suggestionText = data.suggestion;
            return `<span role="listitem" class="k-prompt-suggestion prompt-suggestion-item">${suggestionText}</span>`;
        }
    </script>
    <style>
        .prompt-suggestion-item {
            cursor: pointer;
            border: 1px solid #eaeaea;
            border-radius: 24px;
            margin: 3px;
            padding: 0.5rem;
            transition: transform 0.2s;
            box-shadow: rgba(149, 157, 165, 0.2) 0px 8px 24px;
        }

        .prompt-suggestion-item:hover {
            transform: scale(1.05)
        }
    </style>
6. Handle the AIPrompt Events
The AIPrompt exposes events that you can handle and further customize the functionality of the component. In this tutorial, you will use the exposed OutputRatingChange event to log the selected rating of an output in the browser's console.
    @(Html.Kendo().AIPrompt()
        .Name("aiprompt")
        .Events(ev => ev.OutputRatingChange("onOutputRatingChange"))
        ...... //Additional configuration
    )
    <script>
        function onOutputRatingChange(e) {
            console.log("Output Rated: " + ev.rateType);
        }
    </script>
7. (Optional) Reference Existing AIPrompt Instances
Referencing existing component instances allows you to build on top of their configuration. To reference an existing AIPrompt instance, use the jQuery.data() method.
-
Use the
Name()option of the component to establish a reference.<script> var aipromptReference = $("#aiprompt").data("kendoAIPrompt"); // aipromptReference is a reference to the existing instance of the helper. </script> -
Use the AIPrompt client-side API to control the behavior of the widget. In this example, you will see how to change the current active view (for example, when a button is clicked).
    @(Html.Kendo().Button()
        .Name("btn")
        .Content("Select Commands view")
        .Events(ev => ev.Click("onBtnClick")))

    <script>
        function onBtnClick() {
            var aipromptReference = $("#aiprompt").data("kendoAIPrompt");
            aipromptReference.activeView("commands");
        }
    </script>
For more information on referencing specific helper instances, see the Methods and Events article.
Next Steps
- Configuring the AIPrompt Views
- Using templates in the AIPrompt
- Handling JavaScript Events of the User Interactions