Adding Telerik UI through Local Files
This article describes how to manually configure an ASP.NET MVC application to use the Telerik UI controls. You will learn how to add the Kendo.Mvc.dll assembly that contains the UI for ASP.NET MVC helpers by using locally available files. You will also add the required namespaces and client-side resources like CSS files and Kendo UI scripts.
The method described here is applicable both to new and already existing projects. An alternative approach that automatically adds the namespaces and the Kendo.Mvc.dll assembly to the project is the Setup with Telerik NuGet.
Prerequisites
Telerik UI for ASP.NET MVC requires the .NET Framework.
-
Visual Studio 2012 or later.
For Visual Studio 2017 or later, you must install the ASP.NET & web development workload. See Microsoft's Install Visual Studio workloads documentation for guidance.
Creating the Application
If you already have an existing project and you want to add Telerik UI for ASP.NET MVC to the application, skip this section and continue with Including the Client-Side Resources.
To create the application:
- Open Visual Studio 2019 for Windows. In the toolbar, select File > New > Project.
- Search for and select ASP.NET Web Application C# and click Next.
- Set a name and location for the project and click Create.
- Select the MVC template and click Create.
Including the Client-Side Resources
Before you can use a Telerik UI component, you must include the theme, the jQuery script, and the Kendo UI scripts:
-
Go to
~\Views\Shared\_Layout.cshtmland add the Kendo UI theme of your choice to the<head>of the document. Since Microsoft's project template uses Bootstrap, you can use the Kendo UI SASS Bootstrap theme to match it.<head> <meta charset="utf-8" /> <meta name="viewport" content="width=device-width, initial-scale=1.0"> <title>@ViewBag.Title - My ASP.NET Application</title> @Styles.Render("~/Content/css") @Scripts.Render("~/bundles/modernizr") @* Add the Kendo SASS Bootstrap theme: *@ <link href="https://kendo.cdn.telerik.com/themes/10.0.1/bootstrap/bootstrap-main.css" rel="stylesheet" type="text/css" /> </head> -
In the
_Layout.cshtmlfile, locate the@Scripts.Render("~/bundles/jquery")line in the<body>of the document and delete it. This jQuery script reference comes with the Microsoft ASP.NET Web Application template.Removing this script is crucial because in the next step you add the jQuery script provided by Telerik. Having more than one script references causes errors.
-
Add the jQuery script to the
<head>tag.<head> ... <link href="https://kendo.cdn.telerik.com/themes/10.0.1/bootstrap/bootstrap-main.css" rel="stylesheet" type="text/css" /> @* Add the jQuery script from the jQuery CDN: *@ <script src="https://code.jquery.com/jquery-3.7.0.min.js"></script> </head> -
Add the Kendo UI scripts. The Kendo UI script files required by UI for ASP.NET MVC must be loaded in the
<head>tag after the jQuery script.<head> ... <link href="https://kendo.cdn.telerik.com/themes/10.0.1/bootstrap/bootstrap-main.css" rel="stylesheet" type="text/css" /> <script src="https://code.jquery.com/jquery-3.7.0.min.js"></script> @* Add the Kendo UI scripts: *@ <script src="https://unpkg.com/jszip/dist/jszip.min.js"></script> <script src="https://kendo.cdn.telerik.com/2024.4.1112/js/kendo.all.min.js"></script> <script src="https://kendo.cdn.telerik.com/2024.4.1112/js/kendo.aspnetmvc.min.js"></script> </head> -
Finally, add the
bootstrap.min.jsscript available in Microsoft's ASP.NET Web Application template, and the<head>will look like this.<head> <meta charset="utf-8" /> <meta name="viewport" content="width=device-width, initial-scale=1.0"> <title>@ViewBag.Title - My Telerik MVC Application</title> @Styles.Render("~/Content/css") @Scripts.Render("~/bundles/modernizr") <link href="https://kendo.cdn.telerik.com/themes/10.0.1/bootstrap/bootstrap-main.css" rel="stylesheet" type="text/css" /> <script src="https://code.jquery.com/jquery-3.7.0.min.js"></script> <script src="https://unpkg.com/jszip/dist/jszip.min.js"></script> <script src="https://kendo.cdn.telerik.com/2024.4.1112/js/kendo.all.min.js"></script> <script src="https://kendo.cdn.telerik.com/2024.4.1112/js/kendo.aspnetmvc.min.js"></script> @* Add the bootstrap.min.js script: *@ <script src="@Url.Content("~/Scripts/bootstrap.min.js")"></script> </head>
Always observe the following rules when adding client-side resources to your project:
- Put the Kendo UI script files (
kendo.all.min.jsandkendo.aspnetmvc.min.js) after thejquery.min.jsscript.- A jQuery script must be loaded only once. It must be placed only in the
<head>tag of the_Layout.cshtmlfile. Make sure there are no duplicate jQuery references elsewhere in the_Layoutfile.- The Kendo UI scripts, the Kendo UI CSS file must use a compatible version of the theme, and the
Kendo.Mvc.dllreferenced in the project must be the same version as the Kendo UI script files.
If you prefer to include the Kendo UI scripts and styles from a local source instead of CDNs, refer to the Local Client-Side Resources article.
Downloading and Referencing the Kendo.Mvc.dll Assembly
The Kendo.Mvc.dll assembly contains the UI for ASP.NET MVC Html helpers. Follow the steps below to download it and reference it in the project:
Log in to your Telerik account.
-
Download the installation file:
If you use the free trial, follow this link to download the installer. Once the installation completes, your free trial will be activated and you can continue with the next step.
If you have already purchased a license, continue with the next step.
-
Go to the Telerik UI for ASP.NET MVC download page and download the Telerik UI zip bundle.
If you use the free trial, download the
telerik.ui.for.aspnetmvc.2024.4.1112.trial.zipfile.If you have purchased a license, download the
telerik.ui.for.aspnetmvc.2024.4.1112.commercial.zipfile.
Open the downloaded bundle and extract the
Kendo.Mvc.dllfrom the\wrappers\aspnetmvc\Binaries\Mvc5\folder to thebinfolder of your project.Right-click
Referencesin the Visual Studio Solution Explorer, browse to thebinfolder, select theKendo.Mvc.dll, and add it as reference to the project.
Adding the Kendo.Mvc.UI Namespace
Add the Kendo.Mvc.UI namespace to the ~/Views/Home/Index.cshtml view.
```Razor
    @using Kendo.Mvc.UI
```
Initializing the Grid HtmlHelper
Perform the steps below to add a Grid to the project:
-
Create a model in the
Modelsfolder of the application.public class Product { public int ProductID { get; set; } public string ProductName { get; set; } public Nullable<decimal> UnitPrice { get; set; } public bool Discontinued { get; set; } } -
Open the
~/Views/Home/Index.cshtmlview and add the Grid HtmlHelper.<div class="text-center"> <h2>Kendo UI Grid</h2> @(Html.Kendo().Grid<TelerikMvcApp1.Models.Product>() .Name("grid") .Columns(columns => { columns.Bound(c => c.ProductID).Width(100); columns.Bound(c => c.ProductName).Width(300); columns.Bound(c => c.UnitPrice).Width(100); columns.Bound(c => c.Discontinued).Width(200); }) .DataSource(dataSource => dataSource .Ajax() .Read(read => read.Action("Select", "Home")) ) ) </div> -
Open the
HomeController.csand import theKendo.Mvc.UIand theKendo.Mvc.Extensionsnamespaces so that you can useKendo.Mvc.UI.DataSourceRequestand theToDataSourceResultextension method in the next step.using Kendo.Mvc.Extensions; using Kendo.Mvc.UI; Additionally, import the namespace for the model that you created in step 1.
-
In the
HomeController.cs, add a new action method which will return the data as JSON. The Grid makes an Ajax request to this action, to get its data.public ActionResult Select([DataSourceRequest]DataSourceRequest request) { var data = Enumerable.Range(1, 10) .Select(index => new Product { ProductID = index, ProductName = "Product #" + index, UnitPrice = index * 10, Discontinued = false }); return Json(data.ToDataSourceResult(request), JsonRequestBehavior.AllowGet); }
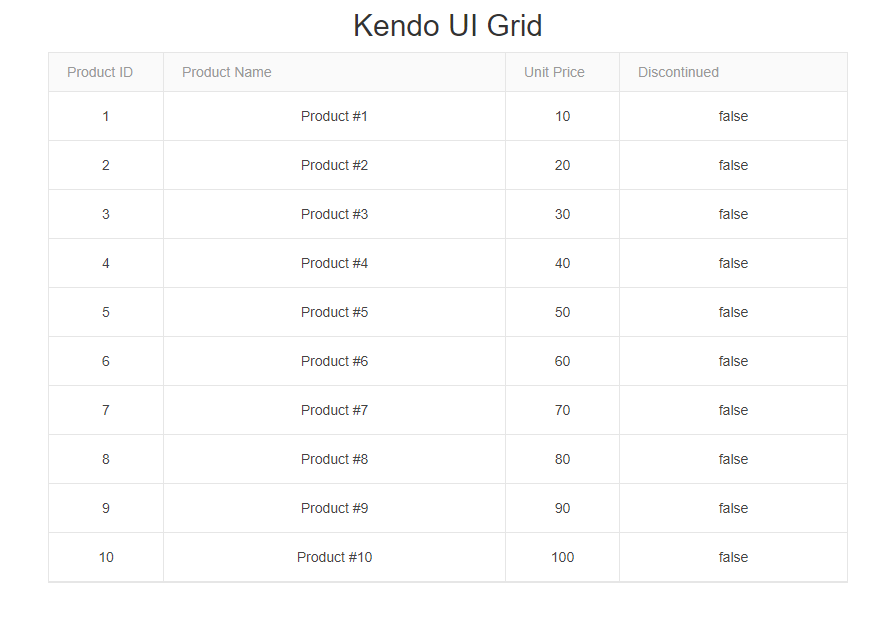
Building and Running the Application
Press CTRL+F5 to build and run the application. As a result, the following sample page is created.
Adding Your License File
Using any client-side assets from the Kendo UI CDN or the @progress/kendo-ui NPM package requires you to add a Kendo UI for jQuery license file to your application. A missing license file triggers a banner, a watermark, and causes a warning message in the browser's console.
To generate your license file and add it to your application, follow the instructions in the Adding a License File article.
Next Steps
- Explore the Telerik UI for ASP.NET MVC fundamentals
- Grid Overview
- Integrate Telerik UI for ASP.NET MVC in Visual Studio