Features / Test Maintenance
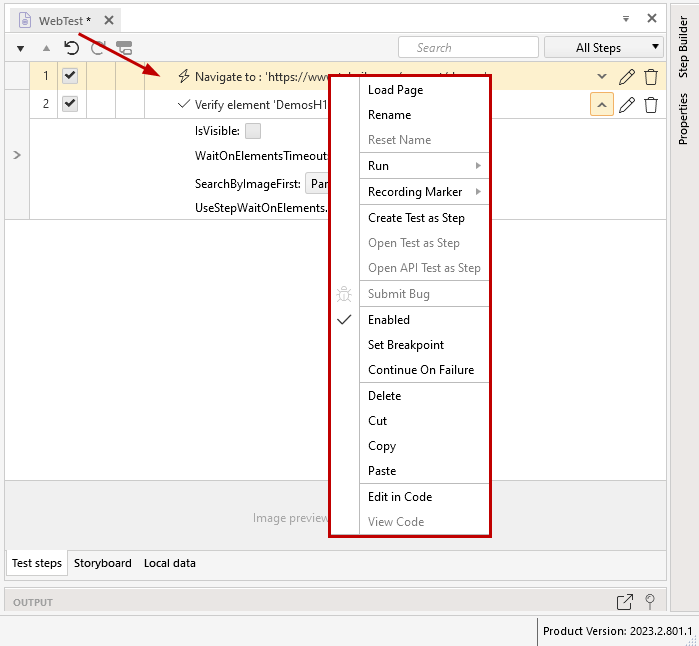
Each test step provides further actions that can be taken in the right mouse button context menu. Note that some of the items will show up or will be enabled only for certain test step types.
 |
 |
=====================
-
Load Page - launches the selected browser in record mode and loads the listed page; available for "Navigate to" steps only.
-
Open PDF - launches the selected browser in record mode and loads the PDF file listed in the step; available for "Open PDF" steps only.
-
Rename - alter the default step description.
-
Reset Name - revert to the default step description.
=====================
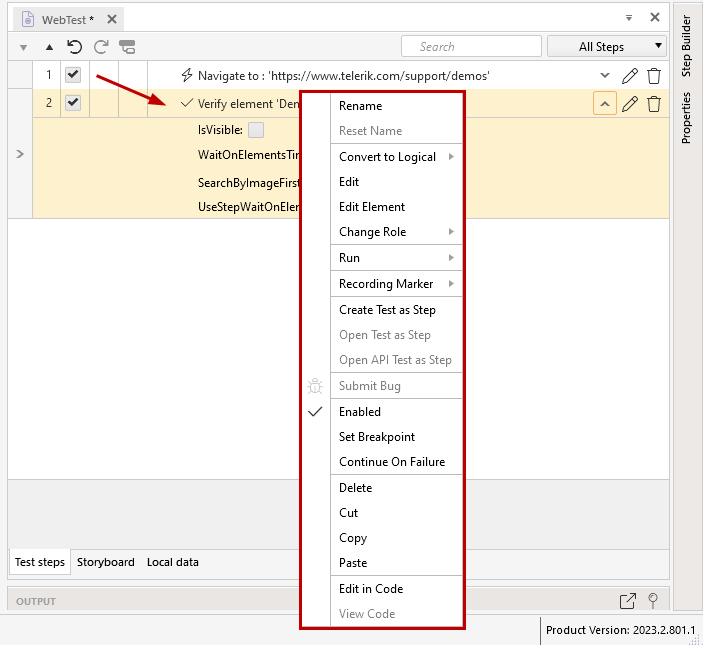
The options in this section are only available for Verification steps!
-
Convert to Logical - inserts the selected verification into a logical step.
-
Convert to if...else - insert the verification within a if...else block.
-
Convert to while...loop - insert the verification within a while...loop block.
-
Edit - loads the Sentence Verification Builder for the selected verification.
-
Change Role - toggles the selected verification type.
-
Set as Verification - converts a Wait or Extract step to a Verification one.
-
Set as Wait - converts a Verification or Extract step to a Wait one.
-
Set as Extraction - converts a Verification or Wait step to an Extract one.
=====================
-
Run - partially executes the test to or from the selected step. Run bits of the test without having to run the entire test.
-
To Here - launches a new instance of the selected browser, execute the preceding (including the selected) test step(s), and finishes the run with recorder attached to the browser.
-
From Here - execute the subsequent steps in an existing browser instance (must have recording toolbar attached).
-
Selected Steps - execute the selected steps in an existing browser instance (must have recording toolbar attached).
=====================
-
Recording Marker - move the marker to the step as selected:
- Move After This Step
- Move Before This Step
- Move After Last Step
=====================
-
Create Test as Step - the selected steps are moved into a new test, and that new test is inserted as a Test as Step.
-
Open Test as Step - active for a test as step; opens the test inserted as a step.
-
Open API Test as Step - active for an API test as step; opens the API test inserted as a step.
=====================
-
Submit Bug - loads the Submit Bug dialog and logs a bug in your previously configured bug tracking application.
=====================
-
Enabled - choose whether the step will be run during execution.
-
Set Breakpoint - choose whether the test pauses at that step and shows Debug Options.
-
Continue On Failure - whether the test stops or continues, if that step detects a failure.
=====================
-
Delete - removes the selected steps from the test.
-
Cut - cuts the selected steps from the test and allows you to paste these into another location in the same test, or in another test. Keyboard shortcut is Ctrl+X.
-
Copy - copies the selected steps from the test and allows you to paste these into another location in the same test, or in another test. Keyboard shortcut is Ctrl+C.
-
Paste - inserts the cut/copied steps in the desired test. Keyboard shortcut is Ctrl+V.
=====================
-
Edit in Code - converts the recorded step to a new method in the coded file related to the test - the code-behind file. Notice that the description and icon change to indicate the step is now a coded one. Once converted, it cannot be switched back to the initially recorded step.
-
View Code - switches to the code-behind file and shows the test method for the selected coded step.