New to Telerik Test Studio? Download free 30-day trial

Configuring Microsoft Edge for Test Studio Automation

The document describes the steps to enable Edge Chromium browser for test recording and execution.

Edge Chromium is one of the browsers supported from Test Studio for web apps automation. To start using the browser for test recording and execution you only need to apply the specific set of settings called calibration.

Browser Calibration

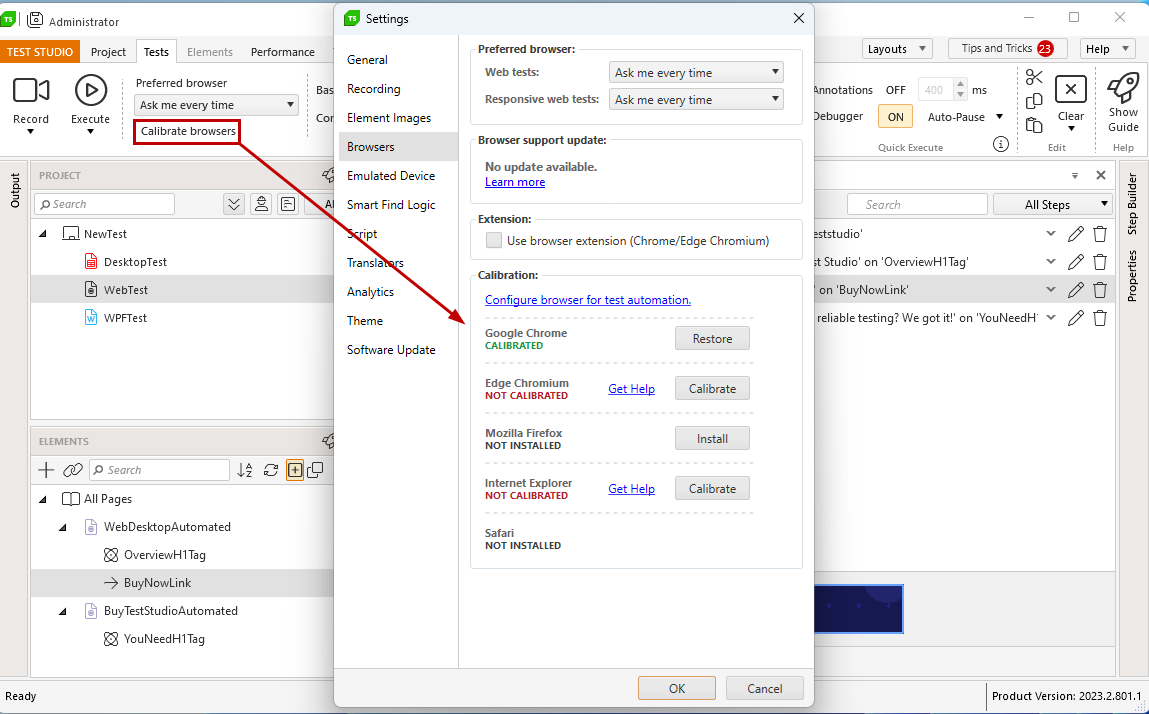
To ensure a flawless and consistent automation process, there is a list of browser settings which Test Studio requires. We call this browser calibration and you can easily apply the specific configuration through the Project settings in the dedicated Browsers tab. You can open it in a web test through the Test ribbon quick access options.

Calibrate browser quick access

Using Extension for Edge Chromium Automation (Optional)

By default Test Studio projects are set to use Edge Chromium without extension. Along with that, there is the option to run Edge Chromium automation with the help of an extension. The Progress Telerik Test Studio Extension is officially distributed in the Chrome web store and is available for download and installation (Edge Chromium supports adding extensions from the Chrome web store).

Enable Project for Edge Chromium Automation with Extension

If you choose to use Edge Chromium for recording and execution with the extension, you need to change a setting in the Test Studio project. The project setting is listed under the Browsers tab and is named Use browser extension(Chrome/Edge Chromium). This option is disabled by default, but you can check the checkbox to set Test Studio to start the Edge Chromium browser for this project with the extensions.

Enable UseBrowserExtension

Tip

You can check all settings applied from the calibration in the Manual Configuration section below (click the + sign to expand it).


Extension Install Procedure +


1.  When you start recording against Edge, but the Progress extension is not installed, the browser will load the recording start page and will try to load the extension. The recorder will search for the extension for the period that is defined in the *ClientReady* Timeout (the default is 60 seconds).

Wait For Extension

2.  If the Progress extension doesn't load within the timeout period, a link to the Web Store will be displayed to install the extension.

Get Extension

3.  By clicking on Get It Free From Chrome Web Store you will be directly navigated to the Progress extension in the Web Store.

Extension In Store

4.  By clicking the Add to Chrome button the extension will be added after confirmation.

Add Extension Confirmation

5.  Click on the icon located to the right of the address bar to find the extension's version.

Extension Version


Manual Configuration +


Follow the steps below to manually configure Edge for web automation with Test Studio.

Enable Extensions

1.  Click on the *Settings* button in Edge - the three dots located in the upper right corner of the browser. Then navigate to Settings -> Extensions.

2.  Ensure that the Progress Telerik Test Studio Extension is enabled.

Extensions

Zoom Level Set to 100%

1.  Click on the *Settings* button in Edge - the three dots located in the upper right corner of the browser.

2.  Use the plus (+) and minus (-) buttons next to Zoom to set it to 100%.

Zoom

Enable File Downloads

1.  Click on the *Settings* button in Edge - the three dots located in the upper right corner of the browser.

2.  Select Settings from the drop-down menu.

3.  Locate the Downloads section.

4.  Enable Ask where to save each file before downloading.

Downloads

Disable Pop-up Blocker

1.  Click on the *Settings* button in Edge - the three dots located in the upper right corner of the browser.

2.  Select Settings from the drop-down menu.

3.  Locate the Site Permissions section.

4.  Open the Pop-ups and redirects section.

5.  Disable the Block option.

Pop up blocker

Allow All Sites to Run JavaScript

1.  Click on the *Settings* button in Edge - the three dots located in the upper right corner of the browser.

2.  Select Settings from the drop-down menu.

3.  Locate the Site Permissions section.

4.  Open the JavaScript section.

5.  Enable the Allowed option.

Allow JavaScript

Unblock Third-Party Cookies and Site Data

1.  Click on the *Settings* button in Edge - the three dots located in the upper right corner of the browser.

2.  Select Settings from the drop-down menu.

3.  Locate the Site Permissions section.

4.  Open the Cookies and site data section.

5.  Enable the Allow sites to save cookies option.

6.  Disable the Block third-party cookies option.

Allow Cookies

Allow All Sites to Download Multiple Files Automatically

1.  Click on the *Settings* button in Edge - the three dots located in the upper right corner of the browser.

2.  Select Settings from the drop-down menu.

3.  Locate the Site Permissions section.

4.  Open the Automatic downloads section.

5.  Enable the Ask when site tries to download multiple files option.

Automatic Download

Allow All Sites to Open PDF Files Externally

1.  Click on the *Settings* button in Edge - the three dots located in the upper right corner of the browser.

2.  Select Settings from the drop-down menu.

3.  Locate the Cookies and site permissions->Site Permissions section.

4.  Under All permissions select PDF documents.

5.  Enable the Always open PDF files externally option.

Always open PDF externally

Allow Extension from Other Stores

1.  Click on the *Settings* button in Edge - the three dots located in the upper right corner of the browser.

2.  Select Extensions from the drop-down menu.

3.  Locate the Site Permissions section.

4.  Enable the Allow extensions from other stores option.

Allow Extension from Other Stores


In this article