How statuses are synced
This page contains information about the synchronization process between TeamPulse work item statuses and TFS WIT statuses. How the values are mapped and how to add custom status to an entity group and sync it with TFS.
The Synchronization Process
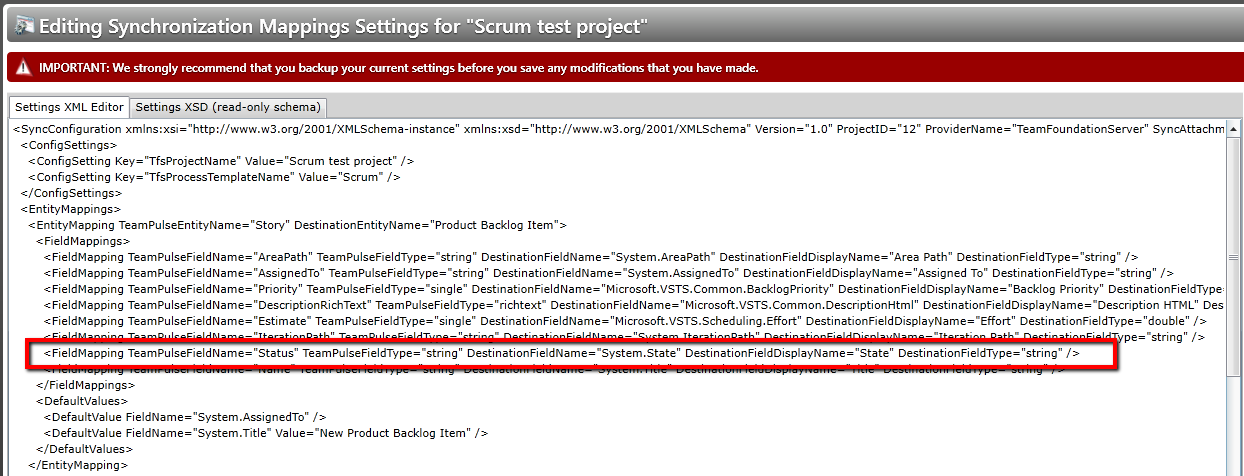
The synchronization process is described by synchronization configuration xml that can be edited from the Synchronization Mappings Settings screen. These mappings define which TeamPulse entities are mapped to which TFS entities (work item types) as well as which fields within those are mapped together.
The mapping for the Status field of each TeamPulse entity type is added as a Field Mapping element in the Synchronization Mapping Settings of every synced project and it is related to the relevant field in the TFS project. Read more about synchronizing a TeamPulse project with TFS.

Status Synchronization
The status field is synced in both directions from TeamPulse to TFS and the opposite from TFS to TeamPulse.
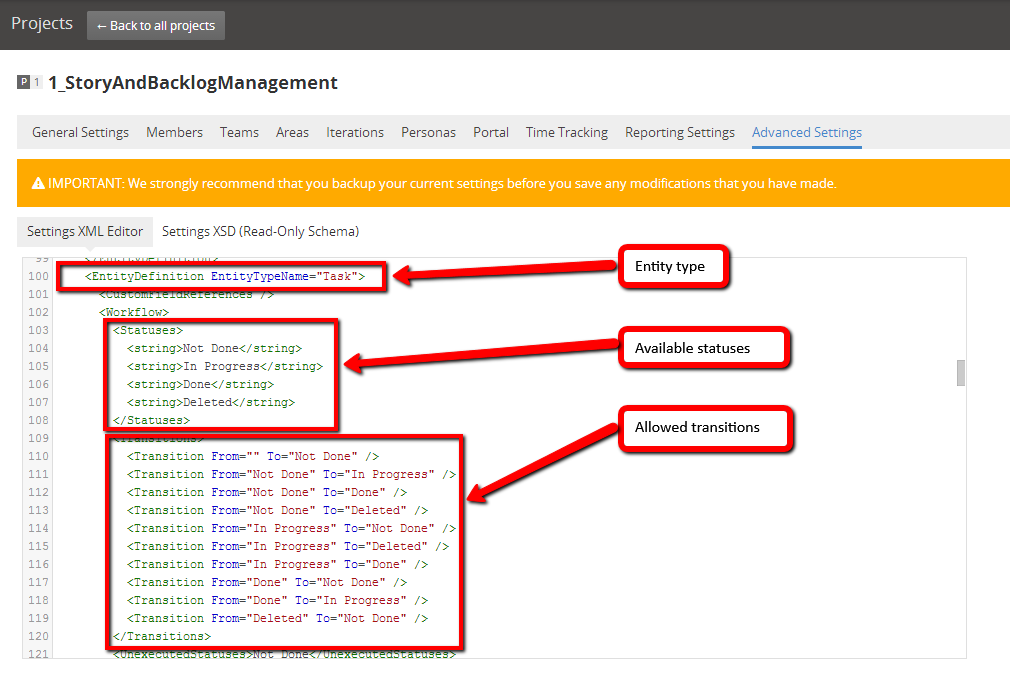
In order to have a successful sync the available entity type statuses in TeamPulse must match the available statuses for the corresponding type in TFS. If the status lists does not match you will get an error with error code TTP2004. Read more about Error Codes.
The other important thing is to have identical transitions between statuses for the work item in TeamPulse and TFS. If the transitions do not match the process will return an error with error code TTP2005. Read more about Error Codes.
If your statuses and transitions mismatch with TFS settings or you want to add your custom state and transitions you have to modify your TeamPulse advanced project settings and match the changes to your TFS project. In order to do that, please follow this article about adding custom states and transitions.
Both, transition and statuses for TeamPulse project entity types can be found in the advanced project settings.

The states and transitions in TFS can be seen as follows:
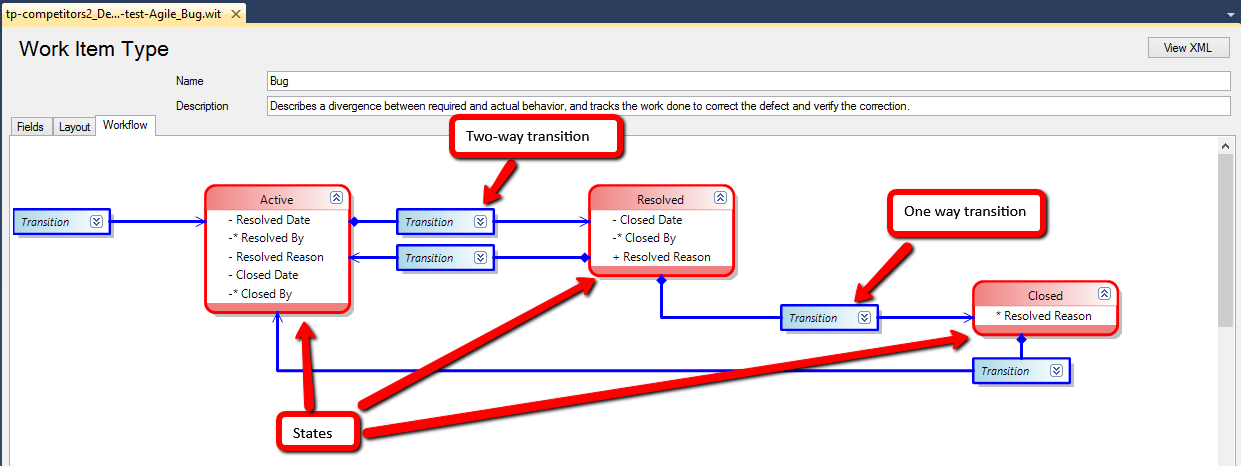
In Visual Studio, navigate to Tools -> Process Editor -> Work Item Types -> Open WIT from server. Use the dialogue to connect to a project collection and then in the "Select Work Item Type" dialogue expand your TFS project and select the WIT you want to see (Bug Item in this case). Visual studio will open the WIT in a new window:

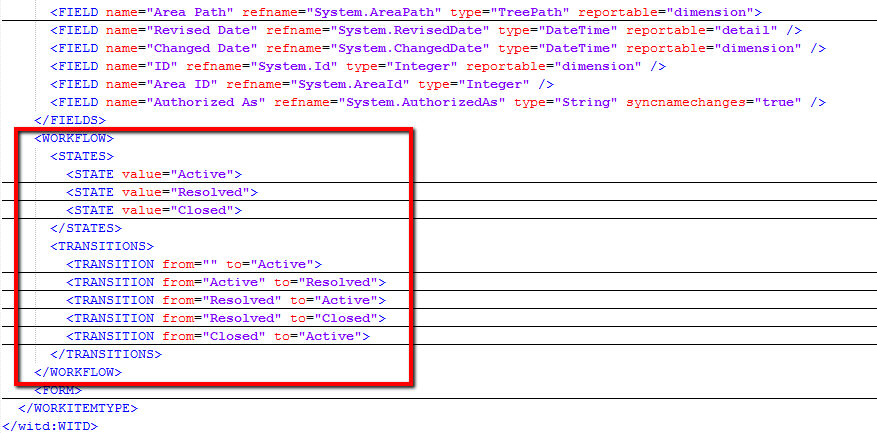
One way to achieve this is to open the XML settings and find “Workflow” section where States and Transitions are placed.

The other options is to select State row and open Workflow tab. Then a diagram with available statuses and transitions between them will be shown.

