Using HTML5 ASP.NET MVC Report Viewer With Reporting REST Service
This document describes the easiest way to add an HTML5 MVC Report Viewer to a web project by using a Telerik HTML5 MVC Report Viewer item template in Visual Studio. If you are looking for an advanced guide that allows you full control over the configuration, refer to the Manual Setup help article.
Prerequisites
The following list describes the prerequisites for this tutorial:
- Review the HTML5 MVC Report Viewer Requirements.
- The project must target ASP.NET 4.0 MVC or a newer framework.
- Adapt all path references in the described steps according to the project setup. For more information, please refer to the MSDN article ASP.NET Web Project Paths.
Telerik MVC Report Viewer View Item Template
After a successful installation of Telerik Reporting, you have access to the Telerik item templates. The item template does the following for you:
- Adds a
.cshtmlpage with the MVC Report Viewer to your project - References an existing or adds a new Telerik Reporting REST WebAPI Service
The following steps describe how to add the template:
- To start the item template wizard, in Solution Explorer, select the target project. On the Project menu, click Add -> New Item. In the Add New Item dialog box, navigate to the Web category and select the Telerik MVC Report Viewer View item.
- Accept the project build prompt. Click 'OK'.
-
The item template will open the Add new Report Viewer dialog with the following steps:
-
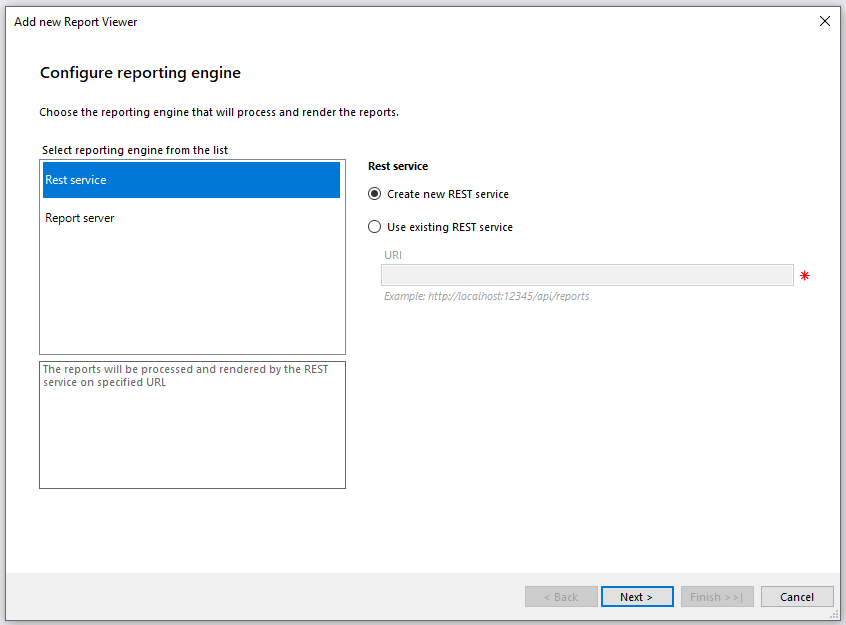
Configure reporting engine configures the reporting engine type that will process and render the reports. You have two options - REST service or Report server. Select the Rest service option. This way, the reports will be processed and rendered by the REST service on the specified URL. On the right side of the dialog, there are two more options:
- Create new REST service - Select this option if there is no REST service project available in the solution. The wizard will create and configure a new REST Service in the current project.
- Use existing REST service - Select this option if there is a configured REST service project in the solution. With this option, you have to enter a valid REST service URI.

-
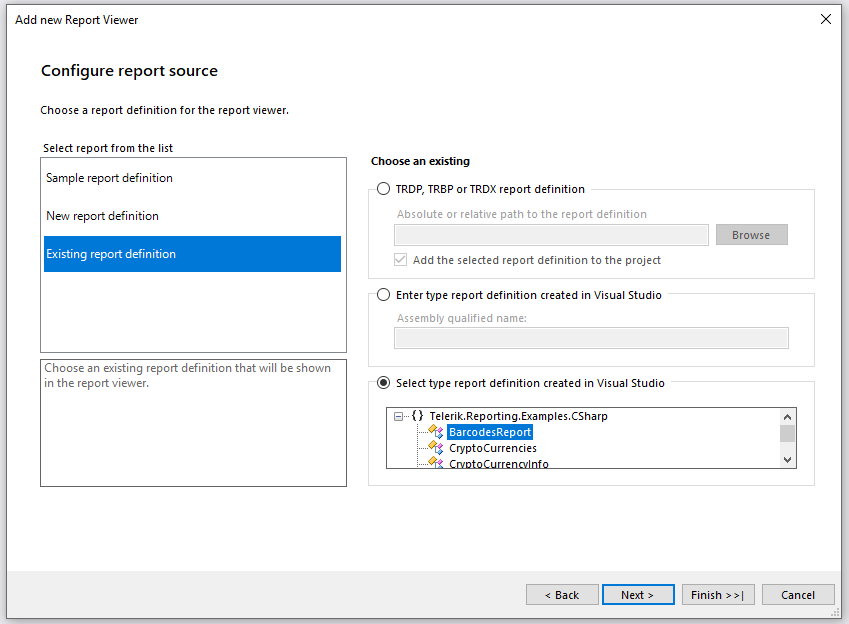
Configure report source - this step adds a report definition for the report viewer. If you selected the Create new REST service option in the previous step, you will have to choose one of the following three options. If you, however, selected the Use existing REST service option, you can select only an Existing report definition.
- Sample report definition - this option will create a sample report definition which will be shown in the new report viewer. It will be placed in a newly created folder called Reports at the root of the application. It can be either modified or changed with another.
-
New report definition - this option will create a new report definition that will be opened for editing in the respective report designer. On the right side of the dialog there are two possible options:
- TRDP report definition - creates a TRDP file with the entered Report name.
- Type report definition - creates a CS|VB file with the entered Report name either in an existing report library project or in a newly created one.
-
Existing report definition - this option will prompt you to choose an existing report definition that will be shown in the report viewer. On the right side of the dialog there are three possible options:
- TRDP, TRBP or TRDX report definition - enter the path or browse to the report definition. Also, there is an option to enable adding the report definition to the project. In this case, the report viewer will use a UriReportSource with the provided path to the file.
- Enter type report definition created in Visual Studio - enter the Assembly qualified name of the type report definition. In this case, the report viewer will use a TypeReportSource with the provided Assembly qualified name.
- Select type report definition created in Visual Studio - select the type report definition from the resolved types in the solution. The engine will search for report types in all projects in the solution that have Telerik Reporting reference included. The VS item template will add the required connection string from the reports project configuration file (if exists).

-
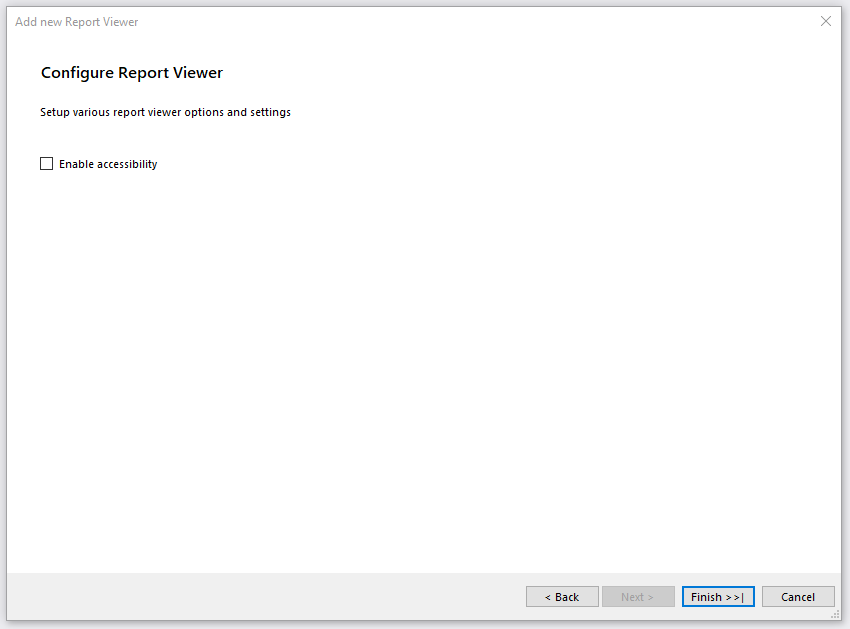
Configure Report Viewer exposes the option to enable accessibility for the report viewer.

-
After finishing, the item template automatically does the following:
- Configures the NuGet packages, if necessary.
- Registers the service routes in
WebApiConfig.cs. - Adds a
CSHTMLpage with the configured HTML5 MVC Report Viewer. - Displays a summary log with all changes.
To display the newly added MVC page, you need to use your own MVC controller's action returning the view. Note that the auto-generated ReportsController is an ApiController. You can use the following steps to add an action (e.g. Reports) returning the desired view (e.g. Reports.cshtml), for example, to the HomeController.
- Move the auto-generated View file (i.e.
ReportViewerView1.cshtml) from the main folder to the 'View' folder of the chosen Controller (View/Homefor this example); - Rename the View accordingly (i.e. from
ReportViewerView1.cshtmltoReports.cshtml); - Add a properly named Action that returns the desired view in the chosen Controller (e.g. action
ReportsinHomeController).
Examples
You can find the complete example setup in Telerik Reporting installation path. For example, C:\Program Files (x86)\Progress\Telerik Reporting 2025 Q4\Examples\CSharp\.NET Framework\AspNetMvcIntegrationDemo.