Change the Default Theme
You can easily change the theme of RadWindow to one of the predefined themes for UI for WPF using the Implicit Styles or StyleManager.
Implicit Styles vs. StyleManager
The Implicit Styles theming mechanism has a full design-time support. It is smaller size of dlls because the NoXaml assemblies contain only the code + the styles for a single theme that comes from the theme dlls. Also, you have easier access to the resources and styles for the controls via the StaticResources keyword.
On the other hand the StyleManager is easier to apply. You need only to set the StyleManager.Theme property on the control you want to theme.
Using Implicit Styles
To change the theme using the implicit styles mechanism you will need to make few steps.
- Reference the NoXaml version of the Telerik UI for WPF dlls. They can be found in the /Telerik UI for WPF installation folder/Binaries.NoXaml/ folder.
- Reference a theme dll - for example Telerik.Windows.Themes.Windows8.dll.
-
Merge the required .xaml files in the App.xaml file.
- Telerik.Windows.Controls.xaml
- Telerik.Windows.Controls.Navigation.xaml
As RadWindow is placed in a different visual tree than the UserControl it is opened from, the XAML files should be merged in App.xaml, if you merge them locally in the UserControl Resources, RadWindow will not receive its Style.
The following example shows how to merge the Windows8 theme resources and open a new window.
Example 1: Merging the required .xaml files for the Windows8 theme
    <Application>
        <Application.Resources>
            <ResourceDictionary>
                <ResourceDictionary.MergedDictionaries>
                    <ResourceDictionary Source="/Telerik.Windows.Themes.Windows8;component/Themes/Telerik.Windows.Controls.xaml"/>
                    <ResourceDictionary Source="/Telerik.Windows.Themes.Windows8;component/Themes/Telerik.Windows.Controls.Navigation.xaml"/>
                </ResourceDictionary.MergedDictionaries>
            </ResourceDictionary>
        </Application.Resources>
    </Application>
Example 2: Opening a window
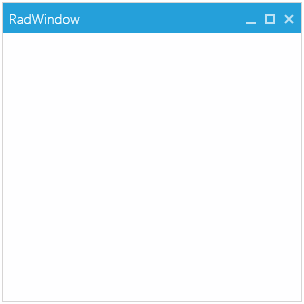
    var window = new RadWindow()
    {
        Width = 300,
        Height = 300
    };
    window.Show();
Dim newWindow As New RadWindow() With { .Width = 300, .Height = 300 } newWindow.Show()Figure 1: RadWindow with the Windows8 theme applied
If you use RadWindow as a custom UserControl as shown in Example 3, you will need to apply a new style targeting the custom control and base it on the default RadWindowStyle. Otherwise, the window won't be displayed.
Example 3: RadWindow defined as a UserControl
<telerik:RadWindow x:Class="RadWindowSamples.RadWindowControl"
   xmlns="http://schemas.microsoft.com/winfx/2006/xaml/presentation"
   xmlns:x="http://schemas.microsoft.com/winfx/2006/xaml"
   xmlns:telerik="http://schemas.telerik.com/2008/xaml/presentation">
</telerik:RadWindow>
Example 4: Adding an implicit style targeting the new window control and based on the default window style
<Application>
    <Application.Resources>
        <ResourceDictionary>
            <ResourceDictionary.MergedDictionaries>
                <ResourceDictionary Source="/Telerik.Windows.Themes.Windows8;component/Themes/System.Windows.xaml"/>
                <ResourceDictionary Source="/Telerik.Windows.Themes.Windows8;component/Themes/Telerik.Windows.Controls.xaml"/>
                <ResourceDictionary Source="/Telerik.Windows.Themes.Windows8;component/Themes/Telerik.Windows.Controls.Navigation.xaml"/>
            </ResourceDictionary.MergedDictionaries>
            <Style TargetType="local:RadWindowControl" BasedOn="{StaticResource RadWindowStyle}" />
        </ResourceDictionary>
    </Application.Resources>
</Application>
The important part is to set the TargetType property to the type of the UserControl.
Read more about this in the How to use RadWindow as user control article.
Using StyleManager
To change the theme via the StyleManager you will need to make few steps.
- Reference the Xaml version of the Telerik UI for WPF dlls. They can be found in the /Telerik UI for WPF installation folder/Binaries/ folder.
-
Set the StyleManager.Theme attached property on the control you want to theme. Or set the StyleManager.ApplicationTheme static property before calling the InitialComponent method of the view or the App.xaml.cs file. This will set the theme globally for all Telerik controls.
Example 5: Setting the theme of the window
    var window = new RadWindow()
    {
        Width = 300,
        Height = 300
    };
    StyleManager.SetTheme(window, new Window8Theme());

    window.Show();
Dim window As New RadWindow() With { .Width = 300, .Height = 300 } StyleManager.SetTheme(window, New Window8Theme()) window.Show()Example 6: Setting the theme globally
    StyleManager.ApplicationTheme = new Window8Theme();
    InitializeComponent();
StyleManager.ApplicationTheme = New Window8Theme() InitializeComponent()
The end result is the same as in Figure 1.