Labels
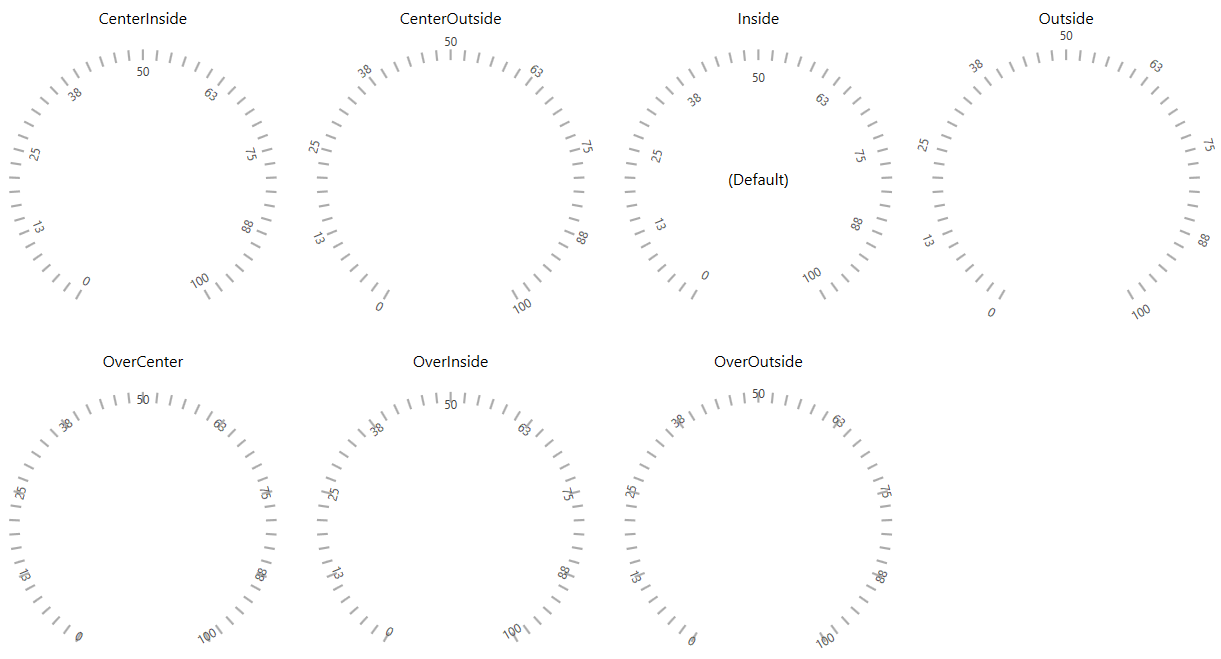
Tick labels are shown for major tick marks. You can set label location around scale bar, font properties (like family, size and foreground), format of the label, or even change whole control template for label.
For the purpose of this tutorial the code snippet in Example 1 will be used.
Example 1: RadialScale example
<telerik:RadRadialGauge Width="200" Height="200" telerik:StyleManager.Theme="Windows8">
    <telerik:RadialScale Min="0" Max="100"
            MajorTicks="8"
            MiddleTicks="2"
            MinorTicks="3">
    </telerik:RadialScale>
</telerik:RadRadialGauge>
Label Location
You can change the location of the labels by using the LabelLocation.

Label Rotation Mode
You can control the label rotation on the radial scale using LabelRotationMode property. It can have the following values: None, Automatic, SurroundIn, SurroundOut.

Label Use Range Color
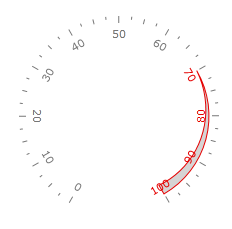
You can use the GaugeRange element on a radial scale to re-color labels automatically. The RadialScale has the boolean LabelUseRangeColor property. If it is True, then each label within the range uses a color according to the specified range's LabelForeground property:

Example 2: Set the LabelUseRangeColor property
<telerik:RadRadialGauge Width="200" Height="200" telerik:StyleManager.Theme="Windows8">
    <telerik:RadialScale Min="0" Max="100"
                            LabelLocation="Inside"
                            LabelUseRangeColor="True">
        <telerik:RadialScale.Ranges>
            <telerik:GaugeRange Min="70"
                                Max="100"
                                StartWidth="0"
                                EndWidth="0.1"
                                Background="#FFD6D4D4"
                                Stroke="#FFE50000"
                                StrokeThickness="1"
                                LabelForeground="#FFE50000">
            </telerik:GaugeRange>
        </telerik:RadialScale.Ranges>
    </telerik:RadialScale>
</telerik:RadRadialGauge>
Label Format
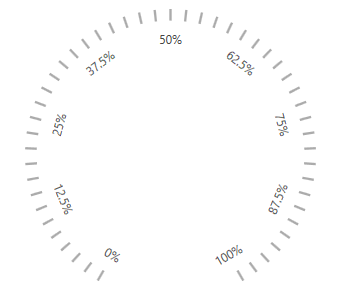
To change the format of the labels, you can use the LabelFormat property. Example 3 demonstrate how you could add a % symbol to the labels.
Example 3: Set the LabelFormat property
<telerik:RadRadialGauge Margin="20 20 20 10" telerik:StyleManager.Theme="Office2016">
    <telerik:RadialScale Min="0" Max="100" Loaded="RadialScale_Loaded"
        MajorTicks="8"
        MiddleTicks="2"
        MinorTicks="3"
        LabelFormat="{}{0}%"/>
</telerik:RadRadialGauge>

Label Offset
In a scenario where you want to offset the labels in order to avoid overlaps for example, you can set the LabelOffset property.
Example 3: Set the LabelOffset property
<telerik:RadRadialGauge Margin="20 20 20 10" telerik:StyleManager.Theme="Office2016">
    <telerik:RadialScale Min="0" Max="100" Loaded="RadialScale_Loaded"
                        MajorTicks="8"
                        MiddleTicks="2"
                        MinorTicks="3"
                        LabelOffset="80"/>
</telerik:RadRadialGauge>

Common Properties
Other properties which can be used to further customize the labels are:
- LabelTemplate
- LabelTooltipFormat
- LabelToolTipStyle
- LabelToolTipTemplate